Home Blog Page 44

Siemens HMIs (P86)

My guest this week is Ramey Miller of Siemens who gives us an overview of the complete line of Siemens HMIs in Episode 86 of The Automation Podcast.

For more information, check out the “Show Notes” located below the video.


Watch the Podcast:


The Automation Podcast is also available on most Video and Podcasting platforms, and direct links to each can be found here.


Listen to the Podcast:


The Automation Podcast, Episode 86 Show Notes:

Special thanks to Ramey Miller of Siemens for coming on the show to bring us up to speed Siemens HMIs!


Vendors: Would you like your product featured on the Podcast, Show or Blog? If you would, please contact me at: https://theautomationblog.com/contact

Until next time, Peace ✌️ 

If you enjoy this episode please give it a Like, and consider Sharing as this is the best way for us to find new guests to come on the show.

Shawn M Tierney
Technology Enthusiast & Content Creator

Eliminate commercials and gain access to my weekly full length hands-on, news, and Q&A sessions by becoming a member at The Automation Blog or on YouTube. You'll also find all of my affordable PLC, HMI, and SCADA courses at TheAutomationSchool.com.

shawntierney avatar

Using Robotics In Bulk Grain Storage

Despite federal regulations and improved safety equipment, farming remains a difficult and sometimes risky occupation — with work in and around stored grain proving especially time-consuming and dangerous.

New robotics are helping to streamline grain storage and reduce the risks farmers face in their day-to-day work. These robots could help farmers manage the growing demand for grain while reducing the safety risks that grain storage can pose to farmers.

Image by Mark Stebnicki – Pexels

The “Grain Weevil” and Robotic Bin Condition Management

Farmers frequently enter grain bins to manage bin conditions by removing clumped or rotted grain — as much as 55 times a year, depending on the number of grain bins they need to manage and the frequency with which problems arise.

Despite innovations in farm technology, the most efficient way to manage bin grain remains a farmer with a shovel, entering the bin themselves.

Bin conditions can be extraordinarily dangerous, however. There have been more than 330 reported cases of grain entrapment since 2010. In 2019 alone, there were 38 entrapments, 23 of which were fatal. Exposure to grain dust and molds in an enclosed environment can also have long-term health effects.

To solve these problems, ag-tech startup JLI robotics developed a new robot that can go into the bins in place of farmers.

The robot is called the “Grain Weevil.” Using an auger for propulsion, it “swims” across the surface of the stored bin grain. In the silo, the robot performs a few essential functions —  breaking up grain crusts, leveling the grain, monitoring silo conditions, extracting grain, and freeing up bin augers.

As needed, the robot can also dive into the grain to perform targeted analysis of storage conditions — like temperature and humidity. The robot’s analysis may be more accurate than conventional monitoring methods, while also reducing the risks that grain farmers face.

The robots can be used in combination with existing grain storage telematics. Together, these devices provide farmers with information about grain storage conditions without the farmer needing to enter a bin.

If buried accidentally, the robot is capable of digging itself out of up to 5 feet of grain. The robot is also waterproof and dustproof, helping it withstand bin conditions, and can be transported around a farm or grain storage facility by backpack.

The current version of the robot is driven by a handheld remote control. Future models of the robot will be autonomous, according to the manufacturer, and could perform essential tasks on their own.

The company is also designing individual Grain Weevils to be linked together in a swarm, allowing a farmer to easily coordinate multiple Weevils in the same bin. The use of swarms instead of larger machines would help improve farm efficiency without risking grain compaction or the robots getting stuck.

Ben Johnson, chief innovation officer at JLI Robotics, is optimistic about the future of the robot and grain storage robotics in general. Johnson told Successful Farming that “in the next five to seven years, we believe nearly every farmer will adopt some sort of grain bin robot.”

In addition to keeping workers safe, the robot could also help to reduce loss due to poor environmental conditions in storage, or issues like mold. Globally, around one-third of food is lost or wasted post-harvest, often due to storage issues.

With a robot that can keep a closer eye on storage conditions, grain-related loss could be mitigated by farmers.

Automated Grain Bagging Systems

Growing demand for grain, coupled with a rising agricultural labor gap, have made automated systems much more popular with farmers and grain processors.

In response to this demand, manufacturers are offering a wider range of automated packaging solutions for the grain industry. Some of these solutions can fully automate grain storage processes that have traditionally required human labor.

In addition to freeing up labor, these systems can have a major impact on the productivity of grain facilities. The efficiency of the grain storage process depends heavily on the bags and how they’re stored, as well as how the grain is transferred to those bags in the first place.

Automated grain bagging machines have become more popular over the past few years as a way to apply the benefits of modern robotics — speed, efficiency, and accuracy — to repetitive manual tasks like bagging grain.

These bagging systems are typically composed of several different parts, often including a bagging scale, a single open-mouth bagger, a bag palletizer, and a stretch wrapper to wrap assembled pallets. More sophisticated solutions may double up on bagging scales, baggers, and other equipment to increase machine throughput.

In some cases, machines like these can help nearly fully automate the grain packaging process. This can save grain processors significant time — allowing them to shift employees to more important and less repetitive tasks.

Other Applications of Robots in Grain Storage

New robotics are also helping to improve grain transfer. With the right robot, it’s possible for farmers and processors to partially or fully automate the storage or removal of grain in flat warehouses.

Italian agricultural cereal handling and flat warehouse automation solutions provider Metalmont, for example, has developed an automated system for the leveling of grain in flat storage warehouses.

Systems like these help farmers maximize their use of storage space and fill the entire available geometric volume of flat warehouses. The same systems can also be used to streamline the emptying of flat warehouses.

As with automated grain bagging systems, these robotic leveling systems significantly improve the accuracy and efficiency of grain storage by reducing the time it takes to store grain in a flat warehouse and the risk of error that can lead to inefficient storage.

Using Robots to Streamline Bulk Grain Storage

Bulk grain storage, despite major advancements, can still be a dangerous and challenging task. New innovations may change this by helping to streamline grain storage and reduce safety risks. Grain-swimming robots like the Grain Weevil can help automate grain bin management, reducing the chance of grain entrapment.

Other systems, like automated levelers and grain bagging machines, further cut down on the need for manual labor. These tools can help farmers and grain processors adapt to increasing levels of demand and a growing industry labor gap.

Written by Emily Newton
Tech and Industrial Journalist

Have a question? Join our community of pros to take part in the discussion! You'll also find all of our automation courses at TheAutomationSchool.com.

Sponsor and Advertise: Get your product or service in front of our 75K followers while also supporting independent automation journalism by sponsoring or advertising with us! Learn more in our Media Guide here, or contact us using this form.

shawntierney avatar
 

MQTT – Connect A-B PLCs & PACs to the Cloud (S2E01)

Learn how to connect A-B PLCs to the Cloud using an MQTT Gateway today on The Automation Show (S2E01)

For more information, check out the “Show Notes” located below the video.


The Automation Show, Season 2 Episode 1 Show Notes:

Special thanks to RTA for sending in a sample of their new A-B PLC MQTT Gateway, as well as for making this episode Ad Free!

All the links mentioned in this episode are listed below:

RTA 460ETCQT-N2E-D Gateway
TAB Store
Amazon Affiliate. link 
Ebay Affiliate link 
Previous RTA Coverage 
MQTT ORG 
Mosquitto Broker
MQTT Explorer 
The Automation Show Season 2 File Bundle link
Locals Community
The Automation Show Season 2 Digital Video Bundle  
The Automation Show & Minute 2013-2020 Collection (USB or Dig.)


Vendors: Would you like your product featured on the Show, Podcast, and Blog? If you would, please contact me at: https://theautomationblog.com/contact

Until next time, Peace ✌️ 

If you enjoy this episode please give it a Like, and consider Sharing as this is the best way for us to find new guests to come on the show.

Shawn M Tierney
Technology Enthusiast & Content Creator

Eliminate commercials and gain access to my weekly full length hands-on, news, and Q&A sessions by becoming a member at The Automation Blog or on YouTube. You'll also find all of my affordable PLC, HMI, and SCADA courses at TheAutomationSchool.com.

shawntierney avatar

How To Setup An MQTT System (Broker & Client)

Recently I received a sample of the brand new MQTT Gateway from the good folks over at Real Time Automation.

To demonstrate it in this week’s episode of The Automation Show, I needed to setup my own test system, and today I’ll share what I learned in the hopes that it will help you get your test system up and running quickly.

https://mqtt.org[/caption%5D

If you’re new to MQTT, the below image from MQTT.org does a great job explaining how a system works. In short, MQTT clients publish and/or subscribe to topics from an MQTT Broker, which is sometimes referred to as an MQTT Server:

Image from https://mqtt.org[/caption%5D

While the RTA MQTT Gateway I’ll be testing works with AWS and Azure as well as generic MQTT gateways, I chose the latter as the first two systems require a credit card to setup an account, as well as an open internet connection (which may not be available in all test applications.)

After doing some research, it seemed like the most popular free, self-hosted MQTT Broker was Mosquitto, and that is the broker I’ll use in this example.

https://mqtt.org[/caption%5D

Step 1) To download the Mosquitto MQTT Broker, head over to Mosquitto.org and click on the downloads page:

Step 2) Next, select the appropriate download for your system. In this example I chose the Windows x64 edition since that will be the operating system I’ll be using:

Step 3) To test your broker you’ll also need a client. In this example I’ll use the free MQTT Explorer from mqtt-explorer.com as the client:

Step 4) To download MQTT Explorer from the product’s homepage, scroll down and select the version that matches your operating system:

Step 5) Now that we have our Broker and Client software downloaded, the next step is to install both. Here I start with the installation of Mosquitto:

Note: As my test system isn’t dedicated to MQTT, I won’t be installing Mosquitto as a service as I don’t need it to run every time I boot my VM:

Step 6) And as I’ll be running Mosquitto from the command line, I’m going to replace the standard installation directory of “C:\Program Files\Mosquitto” with the shorter installation directory of “C:\mos”:

Step 7) One the installation wizard is done, just click on finish:

Step 8) Next we’ll install our client, MQTT Explorer, which is a simple as double-clicking on the installation file we downloaded earlier:

Step 9) With our Broker and Client installed, our next step is to start up our Broker by opening a Command Prompt with Administrative Privileges, and accepting Yes if prompted:

Step 10) With our command prompt open, we first need to change to the directly we installed Mosquitto into by typing in the command “CD\mos”:

Note: To see what executables are available in this directory, you can type in the command, “Dir *.exe”:

Step 11) To start the Mosquitto broker I’ll enter in the commend “mosquitto – v” where the -v enables “verbose” mode:

Step 12) As Mosquitto starts, it lists information about its current configuration, and this is where we find that by default it will only allow “local” connections:

Note: To see the effect of this setting, open a new command line and type in the command, “netstat -a”:

The result shows that the default MQTT port of 1883 is only listening on the local machine at 127.0.0.1:

While the default setting may work for testing local software clients, the sample RTA sent me is a physical MQTT Client which will need to connect to my Mosquitto Broker over Ethernet.

Step 13) To enable Mosquitto to connect to clients on my network, I’ll edit the Mosquitto.conf file found in the installation folder with Windows Notepad:

Step 14) The first change I’ll make is to enable anonymous logins so I can avoid having to create user names and password for my test:

Step 15) The second change I’ll make is to add a listener for port 1883 on IP Address 0.0.0.0:

Step 16) With the config file edited and saved, I close down my original mosquitto  command prompt and open a new one, again with administrative privileges.

Once open, I run mosquitto again, but this time using the configuration file I edited by using the command, “mosquitto -v -c mosquitto.conf”:
Step 17) This time, because Mosquitto is trying to access the network, I get a Security Alert, and after checking both boxes I click on “allow access”:

Now in the command prompt I see confirmation that Mosquitto is running using my configuration file:

I can also confirm it is listening to the network by opening a new command prompt and issuing the “Netstat -a” command again:

Step 18) With my Mosquitto Broker now running, next I turn to setting up my client by running MQTT Explorer, and then click on the New Connection button:

Step 19) I’ll start by giving it a name of “PC” and turning off “Certificates” so I won’t have to provide one:

Step 20) Then I’ll add the IP Address of my VM to the Host field, and leave the Port at the default 1883, then I’ll save my new connection and click on “connect”: Step 21) Below you can see what MQTT Explorer looks like when connected to the Mosquitto Broker I installed earlier:

For more on this topic, tune in tomorrow to see my video on setting up Mosquitto and MQTT Explorer, as well as RTA’s new MQTT Gateway.

Until next time, Peace ✌️ 

If you enjoy this episode please give it a Like, and consider Sharing as this is the best way for us to find new guests to come on the show.

Shawn M Tierney
Technology Enthusiast & Content Creator

Eliminate commercials and gain access to my weekly full length hands-on, news, and Q&A sessions by becoming a member at The Automation Blog or on YouTube. You'll also find all of my affordable PLC, HMI, and SCADA courses at TheAutomationSchool.com.

shawntierney avatar

The Automation Minute and Show Collection 1: 2013-2020 Now Available!

The Automation Minute and Show Collection 1: 2013-2020 includes all 287 episodes across five seasons for more than 29 hours of automation tips and tutorials for just $35 on a USB 3.0 Flash Drive, or $30 for the Digital Edition (digital comes with lifetime streaming and downloads.)

For product links, check out the “Show Notes” located below the video.


The Automation Minute and Show Collection: 2013-2020:

Enjoy over 280 episodes and 29 hours of industrial automation tips and tutorials from The Automation Blog and hosted by Shawn Tierney.

This product includes the following:

– Three page episode listing
– Collectible DVD Case
– USB3.0 Flash Drive with easy to navigate episode menu

USA customers can order our 2013-2020 Collection on USB here:
https://TheAutomationBlog.com/product/tab1/

International orders for our 2013-2020 Collection on USB can be placed here
https://www.trepstar.com/purchase.asp?idprod=363370&mode=itemlist

Digital Editions of our 2013-2020 Collection for all territories can be placed here
https://vimeo.com/ondemand/tab1/


Complete Episode Listing (by season, newest to oldest )

The Automation Show Season 1:

  • SH01: CompactLogix 5380 Experience Kit – 19:43
  • SH02: Ethernet to DH Plus – 28:42
  • SH03: DF1 to Ethernet Gateway – 13:59
  • SH04: DF1 to Ethernet Message – 19:32
  • SH05: CCW Feature Pack – 33:33
  • SH06: What’s New in Logix and View – 43:21
  • SH07: The Sequencer Output Instruction – 30:26
  • SH08: Using PlantPAx Process Library AOIs – 22:55
  • SH10: Automation Q & A – 24:04
  • SH11: Siemens Starter Kit Unboxed – 16:47
  • SH12: First Look at CCW 12 – 23:09
  • SH13: Automation Q & A – 38:00
  • SH14: Flex I/O and Point I/O Compared – 22:24
  • SH15: Using the Micro800 Simulator – 09:39
  • SH16: Set S7-1200 IP Address – 04:12
  • SH17: Add Ethernet Point I/O To Logix – 11:38
  • SH18: Add ControlNet Point I/O To Logix – 09:02
  • SH19: Creating a Siemens S7-1200 Program – 09:14
  • SH20: Creating a Siemens S7-1500 Program – 08:30
  • SH20: What’s New at The Automation Blog, School – 18:40
  • SH21: Add Ethernet Flex I/O To Logix – 14:23
  • SH22: Add ControlNet Flex I/O To Logix – 09:56
  • SH23: First Time Using A Siemens Basic Panel – 17:26
  • SH24: Add Profinet I/O And Drives To An S7-1500 – 13:18
  • SH25: DH-485 Comms Hardware and RSLinx Setup – 26:02
  • SH26: Logix Read Data from SLC, Logix over DH-485 – 29:10
  • SH27: Logix Data From SLC and PLC5 Over DH Plus – 16:39
  • SH28A: Unboxing a Mitsubishi FX-5 – 09:35
  • SH28B: Create and test a Mitsubishi FX-5 Program – 08:09
  • SH29: ControlLogix MSG Read Over Ethernet – 14:02
  • SH30: PanelView Standard on DH485 – 11:20
  • SH31: PV Plus on DH-485 to SLC-503, PLC-5, Logix – 21:11
  • SH32: PanelView Standard on DHP – 14:10
  • SH33: PanelView Standard to Logix on DHP – 08:55
  • SH34: PanelView 800 on DH485 – 11:28
  • SH35: PanelView Plus on DHP – 21:20
  • SHQA4: Automation Q & A for February 25, 2020 – 33:25
  • SH36: RSView32 to PLC5 SLC504 DHP via Gateway – 11:41
  • SH37: RSView32 Direct to ML on DH485, PLC5 DF1 – 13:19
  • SH38: ViewSE on Enet to PLCs on DHP via Gateway – 15:57
  • SH39: ViewSE to ML on DH485, PLC5 via DF1 – 17:12
  • SH42: Update – What’s planned for Summer – 08:44
  • SH40: Siemens S7-1500 Starter Kit Unboxing – 11:49
  • SH41: Add Serial Port to Win10 Desktop PC and VM – 11:37
  • SH42: What’s New Rockwell Logix PLCs, HMIs – 32:24
  • SH43: What’s New With Siemens PLCs and HMIs – 20:44
  • SH44: Unbox, Setup a Wago PLC Starter Kit – 13:31
  • SH45: First Time Wiring, Programming a S7-1500 – 27:24
  • SH46: First Time Programming a Wago PLC – 15:14
  • SH47: IFM TN2511 Setup, Wire, Use with S7, Logix – 19:46
  • SH48: Siemens S7-1200 Signal Modules – 16:49
  • SH49A: IFM Encoder to MicroLogix 1100 HSC – 15:33
  • SH49B: IFM Encoder to CompactLogix HSC – Copy – 11:50
  • SH50A: IFM Encoder to S7-1200 HSC – 12:45
  • SH51: Automation Fair Virtual Networking Space – 11:46
  • SH50B: IFM Encoder to S7-1500 HSC – 11:18

The Automation Minute Season 4:

  • E01: Studio 5000 – Connect to existing Controller – 03:34
  • E02: RSLogix Micro – Selecting the Controller Type – 01:59
  • E03: View Studio – Scaling Value in Numeric Display – 02:27
  • E04: View Studio – Using RSLinx and RSEmulate – 03:31
  • E05: View Studio – Remote Display Control – 02:48
  • E06: View Studio – PLC Start-up Splash Screen – 05:18
  • E07: View Studio – Macro Start-up Splash Screen – 08:18
  • E08: The PanelView 5310 – 02:48
  • E09: Coming: Studio 5000 Refresh – 03:40
  • E10: New 1756 Compute Module – 03:10
  • E11: New CCW R11 with Studio5K like features – 03:38
  • E12: New Micro870 – 02:39
  • E13: New Compact GuardLogix 5380, Safety I/O – 03:05
  • E14: New GuardLogix 5580 – 02:44
  • E15: New CompactLogix 5480 – 02:44
  • E16: New Flex 5000 I/O – 03:41
  • E17: Finding local RA (Allen-Bradley) Distributors – 03:03
  • E18: Download RS Versions and Updates – 05:08
  • E19: Find Allen-Bradley Part Numbers and Prices – 07:34
  • E20: How to save money by upgrading your RS – 02:49
  • E21: Create a Win10 Pro VM using VMware – 05:31
  • E22: Replace a PanelView 550 Lamp with an LED – 04:43
  • E23: Rockwell Software Stop Working? – 07:07
  • E24: Converting SLC-500 Programs to MicroLogix – 03:44
  • E25: Converting SLC-500 Programs to ControlLogix – 07:19
  • E26: Converting MicroLogix 1000 to Micro800 – 04:04
  • E27: FTView Cannot Connect To Addin Object – 02:43
  • E28: RSLinx Classic Failed To Show RSWho – 02:34
  • E29: Resolve Studio 5000 Install Missing .Net – 01:55
  • E30: ViewME Security in Versions 4 through 7 – 02:21
  • E31: Safely Restore ViewME Users, Groups in v4-7 – 02:27
  • E32: ViewME Security in Versions 8 Plus – 02:06
  • E33: Manage Users From PVPlus – 03:01
  • E34: CCW Guide For Studio 5000 Users – 04:20
  • E35: Import Any MicroLogix Program Using CCW 11 – 03:18
  • E36: Work around Studio 5000 CM Runtime Error – 01:48
  • E37: How To Flash PanelView Plus 7 Firmware – 04:52
  • E38: Reset a PVPlus 7 to Factory Defaults – 03:01
  • E39: Change PVPlus 7, 6, CE’s Screen Saver Image – 04:29
  • E40: Changing Screen Saver Image On PVPlus – 04:21
  • E41: Get PLC data values into MS Excel – 08:48
  • E42: Message data, SLC to Microover Ethernet – 04:02
  • E43: Message data, Micro to SLC over Ethernet – 03:50
  • E44: Message data, Micro to Micro over Ethernet – 03:40
  • E45: Error Creating Runtime ViewME v10 – 02:27
  • E46: Tag Database Not Found in ViewME – 01:45
  • E47: Parameter Files Not Working in ViewSE – 02:19
  • E48: Download A-B PLC and HMI Firmware – 02:39
  • E49: Download Rockwell TechED 2018 Labs, Pres. – 02:20
  • E50: How To Download, Use, and Update IIAB – 03:02
  • E51: How To Enable Legacy PLCs In IAB – 02:53
  • E52: How To Use Rockwell’s New EthernetIP Capacity Tool

The Automation Minute Season 3:

  • E01: Import Images Into Machine Edition – 04:21
  • E02: Using Images On Machine Edition Button – 04:47
  • E03: Duplicating Rungs in RSLogix & Studio 5000 – 02:56
  • E04: Duplicating Routines in RSLogix & Studio 5000 – 03:27
  • E05: Duplicating Programs in RSLogix, Studio 5000 – 03:22
  • E06: Download RSLogix, RSLinx, Emulate for FREE – 05:39
  • E07: Get FREE A-B Programs and AOIs – 04:17
  • E08: Get PlantPAx Library of Process Objects – 03:59
  • E09: A-B MicroLogix Programming Software – 04:43
  • E10: A-B MicroLogix Programming Cables – 05:24
  • E11: MicroLogix 1000 Comm Setup & Download – 08:05
  • E12: MicroLogix 1500 Comm Setup & Download – 07:49
  • E13: MicroLogix 1200 Comm Setup & Download – 08:44
  • E14: MicroLogix 1100 Comm Setup & Download – 11:24
  • E15: MicroLogix 1400 Comms Setup and Download – 10:26
  • E16: SLC-500 Serial Comm Setup & Download – 10:34
  • E17: SLC-500 DH-485 Comm Setup & Download – 11:30
  • E18: PLC-5 Serial Comm Setup & Download – 09:42
  • E19: USB to DH Plus Setup to SLC-5/04 and PLC-5 – 05:20
  • E20: DL Connected Components Workbench – 02:40
  • E21: How to install EDS Files – 04:49
  • E22: How to access PanelView Plus Config Menu – 03:51
  • E23: Find Your PanelView Plus Firmware – 03:45
  • E24A: Set your PanelView Plus Ethernet Address – 03:08
  • E24B: Set your PanelView Plus Ethernet Address – 02:56
  • E25: How to copy Runtimes to your PanelView Plus – 04:48
  • E26A: Load, Set PanelView Plus Default Runtime – 02:34
  • E26B: Load, Set PanelView Plus 7 Runtime – 02:41
  • E27A: How to View, Edit PanelView Plus Comms – 02:10
  • E27B: How to View, Edit PanelView Plus 7 Comms – 02:01
  • E28A: How to setup PanelView Plus Screen Saver – 01:36
  • E28B: How to setup PanelView Plus 7 Screen Saver – 01:45
  • E29A: Copy MER runtimes off PanelView Plus – 03:23
  • E29B: Copy MER runtimes off the PanelView Plus 7 – 02:49
  • E30: View, Monitor Memory on PanelView Plus – 01:44
  • E31A: Set the Date and Time on PanelView Plus – 01:25
  • E31B: Set the Date and Time on PanelView Plus 7 – 01:30
  • E32A: Set DST and Time Zone on PanelView Plus – 01:49
  • E32B: Set DST and Time Zone on PanelView Plus 7 – 01:30
  • E33: Access Windows Desktop on PanelView Plus 7 – 02:00
  • E34: Enable and Use VNC on the PanelView Plus 7 – 02:14
  • E35: Enable, Access ViewPoint on PanelView Plus 7 – 01:40
  • E36: Enable the PanelView Plus 7 Webserver – 01:41
  • E37: Setup, Use the PanelView Plus 7 FTP Server – 02:13
  • E38: Setup, Use the PanelView Plus 7 File Server – 02:01
  • E39: Why can’t I run my MER on my PVPlus/6/7 – 03:21
  • E40: Set PowerFlex 525 IP Address using Keypad – 03:50
  • E41: Set PowerFlex 525 IP Address using PC – 03:01
  • E42: Setup Micro800 USB Comms – 03:47
  • E43: Set a Micro800’s Ethernet Address – 04:28
  • E44: Setup RSLinx Ethernet Comms to Micro800 – 04:02
  • E45: How To Alias Micro800 IO – 02:44
  • E46: Micro800 Programs and Variables – 03:18
  • E47: Micro800: Create and Download Ladder Logic – 03:05
  • E48: Micro800: Using the Reverse Coil Instruction – 02:22
  • E49: Micro800: Using the Timer On Off Instruction – 03:11
  • E50: Micro800: Math with Mixed Data Types – 02:54
  • E51: Micro800: Ladder Logic in Function Block Diagrams

The Automation Minute Season 2:

  • E01: RSLogix Micro Starter – 03:43
  • E02: RSLogix 5000 / Studio 5000 Mini – 03:13
  • E03: FactoryTalk View Studio Machine Edition – 03:05
  • E04: Allen-Bradley Micro810 – 02:52
  • E05: A-B Micro810 LCD display – 02:44
  • E06: A-B Micro810 USB Port – 02:26
  • E07: Allen-Bradley Micro830 – 03:25
  • E08: Micro830 Plug-in I/O – 03:17
  • E09: Allen-Bradley Micro820 – 02:59
  • E10: Allen-Bradley Micro850 Starter Pack – 11:17
  • E11: RSLinx to CompactLogix via Serial – 03:23
  • E12: RSLinx to CompactLogix using USB – 02:27
  • E13: Set CompactLogix Enet Ad via USB or Serial – 02:10
  • E14: Use BOOTP to set CompactLogix Enet Ad – 03:12
  • E15: What to know before flashing CompactLogix – 02:37
  • E16: CompactLogix, Flash Firmware over USB – 02:45
  • E17: CompactLogix, Flash Firmware over Ethernet – 02:29
  • E18: RSLinx, ControlFlash, BOOTP – VMware – 01:59
  • E19: RSLogix 5000, create and download a program – 03:06
  • E20: Studio 5000, create and download a program – 02:51
  • E21: RSLogix 5000, Studio 5000, How-to force I/O – 02:12
  • E22: CompactLogix, Use a Timer to flash outputs – 04:05
  • E23: CompactLogix 1769-L16ER – 04:21
  • E24: CompactLogix, Sequencer To Control Outputs – 05:45
  • E25: Message to a CompactLogix over Ethernet – 05:09
  • E26: Learn the CompactLogix and ControlLogix – 02:40
  • E27: Learn which RSLogix, Studio 5000 supports – 03:19
  • E28: Firmware for your Compact, ControlLogix 01:37
  • E29: Download firmware for Logix ControlLogix – 01:49
  • E30: Best PLC To Learn With – 04:24
  • E31: PanelView Plus Serial DH485, Part 1 – 04:28
  • E32: PanelView Plus Serial DH485, Part 2 – 05:08
  • E33: PanelView Plus Serial DH485, Part 3 – 06:26
  • E34: PanelView Plus – Make Trends Historical – 02:53
  • E35: PanelView Plus DF1 Serial Driver – 05:39
  • E36: Download RSLogix and RSLinx for free 01:46
  • E37: Download A-B PLC Emulator for free! – 02:44
  • E38: How to get free A-B PLC Sample Programs – 02:39
  • E39: Top Two RSLogix Tips! – 02:50
  • E40: How to setup and use RS Emulate – 02:01
  • E41: ML1000 vs. 1100 Part One: Program files – 02:22
  • E42: MicroLogix 1000 vs. 1100 Part Two: Data Files – 03:12
  • E43: ControlLogix 1756-L1 5550 – 03:31
  • E44: ControlLogix 1756-L55 5555 – 03:08
  • E45: ControlLogix 1756-L6x/A 5560 – 04:00
  • E46: ControlLogix 1756-L6x/B 5560 – 05:05
  • E47: ControlLogix 1756-L7 5570 – 04:42
  • E48: ControlLogix 1756-DHRIO – 04:29
  • E49: ControlLogix 1756-DNB – 02:45
  • E50: ControlLogix 1756-CNB – 05:11
  • E51: ControlLogix 1756-ENBT – 02:28
  • E52: ControlLogix 1756-EN2T – 03:34
  • E53: ControlLogix 1756 I/O – 02:35

The Automation Minute Season 1:

  • E01: Introductions – 01:59
  • E02: How to get VMware Workstation 02:43
  • E03: Installing VMware Workstation – 02:02
  • E04: Opening VMware  for the first time – 01:51
  • E05: Create Windows XP VM in VMware – 02:32
  • E06: Navigating VMware Workstation – 02:24
  • E07: Updating VMware Workstation – 01:37
  • E08: Installing VMware Tools – 01:36
  • E09: Enable Folder Sharing in VMware – 01:49
  • E10: VMware Workstation Snapshots – 01:34
  • E11: Activating your OS in VMware – 01:39
  • E12: Cloning Virtual Machines in VMware – 02:29
  • E13: How to find Allen-Bradley manuals – 04:29
  • E14: Using RA’s Knowledgebase – 05:42
  • E15: Using RA’s Product Compatibility website – 03:13
  • E16: Finding Rockwell Software Versions – 03:13
  • E17: Finding Allen-Bradley Product Downloads – 02:44
  • E18: Getting Rockwell Software Updates – 01:47
  • E19: Rockwell’s Tech Support Direct Dial Menu – 01:40
  • E20: Help us create affordable training videos – 01:57
  • E21: Unboxing a MicroLogix 1000 – 02:03
  • E22: The MicroLogix 1000 – 02:03
  • E23: MicroLogix 1000 wiring terminals – 02:37
  • E24: Free ML1000, 1100 RSLogix software – 02:01
  • E25: MicroLogix Cables and Connections – 01:14
  • E26: The MicroLogix 1200 – 01:54
  • E27: MicroLogix 1200’s Wiring Terminals – 04:37
  • E28: MicroLogix 1200 Programming Cables – 01:30
  • E29: MicroLogix 1200 DCOMM & Trim Pots – 01:21
  • E30: MicroLogix 1200 Expansion I/O – 01:48
  • E31: The MicroLogix 1500 – 03:21
  • E32: The MicroLogix 1500’s Terminal Blocks – 4:31
  • E33: MicroLogix 1500 Programming Cable – 01:29
  • E34: MicroLogix 1500 DCOMM and Trim Pots – 01:42
  • E35: MicroLogix 1500 Expansion I/O – 02:27
  • E36: MicroLogix 1100 – 02:14
  • E37: MicroLogix 1100’s Wiring Terminals – 02:41 –
  • E38: MicroLogix 1100 Prog. Ports and Cables – 01:48
  • E39: MicroLogix 1100 Expansion I/O – 01:45
  • E40: Use the ML 1100’s LCD to find IP, MAC ad – 01:10
  • E41: Use ML 1100’s LCD to change Modes – 01:28
  • E42: Use ML 1100’s LCD to change Trim Pot Val – 02:34
  • E43: Use ML 1100’s LCD to enable DCOMM  – 02:01
  • E44: The MicroLogix 1400 – 02:16
  • E45: MicroLogix 1400 Terminal Blocks – 01:53
  • E46: MicroLogix 1400 Comm Ports & Cables – 01:53
  • E47: MicroLogix 1400’s Battery – 01:36
  • E48: MicroLogix 1400’s Memory Module – 01:36
  • E49: MicroLogix 1400’s Expansion I/O – 01:39
  • E50: MicroLogix 1400’s LCD Display – 01:22
  • E51: Use ML 1400’s LCD to Monitor Data – 01:56
  • E52: Use ML 1400’s LCD to Change Mode – 01:27
  • E53: Use ML 1400’s LCD to Change Trim Pots – 01:35
  • E54: Use ML 1400’s LCD to Enable DCOMM – 01:55
  • E55: Use ML 1400’s LCD to Change Ethernet Ad – 02:07
  • E56: Machines in Motion:AF14
  • E57: Dalsa camera plays Rock Band: AF14
  • E58: FactoryTalk View Communication Basics, TAM FB01
  • E59: RSLinx Enterprise Local Tab Setup, TAM FB02
  • E60: RSLinx Enterprise Target Tab Setup, TAM FB03
  • E61: Add Logix to RSLinx Enterprise’s Local Tab, TAM FB04
  • E62: RSLinx Enterprise Copy Local Tab to Target, TAM FB05
  • E63: RSLinx Enterprise – Re-Enable Serial Port, TAM FB06
  • E64: FTView PLC-5 SLC-500 Tag Import, TAM FB07
  • E65: FTView HMI Tag Address Browsing, TAM FB08
  • E66: FTView HMI Tag Browsing, TAM FB09
  • E67: FTView Logix Tag Browsing, TAM FB10

Until next time, Peace ✌️ 

If you enjoy this episode please give it a Like, and consider Sharing as this is the best way for us to find new guests to come on the show.

Shawn M Tierney
Technology Enthusiast & Content Creator

Eliminate commercials and gain access to my weekly full length hands-on, news, and Q&A sessions by becoming a member at The Automation Blog or on YouTube. You'll also find all of my affordable PLC, HMI, and SCADA courses at TheAutomationSchool.com.

shawntierney avatar

Community Q & A: Questions of the Week

Over the last few weeks many of our readers made use of our “submit a question” link to send us topics they’d like to see us cover, and today I’ll share a few of them along with my take on how to resolve each question.

Note: Readers can ask submit questions directly for me to answer weekdays at TheAutomationBlog.com/join, or submit them on the blog here if they’d like us to consider covering them in future Q & As.


Question 1:

The clocks on AB PLCs can drift as much as a minute a week. I run dept schedules on my PLCs to reset part counts, trigger reports, and other things like that. What is the best way to synchronize the clocks on all of your PLCs? I currently use the Clock update tool, but it has to be running on my computer to keep the time’s synced.

Shawn’s Take:

The Clock Update Tool is definitely one option.

Another is to have your HMI or SCADA system to update the same “Time Tags” in your PLCs. With View Studio ME and SE this can be accomplished by using Global Connections.

The advantages of using your PC based HMI or SCADA is that your PC is likely already sync’d to internet time. As far as using an HMI, most HMI’s have more accurate clocks than what you’ll find in a PLC, and you can easily make a display on the HMI to allow a qualified operator to tweak the time if you wish.

On the PLC side, the Status Files in the PLC-5, SLC-500, and MicroLogix are where you’ll find the time tags. With ControlLogix and CompactLogix you would need to create your own tags and then use the SSV instruction to set the controller’s time to these tags, similar to how the GSV instructions are used to get the controller’s time as discuss in our previous article here.

A final way it to use a newer Rockwell product like the 1756-EN2T, to sync with a grand master clock, as we discuss in our article here, and you’ll find Rockwell’s white paper on the topic here.


Question 2:

I have a ControlLogix PLC which has a SD Card. The image of the main program is on this card. I copied the image to my pc, but could not open it with RSLogix 5000 because this image file format is p5k. Can u help me to convert this file to ACD or L5k file please?

Shawn’s Take:

While platforms like the S7 PLC line from Siemens do support this functionality, unfortunately Rockwell has never supported this, and as far as I know has no plans to in the future?


Question 3:

Assign a key assignment to a PLC bit for remote navigation without global connection

Shawn’s Take:

There’s really not very much information here, so I’m going to make the assumptions that you are talking about the PanelView Plus.

Aside from actually selecting screen on a PanelView Plus (or remotely via ViewPoint,) there is only ONE way to change screens from the PLC, and that is to use global objects which I cover in this article as well as this article.

If you think about it, it really doesn’t make sense to include two features in a product that have the very same function. And unlike View Site Edition, the PanelView Plus is a simple HMI without scripting capabilities.


Question 4:

I have a new ML1400 series C. It always faults whenever there’s a power cycle and all settings like IP address and programs erases. I have changed the battery. I also program with RSlogix 500 v11. I only see series A, B on the list of processors. What could be the problem?

Shawn’s Take:

Is the MicroLogix set to load from Non-Volatile memory every time it powers up? This would be my first guess.

If that was not the case, next I would suspect your power source is producing a sizable spike that is clearing the controller’s memory. We often see this happen when lightning strikes near a facility, but it can also happen with switching of large loads.

If those first two issues are ruled out, I would next try to rule out your program by creating and downloading a blank program to see if the issue persists.

And the final option would be to get a warranty replacement from your supplier.


Question 5:

I need help in converting my program written in RSlogix500 to RSlogix5000, because I don’t have the RSLogix Project Migrator. Can you do it for me, even for a fee?

Shawn’s Take:

As I recently discussed in my article here, Rockwell no longer makes the Project Migrator available as a free download.

If you have access to the installation files for v19 through v26 you should find the Migrator or Translation Tool in either the RSLogix/Studio 5000 folder, or in the Tools folder.

Otherwise, if you have RSLogix 5 v10 or RSLogix 500 v12, you can simply save your file as an ACD as I discuss in this article.


If you’d like to see our previous Q & A’s, click here.

To submit a question for us to consider covering in a future blog, click here.

Those readers who’d like to ask me questions directly, can do so here.

Until next time, Peace ✌️ 

If you enjoy this episode please give it a Like, and consider Sharing as this is the best way for us to find new guests to come on the show.

Shawn M Tierney
Technology Enthusiast & Content Creator

Eliminate commercials and gain access to my weekly full length hands-on, news, and Q&A sessions by becoming a member at The Automation Blog or on YouTube. You'll also find all of my affordable PLC, HMI, and SCADA courses at TheAutomationSchool.com.

shawntierney avatar

FactoryTalk Logix Echo from Rockwell (P85)

My guest this week is Brad Prosak of Rockwell who introduces us to FactoryTalk Logix Echo in Episode 85 of The Automation Podcast.

Note: As this episode was not sponsored by the vendor, the video edition is only available to our members here on The Automation Blog and on YouTube. For more information, check out the “Show Notes” located below the video.


Watch to the Podcast on The Automation Blog:


Note: As mentioned above, this episode was not sponsored by the vendor so the video edition is a “member only” perk. The below audio edition (also available on major podcasting platforms) is available to the public and supported by ads. To learn more about our membership/supporter options and benefits, click here.


Listen to the Podcast:


The Automation Podcast, Episode 85 Show Notes:

Special thanks to our members for making this show possible! To learn more about becoming a member, click here.


Vendors: Would you like your product featured on the Podcast, Show or Blog? If you would, please contact me at: https://theautomationblog.com/contact

Until next time, Peace ✌️ 

If you enjoy this episode please give it a Like, and consider Sharing as this is the best way for us to find new guests to come on the show.

Shawn M Tierney
Technology Enthusiast & Content Creator

Eliminate commercials and gain access to my weekly full length hands-on, news, and Q&A sessions by becoming a member at The Automation Blog or on YouTube. You'll also find all of my affordable PLC, HMI, and SCADA courses at TheAutomationSchool.com.

shawntierney avatar

Migrate / Convert – PLC-5, SLC-500, and MicroLogix Programs to RSLogix/Studio 5000 and Logix Controllers

Recently one of our readers submitted a question asking for help migrating from a legacy Rockwell PLC (aka PLC-5 or SLC-500) to their new PAC lines (ControlLogix and CompactLogix.)

In his email he went on to say he needed help because he didn’t have a copy of the Project Migrator, previously called the Translation tool.

I’ve covered this tool many times since rebooting this site as The Automation Blog in 2013, and as I often do when I get a question on something I’ve covered previously, I went back to my most recent article on the subject to see if the procedure still worked.

What I found surprised me, as sometime over the past several months Rockwell removed the Project Migrator from the free Studio 5000 Tools download.

As explained in this free Tech Note, you can now use a new feature found inside of RSLogix 500 v12 or RSLogix 5 v10 to save these legacy programs as an Logix ACD file simply by using the “Save As” function.

Before we look at that functionality, for those who don’t have access to those newer versions of RSLogix I wanted to cover which previous versions of RSLogix and Studio 5000 come with either the older Translation Tool or Project Migrator so you can install and use it even though it’s not available as a free download.

Here’ what I found after search through the install files I have access to:

  • v19: Look in \RSLogix5000\ENU\Tools\Translate PLC-5 SLC 2.0 Tool

  • v21: Look in \Studio5000\Tools\Translate PLC-5 SLC 2.0 Tool

  • v24: Look in \Studio5000\Tools\RSLogix Project Migrator

  • v26: Look in \Studio5000\Tools\Translate PLC-5 SLC 2.0 Tool

For those who do have the new versions of RSLogix, below I’ll cover the conversion of a SLC-500 program first, followed by the conversion of a PLC-5:


Migrating SLC-500 Projects to Studio 5000 and Compact or ControlLogix:

Step 1) Open your SLC-500 in RSLogix 500 version 12 or later, and then select File – Save As:

Step 2) Change the “Save as Type” to “Logix Designer Files (*.ACD)”

Step 3) Next select either ControlLogix or CompactLogix, then choose the version. In this example I choose CompactLogix and v30:

Step 4) Next choose your Controller from the drop-down list, and select next:

Step 5) In the next window, select your IO Migration Strategy options and click on Migrate:

Step 6) After a few moments the migration will complete and you’ll have the option of opening Studio 5000 by clicking on the RSLogix 5000 button:

Step 7) Once you have the new project in Studio 5000 you can finish the convertion. In my example below you can see that the migration did not add any IO modules, so I’ll need to do that manually:


Migrating PLC-5 Projects to Studio 5000 and Compact or ControlLogix:

Step 1) Open your PLC-5 project in RSLogix 5 version 10 or later, and then select “File – Save As:”

Step 2) Change the “Save as Type” to “Logix Designer Files (*.ACD)”

Step 3) Next select either ControlLogix or CompactLogix, then choose the version. In this example I choose ControlLogix and v30:

Step 4) Next choose your Controller from the drop-down list, and select next:

Step 5) In the next window, select your IO Migration Strategy options and click on Migrate:

Step 6) After a few moments the migration will complete and you’ll have the option of opening Studio 5000 by clicking on the RSLogix 5000 button:

Step 7) Once you have the new project in Studio 5000 you can finish the conversion. In my example below you can see that the migration did not add any IO modules, so I’ll need to do that manually:


Preforming these types of migrations is something that I’ll be covering in the next edition of my Online ControlLogix and CompactLogix courses in 2022, which you can get for free for a limited time when you buy the existing courses at TheAutomationSchool.com.

Until next time, Peace ✌️ 

If you enjoy this episode please give it a Like, and consider Sharing as this is the best way for us to find new guests to come on the show.

Shawn M Tierney
Technology Enthusiast & Content Creator

Eliminate commercials and gain access to my weekly full length hands-on, news, and Q&A sessions by becoming a member at The Automation Blog or on YouTube. You'll also find all of my affordable PLC, HMI, and SCADA courses at TheAutomationSchool.com.

shawntierney avatar

Why I’m Disappointed With Automation Fair 2021

Rockwell Automation has been the North American market share leader in many automation product categories for decades.

As such, many of us have naturally become incredibly interested in what new features and capabilities are coming in each new hardware and software release.

Over the last three decades one of the best places to learn about what’s new and coming from Rockwell was in the “What’s New” sessions held each year at Automation Fair.

Typically these would include What’s New with ControlLogix, Studio 5000, PanelView HMIs, ViewSE, PowerFlex, Kinetix, Micro800, and more.

The best part was, most years you didn’t to attend in person to get up to speed, as Rockwell wisely made the presentations available to the general public after the show as I’ve documented here, here, here, and here.

Personally, this was something I looked forward to every November, whether is was one of the twenty or so times I attended in person, or by reviewing the presentations after the show when I couldn’t attend.

This lead to a lot of free press for Rockwell, as I created over fifty articles and videos based on Automation Fair, which you’ll find posted right here on The Automation Blog.

So you can imagine my disappointment this week when I learned that for 2021 Rockwell condensed ALL of the “What’s New” presentations into a single, short presentation with almost no technical details, accompanied by a narration which seemed derived from the latest sales brochures?

Take the Micro800 for instance.

While I became a big fan of the Micro800 after teaching my first course on it, most A-B PLC users have been asking for the programming environment to become more like Studio 5000.

Where’s the beef? In previous years the Micro800 would have had it’s own session. It 2021 it and many other products only got a single slide.

So you would think the news of a new generation of Micro800’s (along with the possibility of a more “Studio like” programming environment,) would warrant its own “What’s New” presentation as in previous years?

Instead, we got a single slide teasing something coming in March of 2022, that also praises the features of the Micro850 released in 2009?

Granted the Micro800 line is small potatoes compared to interest in ControlLogix, CompactLogix, and Studio 5000, but the only thing I could find related to the next release of Studio 5000 (or it’s replacement?) was a slide about Rockwell’s new online development tools:

No What’s New and coming with Studio 5000?

What about the next version of Logix and Studio, and any new features and functions?

What about the latest developments with the PanelView Plus 7 and PanelView 5500?

As far as I can tell, you’ll find none of this information on the virtual side of this year’s Automation Fair.

Now I do understand there’s a place for presentations like this, just like there’s a place for glossy brochures and flashy ads full of marketing slogans like Faster, Better, Cheaper, and so on.

But those of us who are experienced users want detailed news on the latest features and updates.

So when all we find is a single, non-technical “What’s New with everything” presentation, it’s kind of like finding a piece of coal in your stocking.

And that brings me to why I’ve spent the couple of hours putting this article together.

I’m hoping to let Rockwell (and other vendors) know that those of us who are experienced users of their products NEED regular technical updates on what’s new and coming.

And while we all understand there is a place for flashy slides full of simplified lists of features and benefits, we the experienced users are well beyond that.


Do you agree with me, or did am I missing the point somehow? Please feel free to chime in below in the comment area below my signature.

Until next time, Peace ✌️ 

If you enjoy this episode please give it a Like, and consider Sharing as this is the best way for us to find new guests to come on the show.

Shawn M Tierney
Technology Enthusiast & Content Creator

Eliminate commercials and gain access to my weekly full length hands-on, news, and Q&A sessions by becoming a member at The Automation Blog or on YouTube. You'll also find all of my affordable PLC, HMI, and SCADA courses at TheAutomationSchool.com.

shawntierney avatar

How End Of Line Automation Can Save Your Business Money

Last year was a tough one for businesses, and even now that we’re in 2021 many are still trying to recover.

This is a time when the world entered the deepest recession since World War II, and despite high unemployment, some companies can’t hire the help they need. Thankfully, end of line automation can help make the most of these hardships.

The KANGA Poucher is a Vertical Form, Fill & Seal pouching system that forms four-sided pouches for the medical device, pharmaceutical, durable goods and other industries. Learn more at https://www.rndautomation.com.

The COVID recession has hit manufacturers harder than most. Social distancing regulations limit how many employees they can house at once, and demand for packaged goods is rising, putting manufacturers in a difficult position. Automation could be the answer.

Even outside of a pandemic and recession, end of line automation can save businesses considerable quantities of cash. Here’s how.

Solving Human Inefficiencies

End of line work isn’t an ideal job for humans. It’s repetitive, mostly mindless and not typically fulfilling. That all adds up to a task that most people would find boring and tiresome. Since employees who don’t feel engaged are 44% less productive, that can impact a business’s bottom line.

Machines don’t get bored, and they don’t get tired. Delegating these repetitive tasks to automated systems instead of human employees can prevent inefficiencies from lack of engagement. Even if end of line processes are the only automated part of a workflow, the efficiency gains don’t stop at these stations.

Since workers don’t have to focus on these repetitive tasks, they can take on more value-adding jobs. This new focus and freed time will help them be more efficient throughout the facility.

Artificially Expanding the Workforce

One of the most significant problems manufacturers face is a growing labor shortage. Some experts expect the industry could have a 7.9 million worker deficit by 2030. Without enough employees to meet rising demand, manufacturers will have no other choice but to automate.

Many people have reservations about automation, worrying it’ll take jobs away from people. In most cases, though, automation doesn’t replace humans but rather compliments their work. Facilities can use it to expand their workforce without worrying about finding too many new hires and account for the labor shortage.

It takes an average of 52 days to fill a job opening now, four days longer than it did in 2011. End of line automation can help facilities keep up with demand while searching for new workers. As it becomes harder to find new hires, it becomes increasingly crucial to make the most of the workforce through automation.

Eliminating Costly Mistakes

Another issue facilities run into with manual end of line tasks is frequent errors. When workers have to perform mindless, repetitive tasks for hours on end, they’re bound to make mistakes. These errors cost money not just in wasted materials, but in the time workers spend fixing them.

In manufacturing, 23% of unplanned downtime results from human error, compared to just 9% in other industries. Machines aren’t entirely immune to error, but they’re far less likely to make mistakes. A lot of human errors in end of line tasks come from issues with distraction and boredom, which machines don’t experience.

Automated systems are far more precise than people and can maintain that precision as long as they work. By employing these machines, facilities could drastically reduce the number of packaging errors they see. In turn, they wouldn’t waste as much material and wouldn’t have as much downtime.

Reducing Maintenance Costs

Even if facilities don’t have an automated end of line workflow, they most likely use some type of machines. On top of freeing up workers, automated versions of these systems are preferable because they can lower maintenance costs. Many of these machines include self-monitoring technology to help them remain autonomous, and these can influence maintenance.

Automated machines can detect issues in their performance and predict when they’ll need repair. According to Deloitte, predictive maintenance like this can increase equipment uptime by 20% and lower maintenance costs by 25%. With traditional machines, humans would have to notice flaws to enable predictive maintenance, which would be less reliable.

Some automation solutions also include maintenance recommendations and spare parts lists, helping further reduce maintenance costs. Since these systems are typically bespoke, they’ll fit each facility’s unique needs.

Increasing Long-Term Flexibility

Most of the time, people associate robotics with a lack of flexibility. While automated systems may not be able to adapt to new situations like people, they can improve long-term flexibility. Embracing automation can help businesses prepare for and survive unexpected changes.

Take the COVID-19 pandemic, for example. All of a sudden, facilities couldn’t hold as many employees and had to meet skyrocketing demand. Without end of the line automation, which can easily scale to meet increased demand, adapting would’ve been a slower, costlier process.

Automation can adjust to rising or falling production rates far faster than people can. By handling repetitive work, these machines also free workers to focus on the more nuanced parts of adjusting workflows. In response to fast-changing consumer trends, modern automated systems are more flexible than their older counterparts, too.

End of Line Automation Can Be a Game-Changer

Today’s markets are constantly changing, and unexpected disruptions can come at any moment. To mitigate the damage of this change, businesses need to be efficient, and automation enables that efficiency. The extent to which a facility is automated could determine its ability to survive economic hardships.

End of line automation solutions are more versatile and affordable than ever. If more businesses adopted these machines, entire industries could become more profitable. Whether there’s a global recession or not, automation is always an excellent way to save money.

Written by Emily Newton
Tech and Industrial Journalist

Have a question? Join our community of pros to take part in the discussion! You'll also find all of our automation courses at TheAutomationSchool.com.

Sponsor and Advertise: Get your product or service in front of our 75K followers while also supporting independent automation journalism by sponsoring or advertising with us! Learn more in our Media Guide here, or contact us using this form.

shawntierney avatar
 

Special thanks to RND Automation for sending in a picture to use as our featured image in this article. Check out their wide range of products at https://www.rndautomation.com

Siemens Distributed IO Overview (P84)

My guest this week is Raj Rajendra of Siemens who introduces us to Siemens Distributed IO in Episode 84 of The Automation Podcast.

For more information, check out the “Show Notes” located below the video.


Watch the Podcast:


The Automation Podcast is also available on most Video and Podcasting platforms, and direct links to each can be found here.


Listen to the Podcast:


The Automation Podcast, Episode 84 Show Notes:

Special thanks to Raj Rajendra of Siemens for coming on the show to bring us up to speed on Siemens IO!


Vendors: Would you like your product featured on the Podcast, Show or Blog? If you would, please contact me at: https://theautomationblog.com/contact

Until next time, Peace ✌️ 

If you enjoy this episode please give it a Like, and consider Sharing as this is the best way for us to find new guests to come on the show.

Shawn M Tierney
Technology Enthusiast & Content Creator

Eliminate commercials and gain access to my weekly full length hands-on, news, and Q&A sessions by becoming a member at The Automation Blog or on YouTube. You'll also find all of my affordable PLC, HMI, and SCADA courses at TheAutomationSchool.com.

shawntierney avatar

How To Register and Use a Device Profile in GX Works3

When you’re working with Mitsubishi PLCs and GX Works3, from time to time you may find it necessary to add profiles for components (like networked devices)  so they can be added into the communications setup of your project.

In today’s article I’ll walk you through how to add a couple of new devices (a remote I/O communication module and variable frequency drive) as well as how to add them to your project.

The basic steps to register your device profile in the GW Works3 software are as follows:

Note: You’ll need to close any open projects, or re-open GX Works without selecting a project to start or edit.

1) In the pull-down menu, select “Tool” -> “Profile Management” -> “Register…”.

2) Select a file in the “Register Profile” dialog screen and click the “Register” button. Do this by navigating to the location you saved the CSPP file or other compressed file used for the profile.

Something to be careful about: Profiles are supplied as compressed files (such as *.zip, *.ipar, and *.cspp,) and you’ll go through the registration of the profile without decompressing.  If you unzip or decompress it beforehand it will not register.

A profile registered in GX Works3 can also be deleted, but I doubt you will need to do that.  Here is how to do it just in case the need arises.

1) Just like adding a profile, start by selecting “Tool”, then “Profile Management” from the pull-downs.

2) From there, click “Delete” instead of “Register”.

3) Select the checkbox of a model name to be deleted in the “Profile Delete” screen, then click the “Delete” button.

Once the profile has been registered, you can now access it from the configuration window.

You will need to open the Ethernet Port Settings by double-clicking in the Navigation window under the parameters (Parameters -> FX5CPU -> Module Parameter -> Ethernet Port).

Next, enable the CC-Link IEF Basic Setting by changing the default “Not to use” to “Use”.

You can do that by double-clicking the “Do Not Use” or using the pull-down option.

When enabled, you can then drag and drop the device under the “Network Configuration Settings” by either double-clicking “<Detailed Settings>” or clicking the button to the far right on that line.

For this example, we are adding an E800 IE-Field variable frequency drive beside an existing IE-Field I/O comms module.

Mitsubishi did a nice job here by allowing you to just drag and drop the device from the list on the right to the location you want on the topology line display on the left.

Once you have it dropped in place, you will need to scroll over in the view of the connection list to set the desired IP address.  At the same time, it would be a good idea to be sure your Host Station (listed at the top) is set to what you expect.

When you are done dropping devices in place and setting IP addresses, you will need to save it.  Do this by pressing the “Close with Reflecting the Setting” button at the top of the configuration window.

If you need to, you can also close without saving.  Maybe if you made a mistake, this might be the easiest route to reset to what it was before you started.

Next, you will need to set the I/O under the “Refresh Settings”.  This is where you will set up the mapping for the discrete I/O between the PLC and the device.

This is where you will need to keep in mind the numbering systems used for I/O and data types to keep things a little simpler.  For instance, in the FX5 CPU, the Y output addresses are set in octal, not hex.

But the mapping for the IE-Field is set up and easier to map in hex.  For the FX5, I would choose to use the B data type so the address mapping aligns easier.

To access these settings, do the same as the network configuration by double-clicking “<Detailed Settings>” or clicking the button to the far right on that line.  You will then see the I/O mapping details.

Change the Target to “Specify Device”.  Once that is selected, select the data type you would like to use for the Device Name.  In the FX5 again, it would simplify things to select the B device type as shown. When complete, press apply.

Finally, once back at the Setting Item List, be sure to click the Apply button once again if needed.  GX Works3 will let you know if this is needed and you try to close it without pressing.  Another helpful notification from Mitsubishi.

Little reminders like that are nice.  Save the program, download the parameters, and for a good measure, you should then reset the PLC or cycle power.

You will then be ready to test the communications and the discrete I/O setup between the IE-Field device(s) and the processor.  Good luck!

Written by Paul Hunt
Senior Automation Engineer and Freelance Writer

Have a question? Join our community of pros to take part in the discussion! You'll also find all of our automation courses at TheAutomationSchool.com.

Sponsor and Advertise: Get your product or service in front of our 75K followers while also supporting independent automation journalism by sponsoring or advertising with us! Learn more in our Media Guide here, or contact us using this form.

shawntierney avatar
 

ASi Field Bus (P83)

My guest this week is Brian Arcangeli of Bihl+Wiedemann who introduces us to the ASi (AS-i) Field Bus in Episode 83 of The Automation Podcast.

For more information, check out the “Show Notes” located below the video.


Watch the Podcast:


The Automation Podcast is also available on most Video and Podcasting platforms, and direct links to each can be found here.


Listen to the Podcast:


The Automation Podcast, Episode 83 Show Notes:

Special thanks to Brian Arcangeli of Bihl+Wiedemann for coming on the show to bring us up to speed on AS-i!


Vendors: Would you like your product featured on the Podcast, Show or Blog? If you would, please contact me at: https://theautomationblog.com/contact

Until next time, Peace ✌️ 

If you enjoy this episode please give it a Like, and consider Sharing as this is the best way for us to find new guests to come on the show.

Shawn M Tierney
Technology Enthusiast & Content Creator

Eliminate commercials and gain access to my weekly full length hands-on, news, and Q&A sessions by becoming a member at The Automation Blog or on YouTube. You'll also find all of my affordable PLC, HMI, and SCADA courses at TheAutomationSchool.com.

shawntierney avatar

Replacing A Mitsubishi J4 Servo Drive

In today’s article I’ll walk you through how to change out a Mitsubishi J4 Drive which an MR-D30 Safety Module Attached.

Note that these instructions are specifically for changing a J4 Servo Drive in the instance of a failure, or if a change in system design is made that affects the motor size specifications.

The assumption is also being made that the safety parameter file is already set up and has been verified to work previously on either this module or another in a matching process.

The first step would be to power down the system and wait the typical 15-30 seconds before attempting to disconnect any wires.  This may take longer.  Be sure to follow manual guidelines if necessary.

After a safe amount of time and be sure the machine is locked out and tagged, continue to remove the MR-D30 safety module from the side of the servo drive to be replaced.  Once removed, you will then disconnect any other cables and connectors and remove the drive.

At this point, if you are using a similar drive, you will just be able to re-use the connectors and reconnect them to the same locations on the new drive.  If the connections are different, refer to any schematics for the system/machine for the proper connection points.

Be sure any purchased cables will cross over to the replacement drive as well.

Once the drive has been removed, go through the proper mounting procedures for mounting the new/replacement drive.  Carefully check and be sure all the connections have been made and the MR-D30 module has been successfully mounted to the side of the servo drive.

Figure 1 - 7A.4 error note from MR-D30 Instruction Manual

Once the physical swap has been completed, review the wiring connections and then remove any lock-out-tag-out (LOTO) devices following your company’s procedures.  Once it is safe to do so, reapply power.

When power is re-applied, you will see an error (or errors) on the drive that was swapped.

If the motor and the drive were changed, you may see a 7A.3 as well as a 7A.4.

  • Motor direction or parameter combination errors (7A.3)

    1. You may see this error if you have parameters PSA18 and PSA19 configured incorrectly (Pr. PSA19 < Pr. PSA18) (see Fig 7)

    2. This error may also signify a rotation direction mismatch setting. This can be found in Pr. PSC03 (see Fig 6)

  • Drive and Safety module Mismatch (7A.4)

    1. This error will pop up when powering up after swapping the drive and not having the MR-D30 reconfigured yet (Fig 1)

Figure 2 - GX3 View of Simple Motion Module Setting selection

Open your PLC configuration file (this example is in GX Works3).  If using Works 2, opening the Simple Motion Module Editor will look slightly different and open with different steps..

When in GX3, expand your parameters and hardware out until you see the Simple Motion Module Setting and double click on it. This will open the Simple Motion Module Setting Function.

Figure 3 - GX3 view of Servo Amplifier Safety Module selection

Once open, navigate down to the “Servo Amplifier Operation Folder”.  Expand it by clicking the “+”.

You will then double-click the “Safety” icon to be able to view the specific safety module-related parameters.

When double-clicked, it will present another window with selection buttons.  Press the “Safety Parameter Setting” button to continue.

Figure 4 - Safety Parameter Setting Dialog

This will open the safety parameter file editor.  You will need to be connected to the PLC at this point to proceed.

Figure 5 - Simple Motion Module Setting WindowYou will be able to read, download, and verify the file settings to the loaded drive settings.  Recommended steps for this process are as follows.  Follow these steps and be prepared to review any manuals for unforeseen issues or error values that may pop up.  Always upload, save as, and backup before making modifications.  You will be glad you did.  Good luck!

  1. Select Axis that has the MR-D30 module.

  2. VERIFY – This will show you if there are any differences between the file and drive

  3. READ – This will update your file with the parameters from the module. A best practice is to upload and use the uploaded file to modify.

  4. SAVE AS – Save the uploaded parameter (.sprm) file. Best to save as a separate file than the original (add “V_#” or date on the name for example).

  5. SET TO DEFAULT – This will set all the parameters in the editor to default. You can VERIFY again at this point if you like. Just to see the differences.  No significant relevance other than verifying the parameters in the module were different in some way from the default.

  6. SINGLE AXIS WRITE – Press this once you are sure you are looking at the correct axis (Axis 7 in this example)

  7. CYCLE POWER (wait 30+ seconds before powering back on)

  8. Once complete, open the file you just saved or perhaps the original file you know to be good.

  9. You can choose to verify here as an optional step just to be sure the file loaded is different than the default files you just loaded.

  10. Repeat the SINGLE AXIS WRITE step for writing the correct parameters back to the module.

  11. CYCLE POWER

  12. Test to be sure the error messages are gone.

Figure 6 – Pr. PSC03 Description from MR-D30 Instruction ManualFigure 7 – Pr. PSA18 and Pr. PSA19 descriptions from MR-D30 Instruction Manual

The system should run as before at this point.

Written by Paul Hunt
Senior Automation Engineer and Freelance Writer

Have a question? Join our community of pros to take part in the discussion! You'll also find all of our automation courses at TheAutomationSchool.com.

Sponsor and Advertise: Get your product or service in front of our 75K followers while also supporting independent automation journalism by sponsoring or advertising with us! Learn more in our Media Guide here, or contact us using this form.

shawntierney avatar
 

Automation Fair 2021: Rockwell’s plans for this year’s show (P82)

My guest this week is Tina Dear of Rockwell Automation, and she brings us up to speed on Rockwell’s plans for Automation Fair 2021 (Nov. 9-11) in Episode 82 of The Automation Podcast.

Note: As this episode was not sponsored by the vendor, the video edition is only available to our members here on The Automation Blog and on YouTube. For more information, check out the “Show Notes” located below the video.


Watch to the Podcast on The Automation Blog:


Note: As mentioned above, this episode was not sponsored by the vendor so the video edition is a “member only” perk. The below audio edition (also available on major podcasting platforms) is available to the public and supported by ads. To learn more about our membership/supporter options and benefits, click here.


Listen to the Podcast:


The Automation Podcast, Episode 82 Show Notes:

Special thanks to our members for making this show possible! To learn more about becoming a member, click here.


Vendors: Would you like your product featured on the Podcast, Show or Blog? If you would, please contact me at: https://theautomationblog.com/contact

Until next time, Peace ✌️ 

If you enjoy this episode please give it a Like, and consider Sharing as this is the best way for us to find new guests to come on the show.

Shawn M Tierney
Technology Enthusiast & Content Creator

Eliminate commercials and gain access to my weekly full length hands-on, news, and Q&A sessions by becoming a member at The Automation Blog or on YouTube. You'll also find all of my affordable PLC, HMI, and SCADA courses at TheAutomationSchool.com.

shawntierney avatar

Community Q & A: Questions of the Week

Over the last few weeks many of our readers made use of our “submit a question” link to send us topics they’d like to see us cover, and today I’ll share a few of them along with my take on how to resolve each question.

Note: Readers can ask submit questions directly for me to answer weekdays at TheAutomationBlog.com/join, or submit them on the blog here if they’d like us to consider covering them in future Q & As.


Question 1:

We have a machine in our factory which runs off a chip, with around 5 buttons and a number pad. The system is pretty old, and the screen broke, so we were looking for a replacement.

Long story short, the manufacturer shut down and a replacement unit wasn’t available, so our fix was to connect serially to the machine through a windows computer and use Putty to serially communicate with it.

It works, but we want to get rid of the computer system and possibly replace it with a touch screen tablet.

Shawn’s Take:

Good morning, if you’d like to use a modern control system, I’d recommend contacting a local System Integrator for Siemens, Rockwell, or another automation company with local representation.

They can come in and give you a quote to replace your chip/buttons/screen with a modern, low cost PLC and HMI which any good integrator in the world can program, and you can learn to program yourself.

Siemens and Rockwell both have starter packs under $1,000 that include the PLC, SW, and HMI. Siemens would be the S7-1200 / Basic Panel, and Rockwell’s would be the Micro800 / PanelView 800.

To learn more about either product check out my previous coverage, and best of luck with your project!


Question 2:

While opening PowerFlex 525 drive properties in RSLogix 5000, the display setting changes and becomes small and I’m unable to change the Ethernet properties of drive.

Shawn’s Take:

While I haven’t run into this issue, it sound like a bug that would likely be fixed in a patch. Since you didn’t share the version of RSLogix 5000 and PowerFlex AOP, I’ll generically recommend you first close all other programs first, prior to trying this again.

If the issue continues, I’d recommend first updating your AOPs using this link, and if that doesn’t fix the issue try installing the latest minor revision of the version of RSLogix 5000 you are using which you can learn about here.


Question 3:

I need to install the firmware version 8.0 on PanelView Plus 1000, but on the RA Download Center I just notice the version 5.10.16UP, so my questions are: Why Version 8.0 doesn’t exist for PanelView Plus 1000? Or I’m doing a bad search in the website download center? Have you a recommend method for install firmware 8.0 on PanelView Plus 1000?

Shawn’s Take:

This is a great question which many PanelView Plus users have. As I’ve covered previously here, the original PanelView Plus only supports up to version 5.1, which the PanelView Plus 6 and 7 support revision beyond 5.1.

Your best solution is to first find out which PanelView Plus you have, then grab the right firmware for it. Below I’ll include a screenshot of the firmware available for the PanelView Plus 6:


Question 4:

I am working on a programming and I need to convert the runtime logic in Studio 5000 to CCW version 12.0.

Shawn’s Take:

According to Rockwell’s release notes for CCW, you can import Studio 5000 programs into your Micro800 programs starting with the Feature Pack for version 11, which is also built into v12. These features are also said to be enhanced in v13.

Here’s a snippet from the CCW v12 release notes:

Share Connected Components Workbench logic with Studio 5000 Logix Designer and RSLogix 500. Supports the ability to share ladder logic between Connected Components Workbench and Studio 5000 Logix Designer or RSLogix 500 by doing a copy-and-paste operation in either direction. Enables easy logic transfer from the existing Studio 5000 Logix Designer or RSLogix 500 project to a Connected Components Workbench project, and vice versa. Supported logic sharing ways are:

  • Copy ladder logic ASCII text from or to Studio 5000 Logix Designer or RSLogix 500.
  • Copy ladder logic graphically from Studio 5000 Logix Designer or RSLogix 500 and paste to Connected Components Workbench ladder logic ASCII text.
  • Copy ladder logic graphically from Studio 5000 Logix Designer or RSLogix 500 and paste graphically to Connected Components Workbench.


Question 5:

We have a refrigerant charging machine whose Allen-Bradley PanelView is 550, shows error 613 network node not found’, do you have any idea what would be the issue.

Shawn’s Take:

Errors like this typically happen when the PanelView and PLC become disconnected. This often happens when the networking cable becomes frayed, or is expanded or added to in an unsupported way.

According to page 254 of the user manual here, the error is caused when, “Tag or address does not exist or is the wrong data type.”


If you’d like to see our previous Q & A’s, click here.

To submit a question for us to consider covering in a future blog, click here.

Those readers who’d like to ask me questions directly, can do so here.

Until next time, Peace ✌️ 

If you enjoy this episode please give it a Like, and consider Sharing as this is the best way for us to find new guests to come on the show.

Shawn M Tierney
Technology Enthusiast & Content Creator

Eliminate commercials and gain access to my weekly full length hands-on, news, and Q&A sessions by becoming a member at The Automation Blog or on YouTube. You'll also find all of my affordable PLC, HMI, and SCADA courses at TheAutomationSchool.com.

shawntierney avatar

MDT AutoSave: Automatic Backup, Compare, Archive (P81)

Matthew Lawson of MDT Software is my guest this week, and he shows me how MDT AutoSave is used to backup and compare programs of automation devices like PLCs and HMIs in episode 81 of The Automation Podcast.

For more information, check out the “Show Notes” located below the video.


Watch the Podcast:


The Automation Podcast is also available on most Video and Podcasting platforms, and direct links to each can be found here.


Listen to the Podcast:


The Automation Podcast, Episode 81 Show Notes:

Special thanks to Matthew Lawson for coming on the show to talk about MDT’s AutoSave product.

To learn more about AutoSave, check out the below link:


Vendors: Would you like your product featured on the Podcast, Show or Blog? If you would, please contact me at: https://theautomationblog.com/contact

Until next time, Peace ✌️ 

If you enjoy this episode please give it a Like, and consider Sharing as this is the best way for us to find new guests to come on the show.

Shawn M Tierney
Technology Enthusiast & Content Creator

Eliminate commercials and gain access to my weekly full length hands-on, news, and Q&A sessions by becoming a member at The Automation Blog or on YouTube. You'll also find all of my affordable PLC, HMI, and SCADA courses at TheAutomationSchool.com.

shawntierney avatar

Mitsubishi Basic HMI Project Setup

In today’s article I walk through the initial steps of setting up a new Mitsubishi HMI project, including creating a project, importing the PLC symbol database, and more.

Focusing on the same principle that you can make something difficult or simple, the GOT Designer software for Mitsubishi HMIs can let you do just that.

You can create a project that just does the simplest of things from push buttons and numeric displays, to a combination of more advanced data logging displays or using background scripting that copies, renames, and deletes files that are written over an FTP connection from another non-Mitsubishi controller.

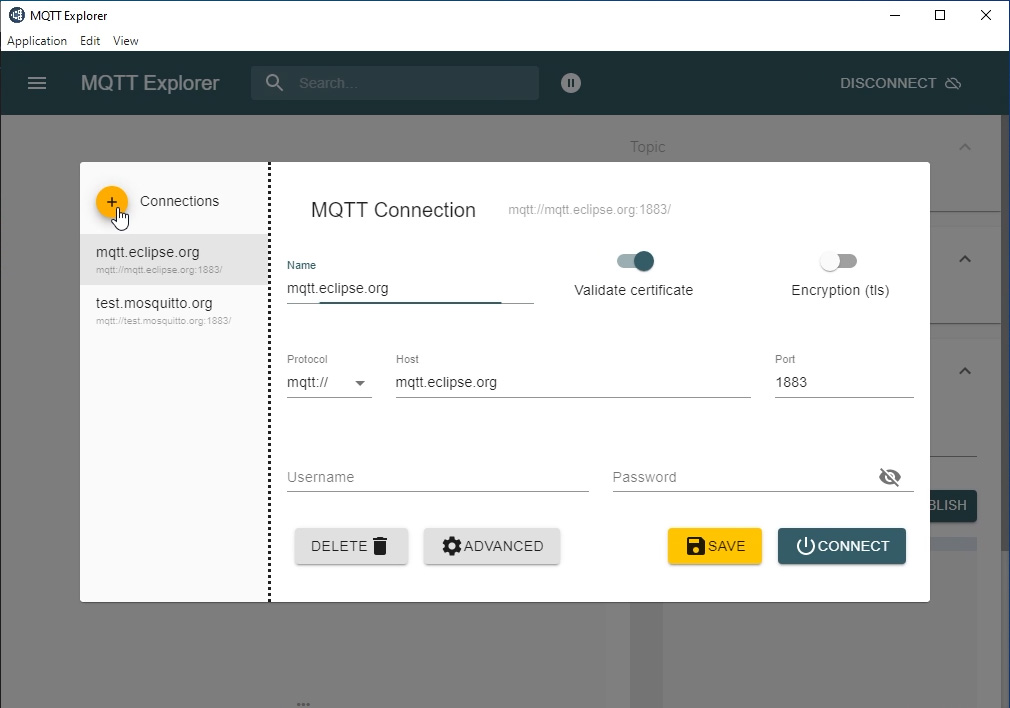
I’n today’s article we’ll start our new HMI application by creating a project in GT Designer 3 by way of the “New Project Wizard.”

Figure 1 – Initial Dialog

Once the application has started, we’ll select “Project” and click “New”.  You can also just simply press the “New…” button on the dialog window that pops up when the software starts.

The new project wizard will open up and ask for you to press “Next” to start cycling through the wizard’s steps.

The first step is where you can select items that will set the unit up for a traditional horizontal display or maybe a vertical display.  The vertical display setup is good for mounting in the side of an enclosure or maybe for easier display of some graphics that are better viewable when tall instead of wide.

Figure 2 – Starting New Project Wizard

Figure 3 – Select Model

Simply stepping through the project creation wizard will get you a nice easy intuitive start.

In the next step, you will select the type/model you are planning to use, being sure that the model you want to use is shown in the “Model:” box after you select the series (GOT2000, GOT1000, or GS Simple series).

For this example, we will pick a GS Series model. We then verify that the 7” (GS2107) model we want is in the list.  Here is the GS2107-WTBD is shown as one of the options.

Figure 4 – Verify PN of target Model

Check out our unboxing of a GS21 HMI here, as well as an overview of the entire line of Mitsubishi HMIs here.

Once you click next, verifying the model you want, you will then select the processor target type the HMI will be connecting to in your system.  For this example, I chose an iQ-F series.  This would be for the relatively new FX5 (also FX5U or FX5UC) series PLC.

Figure 5 – Confirm Setup

Figure 6 – Selection of Target Controller

Check out our unboxing of a FX-5 PLC here, as well as our first time programming it here.

With this basic connection example, we are choosing to use an Ethernet connection.  So next you will then set up the IP address settings and some screen switching and window controls words as well as a basic screen design theme.

After these three windows, you’re almost done with the creation of the new project.  On the final window, you just should verify the setup and press the final “Next”.  You can also go back if needed at any point.

Figure 7 – Enter Desired IP Information

Figure 8 – Run Screen and Window Switching Devices

Figure 9 – HMI Color Theme

Figure 10 – Final Verification of Wizard Setup

When in designer and dropping in objects to control your system, you can either enter a device number (like D150 or M10) or use a label in some cases.

Just entering the desired device number would be the simplest way to set up the interfacing between the PLC and the HMI, but it could get complicated when adding to the project later or if integrating into an existing system.

If you have the correct controller, you can also export the symbol database to be imported into GT designer and use the symbols instead of the devices.

This is a nice way to not only see exactly what the device is, but also the structure type it is part of if you have set up multiple instances of similar devices in the code.

In the PLC program, select the edit pulldown and “Export to File…”.  This will be the CSV formatted file to import to GT Designer.  Be sure you select the “Export to CSV File” radio button before pressing Execute.

Figure 11 – Export of CSV from GX Works3

Figure 12 – CSV File Type Selection

Once that is complete, the next step is to go back to your GT Designer. In your project, select the “Project” pull-down, “Import Other Data”, and then “Device Comment/Device Definition…”.

You will then need to add the file.  Select “Add” and then press the “…” selection button on the next dialog window to browse for and select the “Device / Comment” file.

A standard windows browser will open.  Browse to the location of the CSV file you exported from your PLC file in GX Works3.  Select it and press open.

Figure 13 – Import to GT Designer

Figure 14 – Add Device File Dialog

Figure 15 – Browse for CSV File

Once complete, you will be able to select the Symbols in place of just a device address.

The more complicated your system, the important it becomes to use tools like label identification to be sure the project stays organized and clear for future troubleshooting or use in other similar projects.

Figure 16 – Device or Symbol Display on HMI

The downside of using the more economical FX5 is that you can only use the devices (i.e., D, M, SD, etc) and not the associated labels.  The use of exported labels is not permitted on the iQ-F line.

If looking at the device display on the HMI while in design mode, you will see only a D# for instance instead of a “::LABEL_TEXT…” shown on the object set up on the HMI.

While looking at the label database you will see the option for allowing “Access from External Device” (last column to the far right).

When checked, this allows the symbol to be exported and used in the GOT file as we set up above.

In the image below you can see the difference between an iQ-F (FX5) database that does not allow the export and an iQ-R (R04CPU) database file that does permit it:

Figure 17 – Permit or Not of the External Device Usage

How you use this tool or if you need it at all depends on the complexity and size of your project. It makes for easier automation with the proper knowledge and planning upfront.

Stick to the documentation and naming that makes sense and keep it simple to understand.  If you do that, regardless of the complexity of the project, 10-years down the road you will still be able to understand what you did and others will too.

I promise you, they will appreciate it.

Written by Paul Hunt
Senior Automation Engineer and Freelance Writer

Have a question? Join our community of pros to take part in the discussion! You'll also find all of our automation courses at TheAutomationSchool.com.

Sponsor and Advertise: Get your product or service in front of our 75K followers while also supporting independent automation journalism by sponsoring or advertising with us! Learn more in our Media Guide here, or contact us using this form.

shawntierney avatar
 

Top Ten Podcast Episodes

Over the last couple of years we’ve had a great response to our invitation to Vendors and Automation Experts to come on The Automation Podcast and educate myself and the audience about products and technologies.

And with several more episodes already recorded and scheduled to be released in the coming weeks, I though it was a good time to look back at what our all-time top ten podcast episodes have been up to now:

Top Ten Podcast Episodes

10) Real-Time Maintenance by IFM with Bob Drexel

In this episode of The Automation Podcast, Bob Drexel of IFM comes on to discuss Real-Time Maintenance applications and technologies.

09) FX-5 PLCs by Mitsubishi Electric with Jeffrey Brown

In this episode of The Automation Podcast, Jeff Brown from Mitsubishi provides us with an overview of the iQ-F line of small PLCs.

08) Basic HMIs by Siemens with Ramey Miller

In this episode of The Automation Podcast, Ramey Miller from Siemens provides us with an overview of Siemens Basic HMI line of HMIs.

07) Introduction To EtherCAT by SMC with Nathan Eisel

In this episode of The Automation Podcast I sit down with Nathan Eisel of SMC to get a detailed introduction to EtherCAT.

06) iQ-R PLCs by Mitsubishi Electric with Jeffrey Brown

In this episode of The Automation Podcast, Jeff Brown from Mitsubishi provides us with an overview of the iQ-R line of PLCs.

05) Scalance Layer 2 Switches by Siemens with Ford Cheeseman

In this episode of The Automation Podcast I sit down with Ford Cheeseman to learn about the Siemens Scalance line of Layer 2 Unmanaged Industrial Switches.

04) Unified Comfort Panels by Siemens with Ramey Miller

In this episode of The Automation Podcast we take a look at the new line of HMI’s from Siemens, the Unified Comfort Panels.

03) PLCnext by Phoenix Contact with Ira Sharp

In this episode of The Automation Podcast I sit down with Ira Sharp from Phoenix Contact to get up to speed on their next gen PLC line, PLCnext.

02) What is IOLink, and Why Use It? by IFM with Yuen Li

In this episode of The Automation Podcast I sit down with Yuen Li from IFM Efector to learn what IOLink is, and why you should consider using it on your next project.

And our number one podcast is currently…

01) What’s New in TIAPortal v17 by Siemens with John DeTellem and Luis Narvaez

In this episode of The Automation Podcast I sit down with John DeTellem and Luis Narvaez with Siemens to learn what’s new in TIA Portal v17.


Huge thanks to all the vendors that have come on the show and helped bring myself and the audience up to speed on automation products and technologies!

If you’re a Vendor, Service Provider, or Automation Expect and would like to bring our audience up to speed on your industrial automation product or topic of interest, please don’t hesitate to reach out to me directly here.

Until next time, Peace ✌️ 

If you enjoy this episode please give it a Like, and consider Sharing as this is the best way for us to find new guests to come on the show.

Shawn M Tierney
Technology Enthusiast & Content Creator

Eliminate commercials and gain access to my weekly full length hands-on, news, and Q&A sessions by becoming a member at The Automation Blog or on YouTube. You'll also find all of my affordable PLC, HMI, and SCADA courses at TheAutomationSchool.com.

shawntierney avatar

S7-1500 – Advanced Siemens PLC Overview (P80)

Jim Wilmot of Siemens is my guest this week, and he covers the Siemens S7-1500 line of Advanced Programmable Controllers on episode 80 of The Automation Podcast.

For more information, check out the “Show Notes” located below the video.


Watch the Podcast:


The Automation Podcast is also available on most Video and Podcasting platforms, and direct links to each can be found here.


Listen to the Podcast:


The Automation Podcast, Episode 80 Show Notes:

Special thanks to Jim Wilmot for coming on the show to bring us up to speed on the S7-1500 line of Advanced Programmable Controllers.

To learn more about the S7-1500, check out the below link:


Vendors: Would you like your product featured on the Podcast, Show or Blog? If you would, please contact me at: https://theautomationblog.com/contact

Until next time, Peace ✌️ 

If you enjoy this episode please give it a Like, and consider Sharing as this is the best way for us to find new guests to come on the show.

Shawn M Tierney
Technology Enthusiast & Content Creator

Eliminate commercials and gain access to my weekly full length hands-on, news, and Q&A sessions by becoming a member at The Automation Blog or on YouTube. You'll also find all of my affordable PLC, HMI, and SCADA courses at TheAutomationSchool.com.

shawntierney avatar