
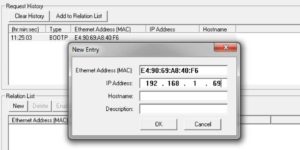
 In today’s article I walk you through how to use the BOOTP DHCP Utility to set a CompactLogix processor’s Ethernet address.
NOTE: You can also set a CompactLogix processor’s IP address through either Serial or USB. To learn how to, see the below articles:
- Set CompactLogix Ethernet Address through its Serial Port
- Set CompactLogix Ethernet Address through its USB Port
Step 1) Launch the BOOTP-DHCP Server utility
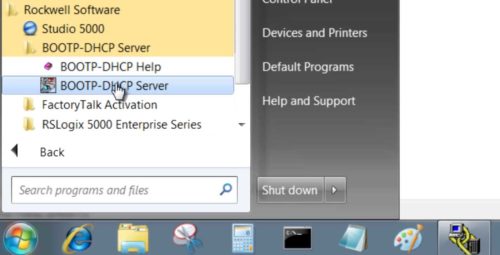
Launch the BOOTP-DHCP Server utility found in the start menu under “All Programs, Rockwell Software, BOOTP-DHCP Server:”
Step 2) Allow the utility to use your networks
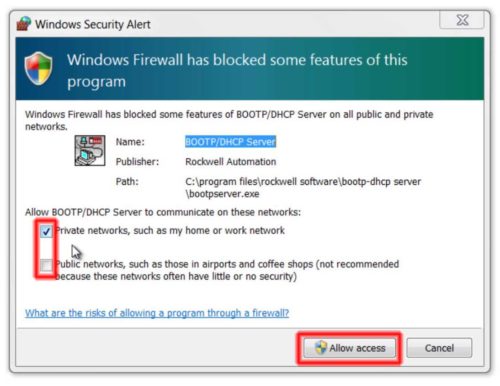
If the Windows Firewall security alert popup is displayed, select both checkboxes and click “Allow Access” to allow the utility to access your CompactLogix using your network connections:
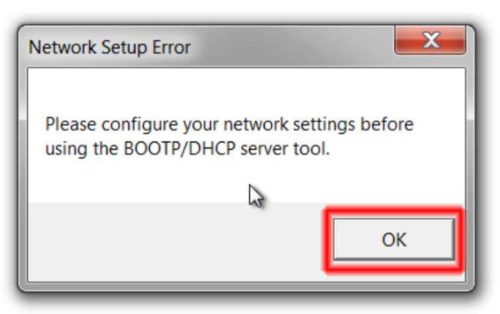
Step 3) Click Ok on initial setup window
The first time you run the BOOTP utility you will receive a popup warning that the utility needs your network settings specified. Click “Ok” to proceed:
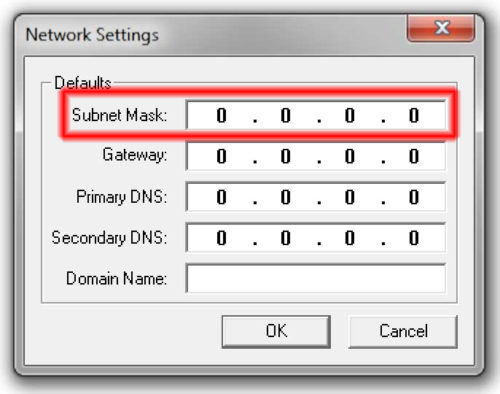
Step 4) Enter your Subnet Mask
In the network settings window, enter in your Subnet mask and click on “Ok”:
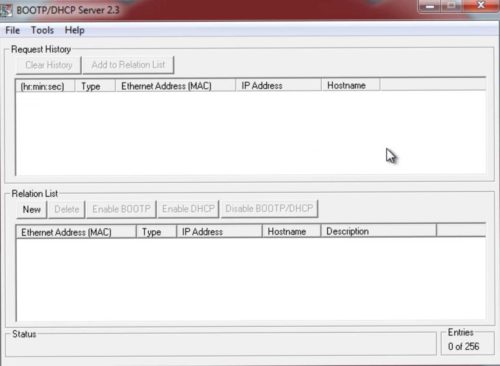
Step 5) Wait for the CompactLogix to request an Ethernet Address
At this point you’ll need to wait for your CompactLogix to request an IP address:
NOTE: If your CompactLogix processor has been on for a long time, it rate at which it requests an IP is very slow. To get it to request an IP address quicker, cycle power to the processor.
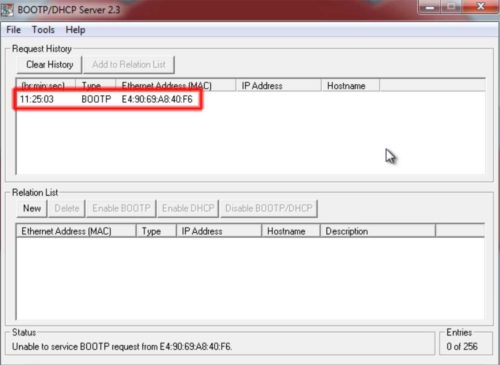
Step 6) Select the request in the “Request History” list
Once you see your CompactLogix’s request for an IP address in the “Request History” area, go ahead and select it:
NOTE: Double check the requesting MAC address to be sure the request is from your CompactLogix and not some other device or windows driver.
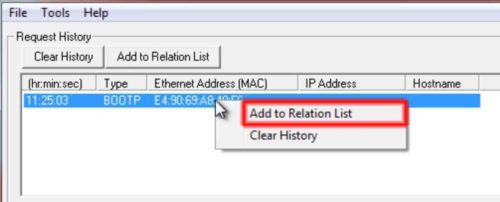
Step 7) Right Click and select “Add to Relation List”
Now right click on the request and select “Add to Relation List” as shown below:
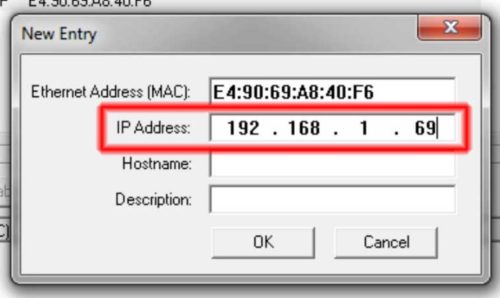
Step 8) Enter in IP address for your CompactLogix
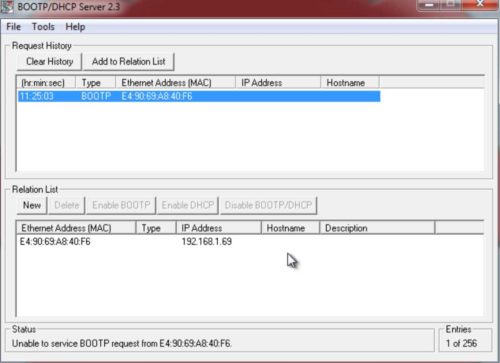
Now enter in the IP address you would like to give your CompactLogix and then click on “Ok”:
Step 9) You now need to turn off BOOTP in the processor to insure it retains the address
At this point, while your CompactLogix has an Ethernet IP address, it is still set for BOOTP. This means, once you cycle power to the processor it will again ask for an address via BOOTP, and will no longer have the address you gave it above.
While it is possible to disable BOOTP for some devices by right clicking on the device listed in the “Relation List” and selecting the appropriate menu option, since this doesn’t work for all devices I’ll show you another way to do this starting in the next step.
Step 10) Open RSLinx and select your CompactLogix
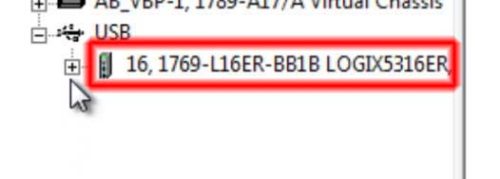
Open RSLinx, and select either your CompactLogix’s Ethernet module, or if you have a newer 5370 CompactLogix you can just select the processor itself as shown below:
 NOTE: If you need help setting up RSLinx please refer to our previous articles HERE and HERE.
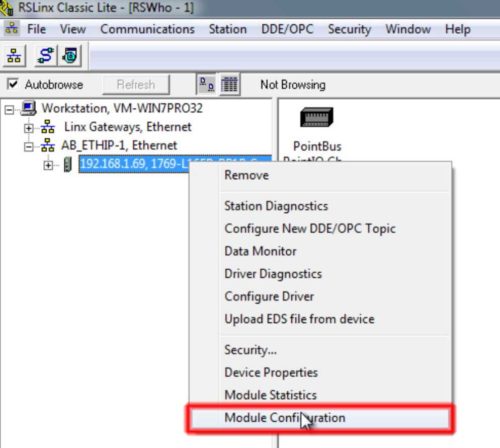
Step 11) Select “Module Properties from the right click menu
Now right click on the device selected above, and choose “Module Properties” from the menu:
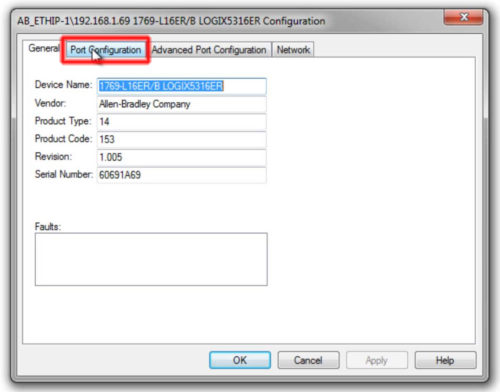
Step 12) Select “Port Configuration”
From the popup window select the “Port Configuration” tab:
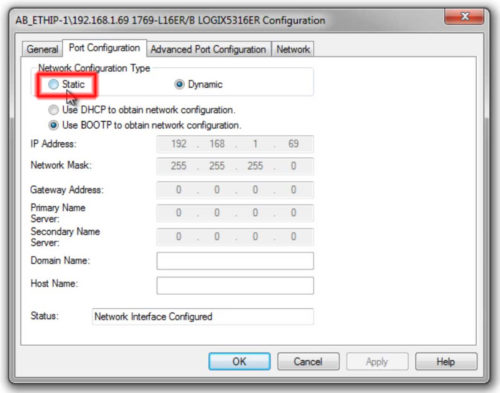
Step 13) Select “Static”
Now under “Network Configuration Type” select “Static” as shown below:
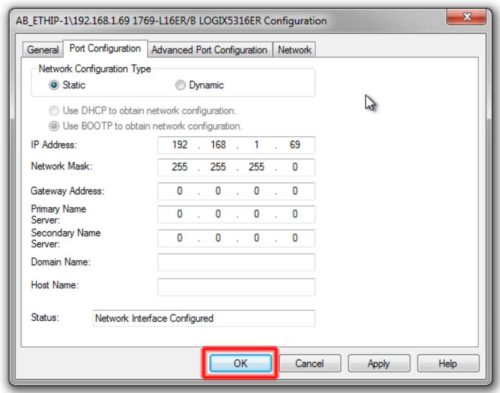
Step 14) Click on “Ok”
Now that you have selected “Static,” click on the “Ok” button:
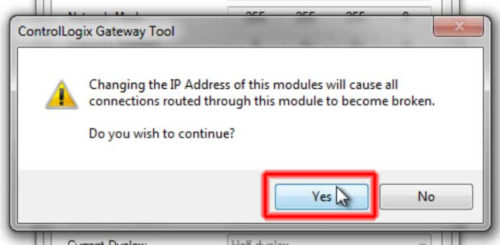
Step 15) Click on “Yes” to accept your changes
Finally, click on “Yes” to accept your changes so your CompactLogix will no longer be set for BOOTP and will maintain the address you gave it using the BOOTP-DHCP Server utility:
NOTE: Watch me run through the above steps in today’s episode of The Automation Minute!
I hope the above article on how to set a CompactLogix processor’s Ethernet address using BOOTP was helpful.
If you have any questions or comments, please feel free to share them with us by clicking on the “post a comment or question” link below.
Until next time, Peace ✌️
If you enjoyed this content, please give it a Like, and consider Sharing a link to it as that is the best way for us to grow our audience, which in turn allows us to produce more content 🙂
Shawn M Tierney
Technology Enthusiast & Content Creator
Support our work and gain access to hundreds members only articles and videos by becoming a member at The Automation Blog or on YouTube. You’ll also find all of my affordable PLC, HMI, and SCADA courses at TheAutomationSchool.com.
- Digital Twin Discussion with Arthur Alter of Smart Spatial (01/15/26) - January 15, 2026
- PRONETIQS: Measure, Monitor, and Maintain (P257) - January 14, 2026
- FactoryTalk Design Workbench First Look, CCW Comparison - December 19, 2025

Discover more from The Automation Blog
Subscribe to get the latest posts sent to your email.




Very helpfull and good explication!!
With BootP I arrived at the instant where I couldn’t disable the BootP on the PLC. Finally I’d to disable it with the RsLinx!
Many Thanks!!
Good morning GG,
Yes, many of Rockwell’s products can’t have Boot-P disabled using the Boot-P utility, but those that can’t typically can be disabled in RSLinx Classic as you’ve found and as shown above.
Have a great week,
Shawn Tierney
[sc name="stsigcom"]