In today’s article I’ll walk you through how to change out a Mitsubishi J4 Drive which an MR-D30 Safety Module Attached.
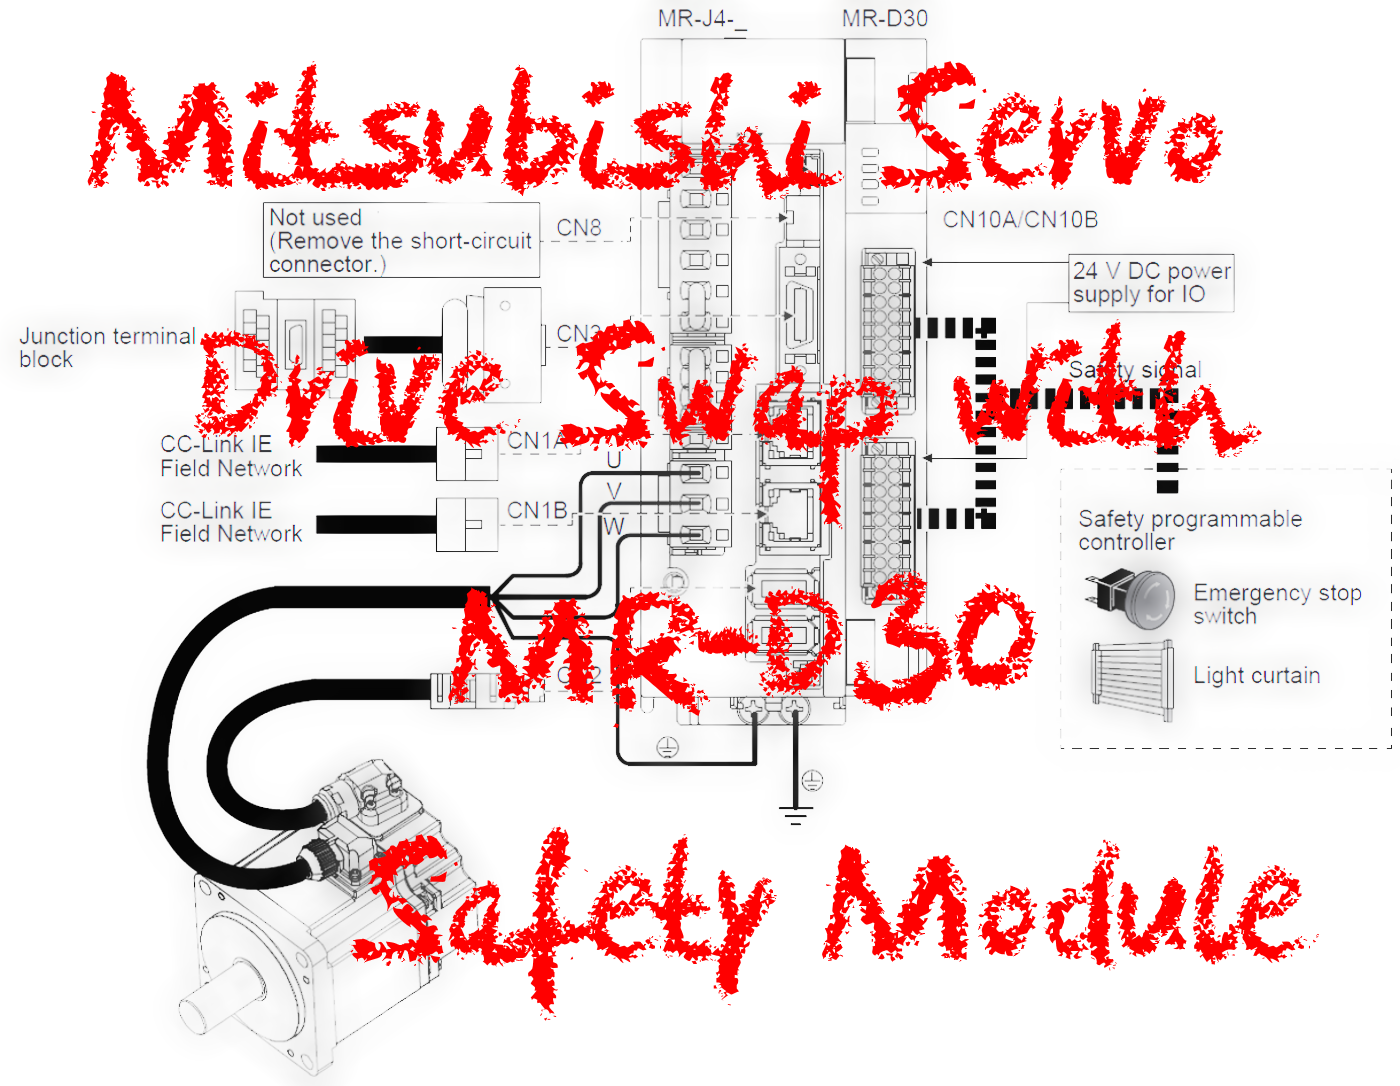
Note that these instructions are specifically for changing a J4 Servo Drive in the instance of a failure, or if a change in system design is made that affects the motor size specifications.
The assumption is also being made that the safety parameter file is already set up and has been verified to work previously on either this module or another in a matching process.
The first step would be to power down the system and wait the typical 15-30 seconds before attempting to disconnect any wires. This may take longer. Be sure to follow manual guidelines if necessary.
After a safe amount of time and be sure the machine is locked out and tagged, continue to remove the MR-D30 safety module from the side of the servo drive to be replaced. Once removed, you will then disconnect any other cables and connectors and remove the drive.
At this point, if you are using a similar drive, you will just be able to re-use the connectors and reconnect them to the same locations on the new drive. If the connections are different, refer to any schematics for the system/machine for the proper connection points.
Be sure any purchased cables will cross over to the replacement drive as well.
Once the drive has been removed, go through the proper mounting procedures for mounting the new/replacement drive. Carefully check and be sure all the connections have been made and the MR-D30 module has been successfully mounted to the side of the servo drive.
Once the physical swap has been completed, review the wiring connections and then remove any lock-out-tag-out (LOTO) devices following your company’s procedures. Once it is safe to do so, reapply power.
When power is re-applied, you will see an error (or errors) on the drive that was swapped.
If the motor and the drive were changed, you may see a 7A.3 as well as a 7A.4.
-
Motor direction or parameter combination errors (7A.3)
-
You may see this error if you have parameters PSA18 and PSA19 configured incorrectly (Pr. PSA19 < Pr. PSA18) (see Fig 7)
-
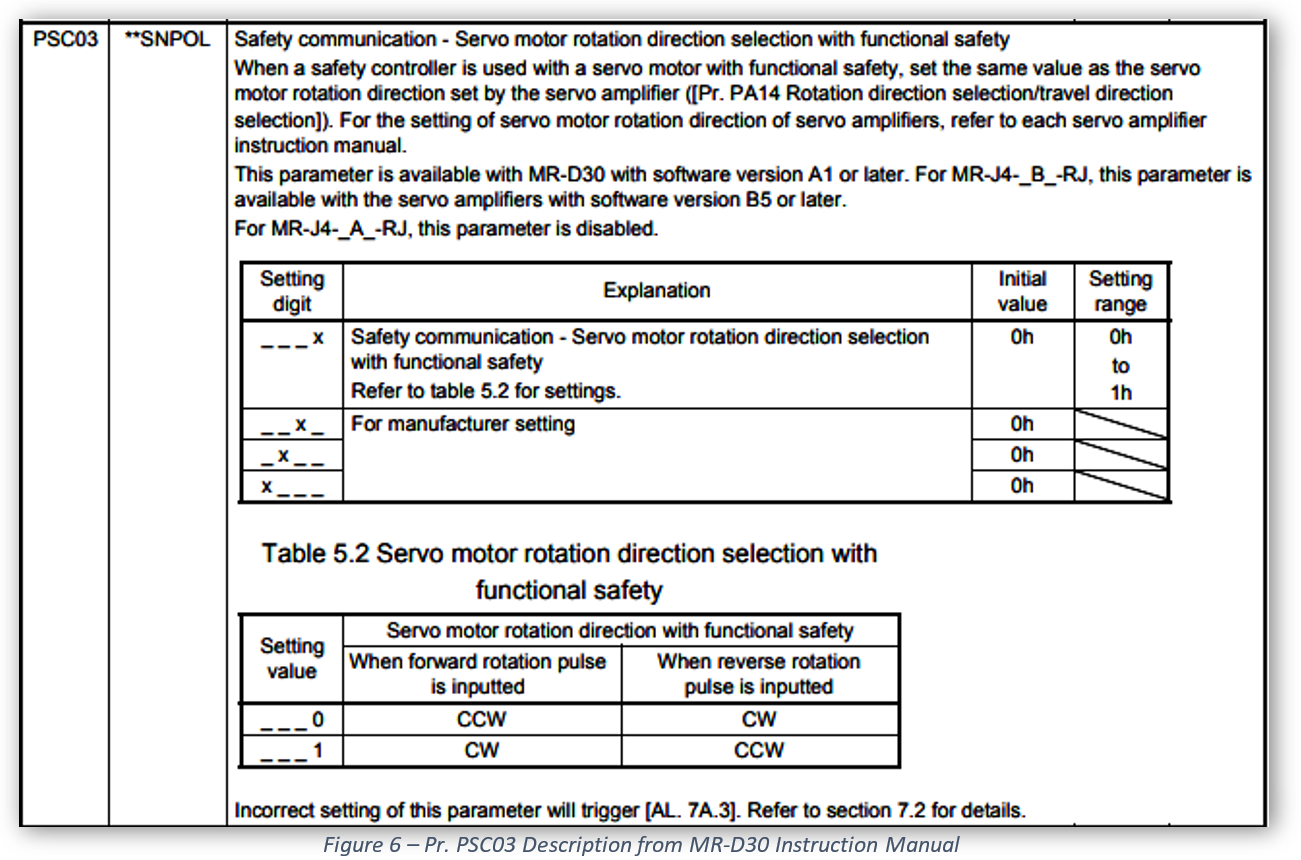
This error may also signify a rotation direction mismatch setting. This can be found in Pr. PSC03 (see Fig 6)
-
-
Drive and Safety module Mismatch (7A.4)
-
This error will pop up when powering up after swapping the drive and not having the MR-D30 reconfigured yet (Fig 1)
-
Open your PLC configuration file (this example is in GX Works3). If using Works 2, opening the Simple Motion Module Editor will look slightly different and open with different steps..

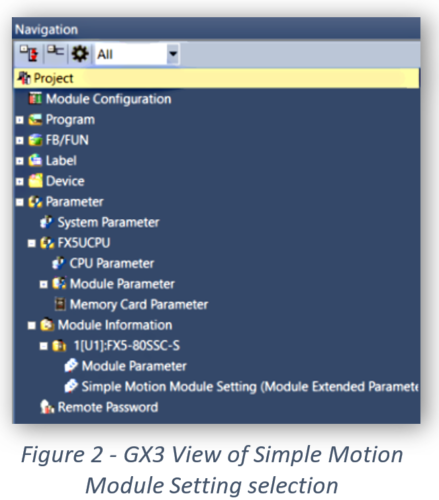
When in GX3, expand your parameters and hardware out until you see the Simple Motion Module Setting and double click on it. This will open the Simple Motion Module Setting Function.
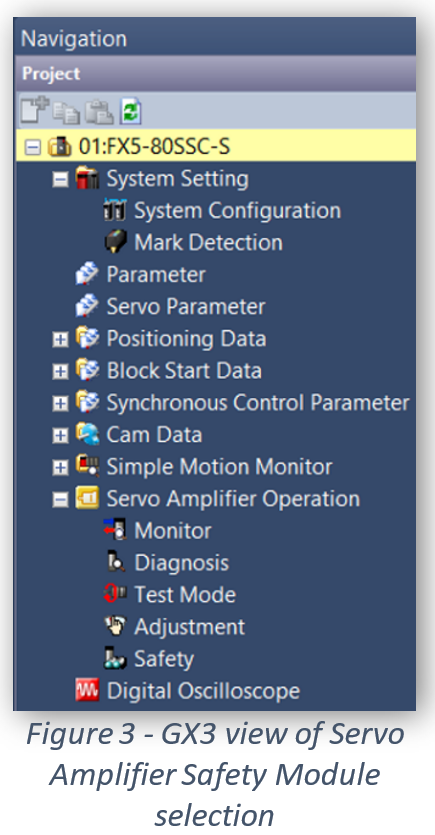
Once open, navigate down to the “Servo Amplifier Operation Folder”. Expand it by clicking the “+”.
You will then double-click the “Safety” icon to be able to view the specific safety module-related parameters.
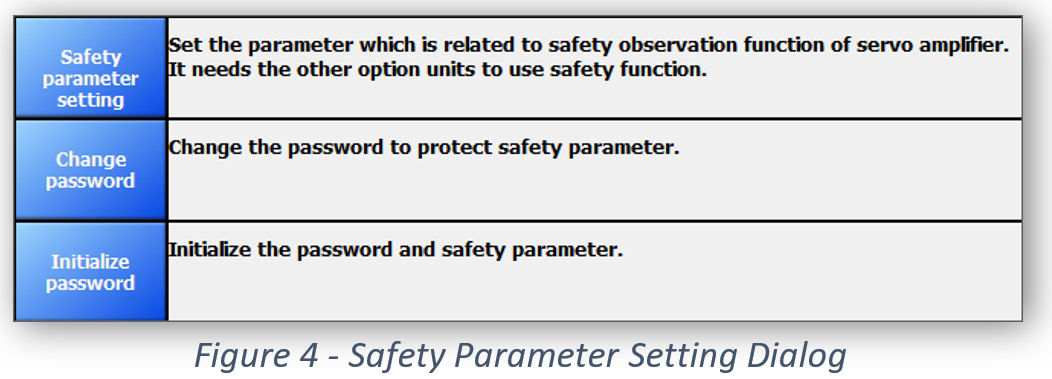
When double-clicked, it will present another window with selection buttons. Press the “Safety Parameter Setting” button to continue.
This will open the safety parameter file editor. You will need to be connected to the PLC at this point to proceed.
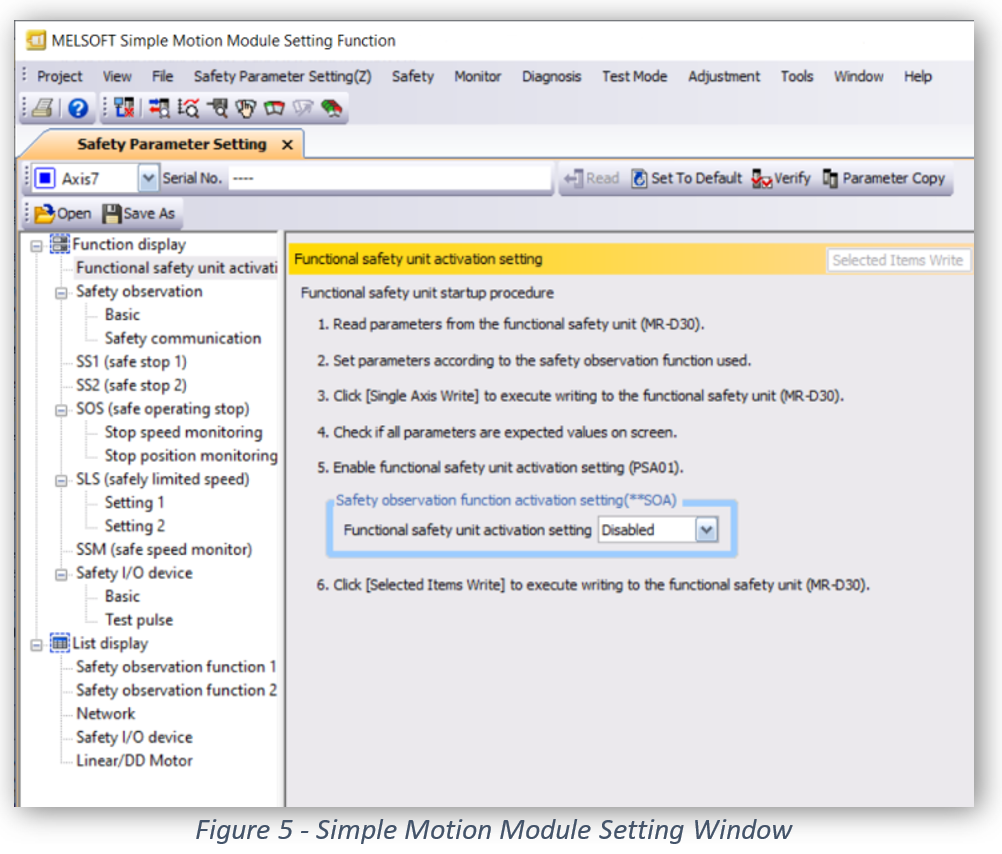 You will be able to read, download, and verify the file settings to the loaded drive settings. Recommended steps for this process are as follows. Follow these steps and be prepared to review any manuals for unforeseen issues or error values that may pop up. Always upload, save as, and backup before making modifications. You will be glad you did. Good luck!
-
Select Axis that has the MR-D30 module.
-
VERIFY – This will show you if there are any differences between the file and drive
-
READ – This will update your file with the parameters from the module. A best practice is to upload and use the uploaded file to modify.
-
SAVE AS – Save the uploaded parameter (.sprm) file. Best to save as a separate file than the original (add “V_#” or date on the name for example).
-
SET TO DEFAULT – This will set all the parameters in the editor to default. You can VERIFY again at this point if you like. Just to see the differences. No significant relevance other than verifying the parameters in the module were different in some way from the default.
-
SINGLE AXIS WRITE – Press this once you are sure you are looking at the correct axis (Axis 7 in this example)
-
CYCLE POWER (wait 30+ seconds before powering back on)
-
Once complete, open the file you just saved or perhaps the original file you know to be good.
-
You can choose to verify here as an optional step just to be sure the file loaded is different than the default files you just loaded.
-
Repeat the SINGLE AXIS WRITE step for writing the correct parameters back to the module.
-
CYCLE POWER
-
Test to be sure the error messages are gone.
The system should run as before at this point.
Written by Paul Hunt
Senior Automation Engineer and Freelance Writer
Have a question? Join our community of pros to take part in the discussion! You'll also find all of our automation courses at TheAutomationSchool.com.
Sponsor and Advertise: Get your product or service in front of our 75K followers while also supporting independent automation journalism by sponsoring or advertising with us! Learn more in our Media Guide here, or contact us using this form.
- Mitsubishi PLCs: Brief History and Hardware Overview - August 2, 2022
- Mitsubishi PLCs: FX5 vs iQ-R - February 10, 2022
- How To Register and Use a Device Profile in GX Works3 - November 9, 2021

Discover more from The Automation Blog
Subscribe to get the latest posts sent to your email.


