
When I was hired at my first professional job in September of 2000, I would soon learn that the facility I was being hired at would undergo a very large expansion in the next nine months.
One aspect of that startup was an experience that was invaluable to learning about Rockwell Automation Systems. Most of the motor controls in the facility had DeviceNet communication, and I was fortunate to be able to configure hundreds of E3 Overload modules and 1336 PII drives during that time.
But if you are installing smart overloads in your facility today, it will likely not be the old E3 module, but rather the E300 module that uses EtherNet/IP communication (like shown below) that would be installed:
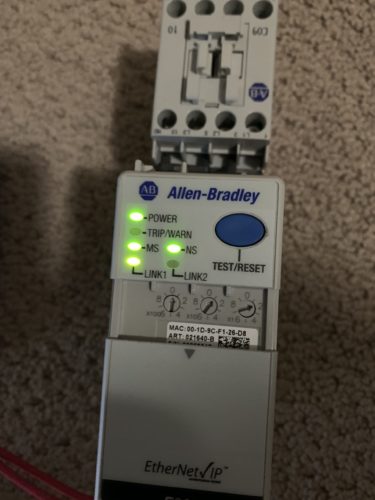
Getting Started With A New Allen Bradley E300 Overload Module
Part 1 – Setting the Dip Switches:
The front cover of the E300 Slides down to provide access to the Dip Switches that are located on the front of the module, and which have the following functions:
- Admin Mode – Enabled by setting Dip Switches to “0”, “0”, “0”
Setting the Dip Switches to Admin Mode and cycling power will allow you to access the web browser to permanently enable the web browser if you choose to utilize this option.
- IP Address – Enabled by setting the Dip Switches to represent a “valid” last Octet (001 to 254) of the product’s default private Ethernet Address of 192.168.1.XXX.
In this example our Dip Switch Setting is “0”, “1”, “2,” which will set the IP Address of the device to 192.168.1.12.
Be sure to cycle power after setting these dip switches.
- Reset to Factory Defaults – Enabled by setting Dip Switches to “8”, “8”, “8”
By setting the switches to this setting, cycle power and the device will return to factory defaults.

Part 2- Applying Initial Power:
On the terminal strip of the E300, terminal A1 is 24 VDC (+) and terminal A2 is 24 VDC( -)
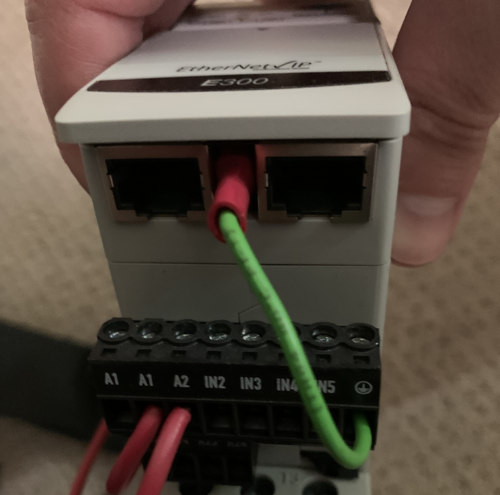
Part 3 – Accessing the Web Browser:
If you have chosen a static address as we did in this example, you need to be sure you also set your computer’s Subnet Mask to match (255.255.255.0,) while giving your PC an unique IP Address (like 192.168.1.10)
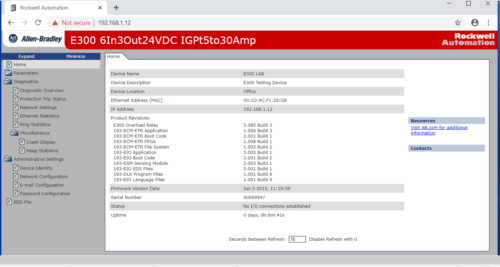
Once done, open a web browser and type in the IP address of the E300 device (http://192.168.1.12 in our example.)
Under “Administrative Settings” you can change network configuration, the password, and add device location and other information under the device identity tab using the default username of Administrator, and default password which is the serial number of the E300 (located on the Home Screen of the E300’s web page)
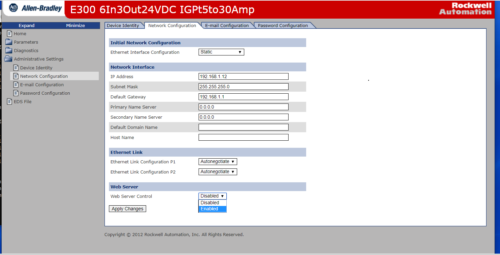
To enable the web server, you can go to the “Network Configuration” Tab and change the “Web Server Control” parameter to “Enable” and then “Apply Changes”
Part 4 – Parameters:
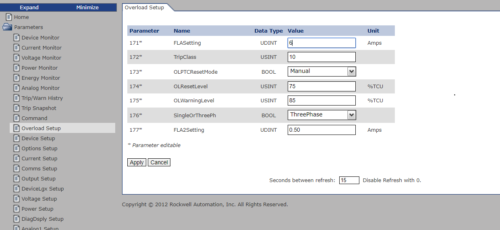
The E300 Device Parameters are accessible in the web browser, and settings such as the FLA Setting as shown here can be modified.
Simply, click the “EDIT” button, modify the parameter and then the “APPLY” button to write the changes to the device:
For more information, see the below Rockwell publications:
Additional Info:
Depending on the model, there is also a backup /restore function in the web browser that is not available in this model, but is in the series “B” version.
Configuration settings can also be written to the device from your Studio 5000 project, but that is a topic for another time.
With straight forward configuration, the elimination of I/O (Input/Output) wiring, and the ability to have important data monitoring available to you, the E300 is a product I recommend looking at if you are checking the market for smart overloads for your MCC’s.
Written by Brandon Cooper
Senior Controls Engineer and Freelance Writer
Have a question? Join our community of pros to take part in the discussion! You'll also find all of our automation courses at TheAutomationSchool.com.
Sponsor and Advertise: Get your product or service in front of our 75K followers while also supporting independent automation journalism by sponsoring or advertising with us! Learn more in our Media Guide here, or contact us using this form.
- Things I’ve Learned Travelling for Work (2) - July 17, 2025
- Things I’ve Learned Travelling for Work (1) - July 10, 2025
- Emulating an Allen-Bradley E3 or E3 Plus - June 30, 2025

Discover more from The Automation Blog
Subscribe to get the latest posts sent to your email.


