To program Rockwell’s Micro820 and Micro850 over Ethernet you first need to know how to setup RSLinx Classic’s Ethernet drivers, and in today’s article I’ll show you step-by-step how to do just that.
Preface: Before proceeding it’s a good idea to insure that the installed copy of RSLinx Classic is at least as new as your Micro800, as using old versions of RSLinx with new products does not always work.
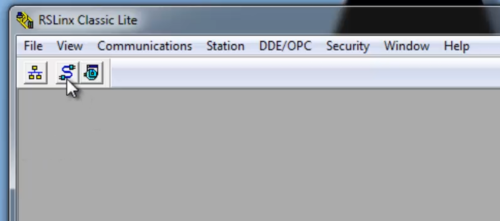
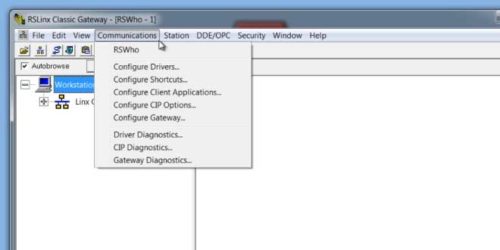
Step 1) Launch RSLinx Classic and then open “Configure Drivers” by selecting the Cable icon on the toolbar, or by choosing “Configure Drivers” in the “Communications” menu.
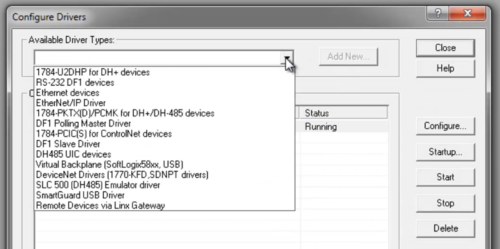
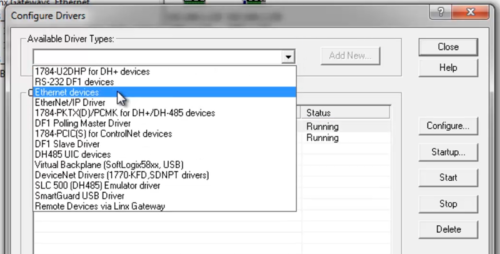
Step 2) Under the “Available Driver Types” you’ll see two different Ethernet Drivers: “Ethernet Devices” and “Ethernet/IP Driver”
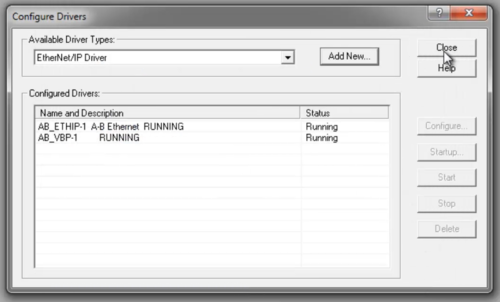
Step 3) In our first example we’ll select the “Ethernet/IP Driver,” and then click on “Add New”:
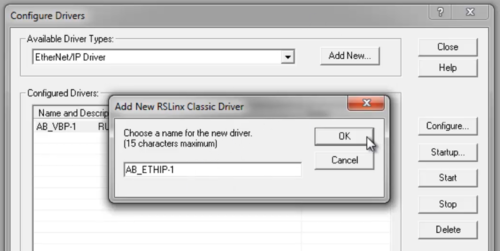
Step 4) Now select “OK” to accept the default driver name:
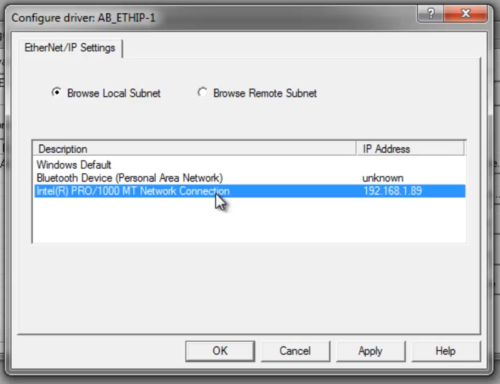
Step 5) In the next window it’s recommended to select the Ethernet device in your PC which is connected to your Micro800’s network, and then select “OK”:
Step 6) Now select “Close” to close the “Configure Drivers” window.
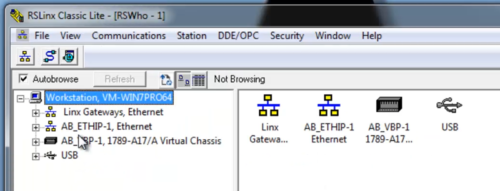
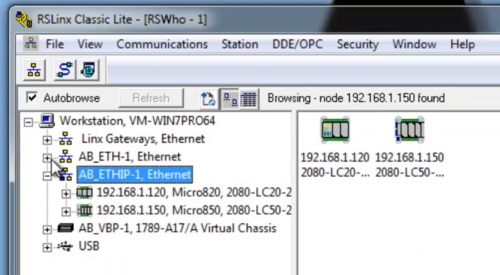
Step 7) Back in RSLinx Classic, in the RSWho window select the “+” sign next to the “AB_ETHIP-1” driver (or double click on the “AB_ETHIP-1” driver) to expand it and start browsing:
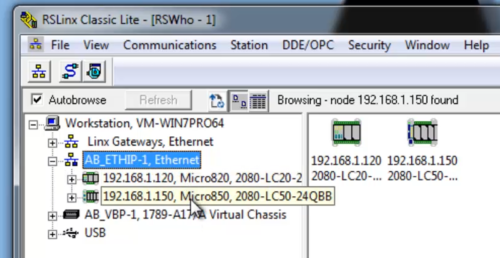
Step 8) At this point if your PC is connected to the same subnet as your Micro800, and there are no router or firewall settings preventing the Ethernet/IP Driver’s auto-browse feature from working, you should see your Micro800 appear in the RSWho within 10 seconds.
Step 9) If your Micro800 does not appear, perform a Ping test as described in this article.
If you can ping your Micro800 but the “Ethernet/IP Driver” does not find your Micro800 using auto-browse, continue on to the next step.
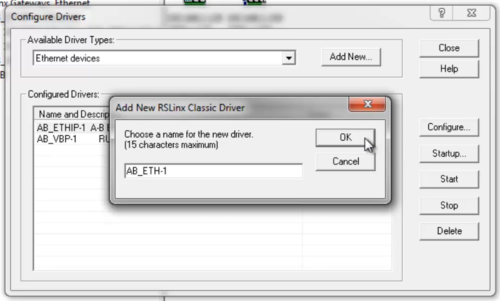
Step 10) Open the RSLinx Classic “Configure Drivers” window again, and this time select the “Ethernet Devices” driver and click on “Add New”:
Step 11) The click on “OK” to accept the default driver name:
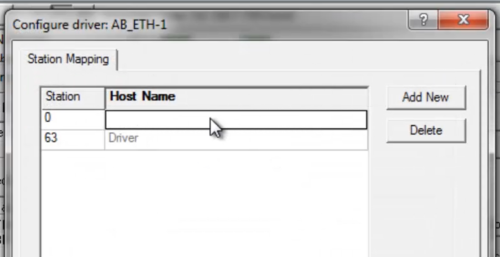
Step 12) Now enter in the Ethernet IP addresses of any Ethernet Micro800 PLCs you would like to connect to:
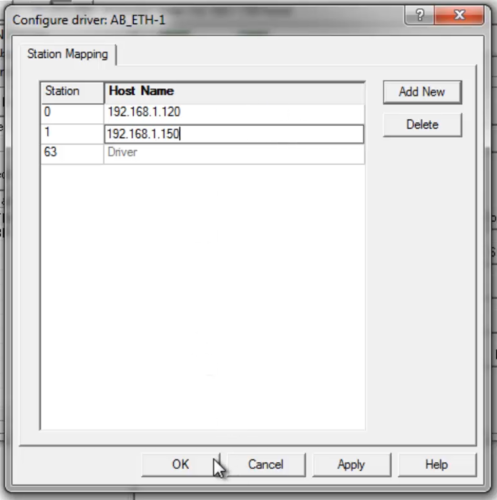
Step 13) Here you can see we’ve added two addresses, 192.168.1.120 and 192.168.1.150. The next step is to click on “OK:”
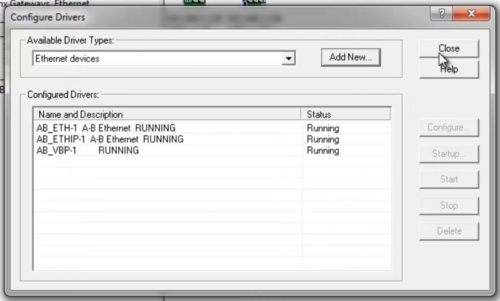
Step 14) Now select “Close” to close the “Configure Drivers” window:
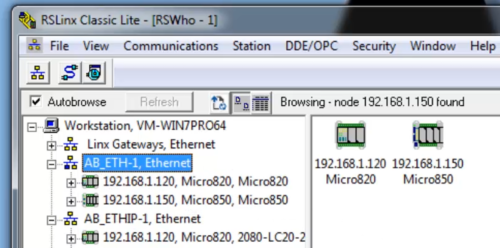
Step 15) Back in the RSLinx Classic RSWho window click on the “+” sign next to the “AB_ETH-1” driver (or double click on the “AB_ETH-1” driver) to expand the driver and start browsing:
Step 16) At this point if your PC is connected to the same subnet as your Micro800, you should see it appear in the RSWho window within 10 seconds.
I hope you found this article helpful. If you have any questions please feel free to post them at TheAutomationBlog.com/join which I visit each weekday to reply to reader’s questions.
Until next time, Peace ✌️
If you enjoyed this content, please give it a Like, and consider Sharing a link to it as that is the best way for us to grow our audience, which in turn allows us to produce more content 🙂
Shawn M Tierney
Technology Enthusiast & Content Creator
Support our work and gain access to hundreds members only articles and videos by becoming a member at The Automation Blog or on YouTube. You’ll also find all of my affordable PLC, HMI, and SCADA courses at TheAutomationSchool.com.
- Digital Twin Discussion with Arthur Alter of Smart Spatial (01/15/26) - January 15, 2026
- PRONETIQS: Measure, Monitor, and Maintain (P257) - January 14, 2026
- FactoryTalk Design Workbench First Look, CCW Comparison - December 19, 2025

Discover more from The Automation Blog
Subscribe to get the latest posts sent to your email.


