
In today’s manufacturing environment, Ethernet is being is being used in place of discrete I/O.
Fanuc has made this easier by having the ability to set up I/O via Ethernet that can be easily integrated with Rockwell’s RS Logix platform.
This article will walk through how to set up communications with Fanuc ethernet I/O.
This article will assume the reader has a base level of know of Fanuc Robotics. It can be quite dangerous if an untrained operator or engineer will attempt to use a teach pendent devoid of the proper training.
I highly recommend taking a basic Robotic operations course through Fanuc or with a Fanuc Certified educator at a local Community College or Four Year University.
In spite of this warning, I will touch on certain items that you need to set up Fanuc’s side in order to monitor/control the robot.
In order for Fanuc Ethernet I/O to work, the EIP Scanner Option (R784) needs to be installed on the controller.
This option only allows communication of discrete I/O status over Ethernet. See below to see if this option is available.
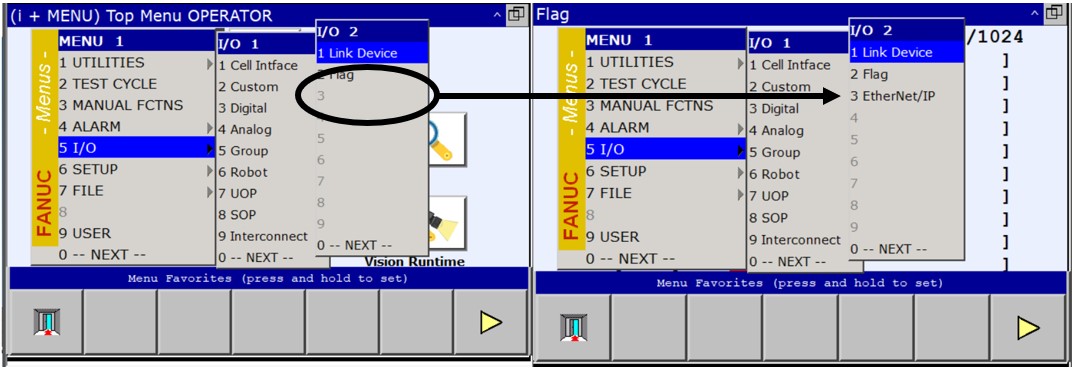
Caption: If you don’t see “Ethernet I/O” as an option, you will need to contact Fanuc or a Fanuc distributor to purchase the correct PAC code.

Other items that will need to be setup on the Fanuc side are.
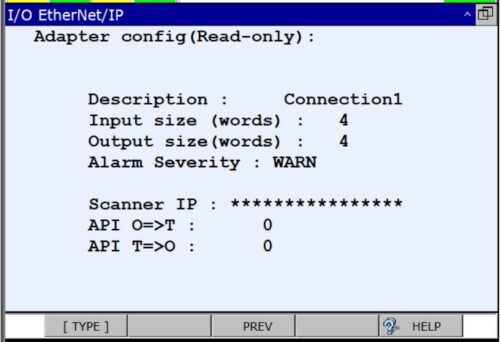
- Under ethernet I/P menu, the connection needs to be enabled and configured for how many 16 bit words will be transferred between the robot and the plc.
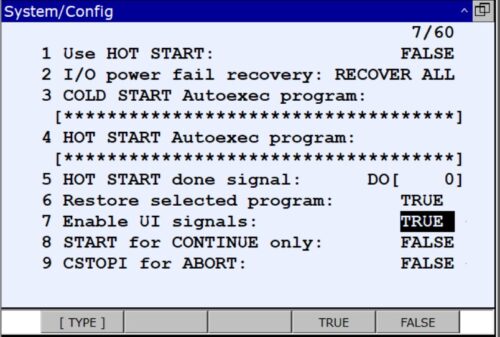
- UI signals should be enabled in menu->system->config
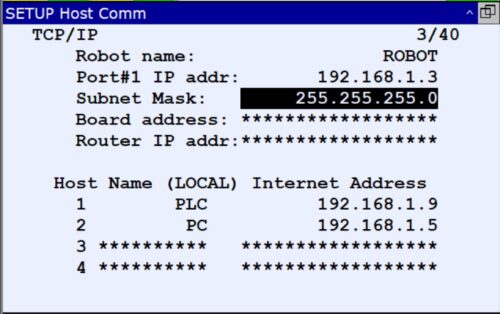
- The robot needs an IP address assigned to it and the PLC/CPU need added to allow communication via Menu->Setup->Host Comm->TCP/IP
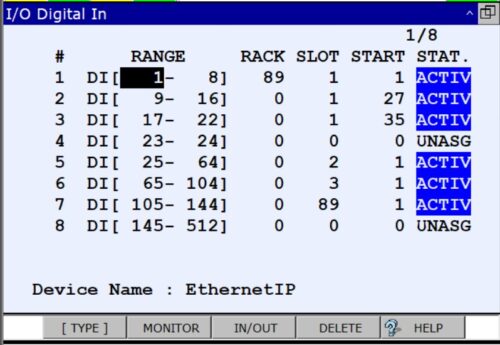
- Digital I/O and UOP I/O need mapped to rack 89 to point to ethernet I/O and cycle power. This may look different depending on your hardware configuration.
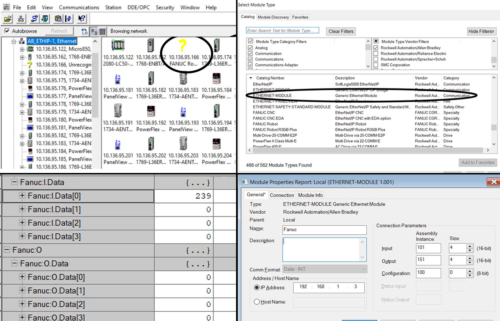
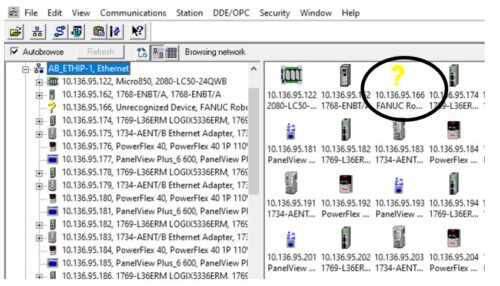
If everything is setup properly, the robot should appear in RSLinx Classic as an unrecognized device.
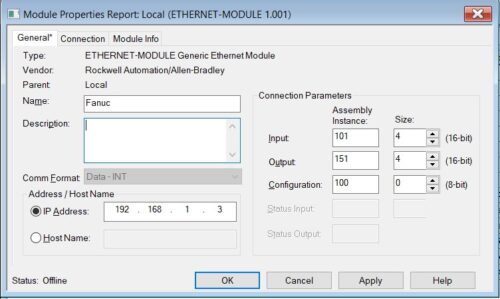
In the PLC’s IO configuration, I recommend using a generic ethernet module instead of Fanuc profiles under the vendor module files since these may not be available in all versions.
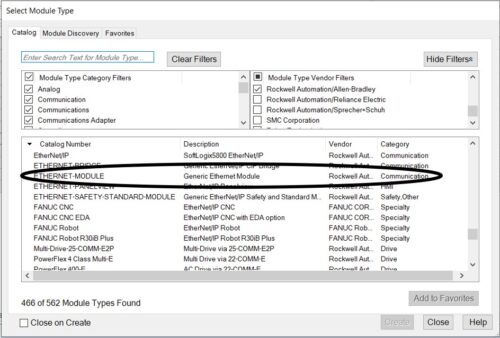 Setup the generic module with the following settings:
At this point, download the project to the controller and ensure communication is taking place. The DO/UO from the robot will be Inputs on the PLC and the PLC outputs will be DI/UI on the robot depending on the mapping and set up of your robot.
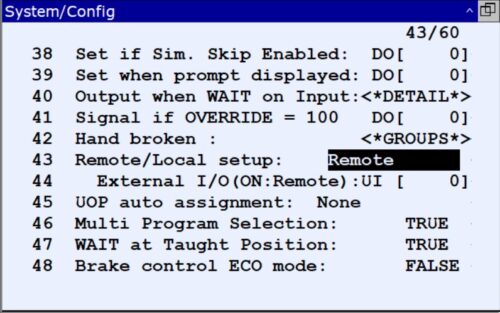
If you want the plc to start the robot, UI signals need to be enabled and mapped to the correct bits based on the Robot’s configuration. Also, Remote/Local setup needs to be changed to Remote to all remote start.
With these steps, communication can be established between the robot and the PLC.
Written by Dan Staifer Assistant Professor, Department Chair, and Freelance WriterHave a question? Join our community of pros to take part in the discussion! You'll also find all of our automation courses at TheAutomationSchool.com.
Sponsor and Advertise: Get your product or service in front of our 75K followers while also supporting independent automation journalism by sponsoring or advertising with us! Learn more in our Media Guide here, or contact us using this form.
- IFM – IOLink Master: How To Setup with Logix - November 11, 2020
- Setting Up Fanuc Ethernet I/O with Studio 5000 - October 27, 2020

Discover more from The Automation Blog
Subscribe to get the latest posts sent to your email.





Is there a list of the Inputs and Outputs and how they are mapped to the Fanuc?