I first began using ControlLogix in 2001, back when the software and firmware were both at version 7.
In those early days it wasn’t so easy to add a new remote I/O Chassis to an existing ControlLogix system as most of the systems at that time were networked together using ControlNet.
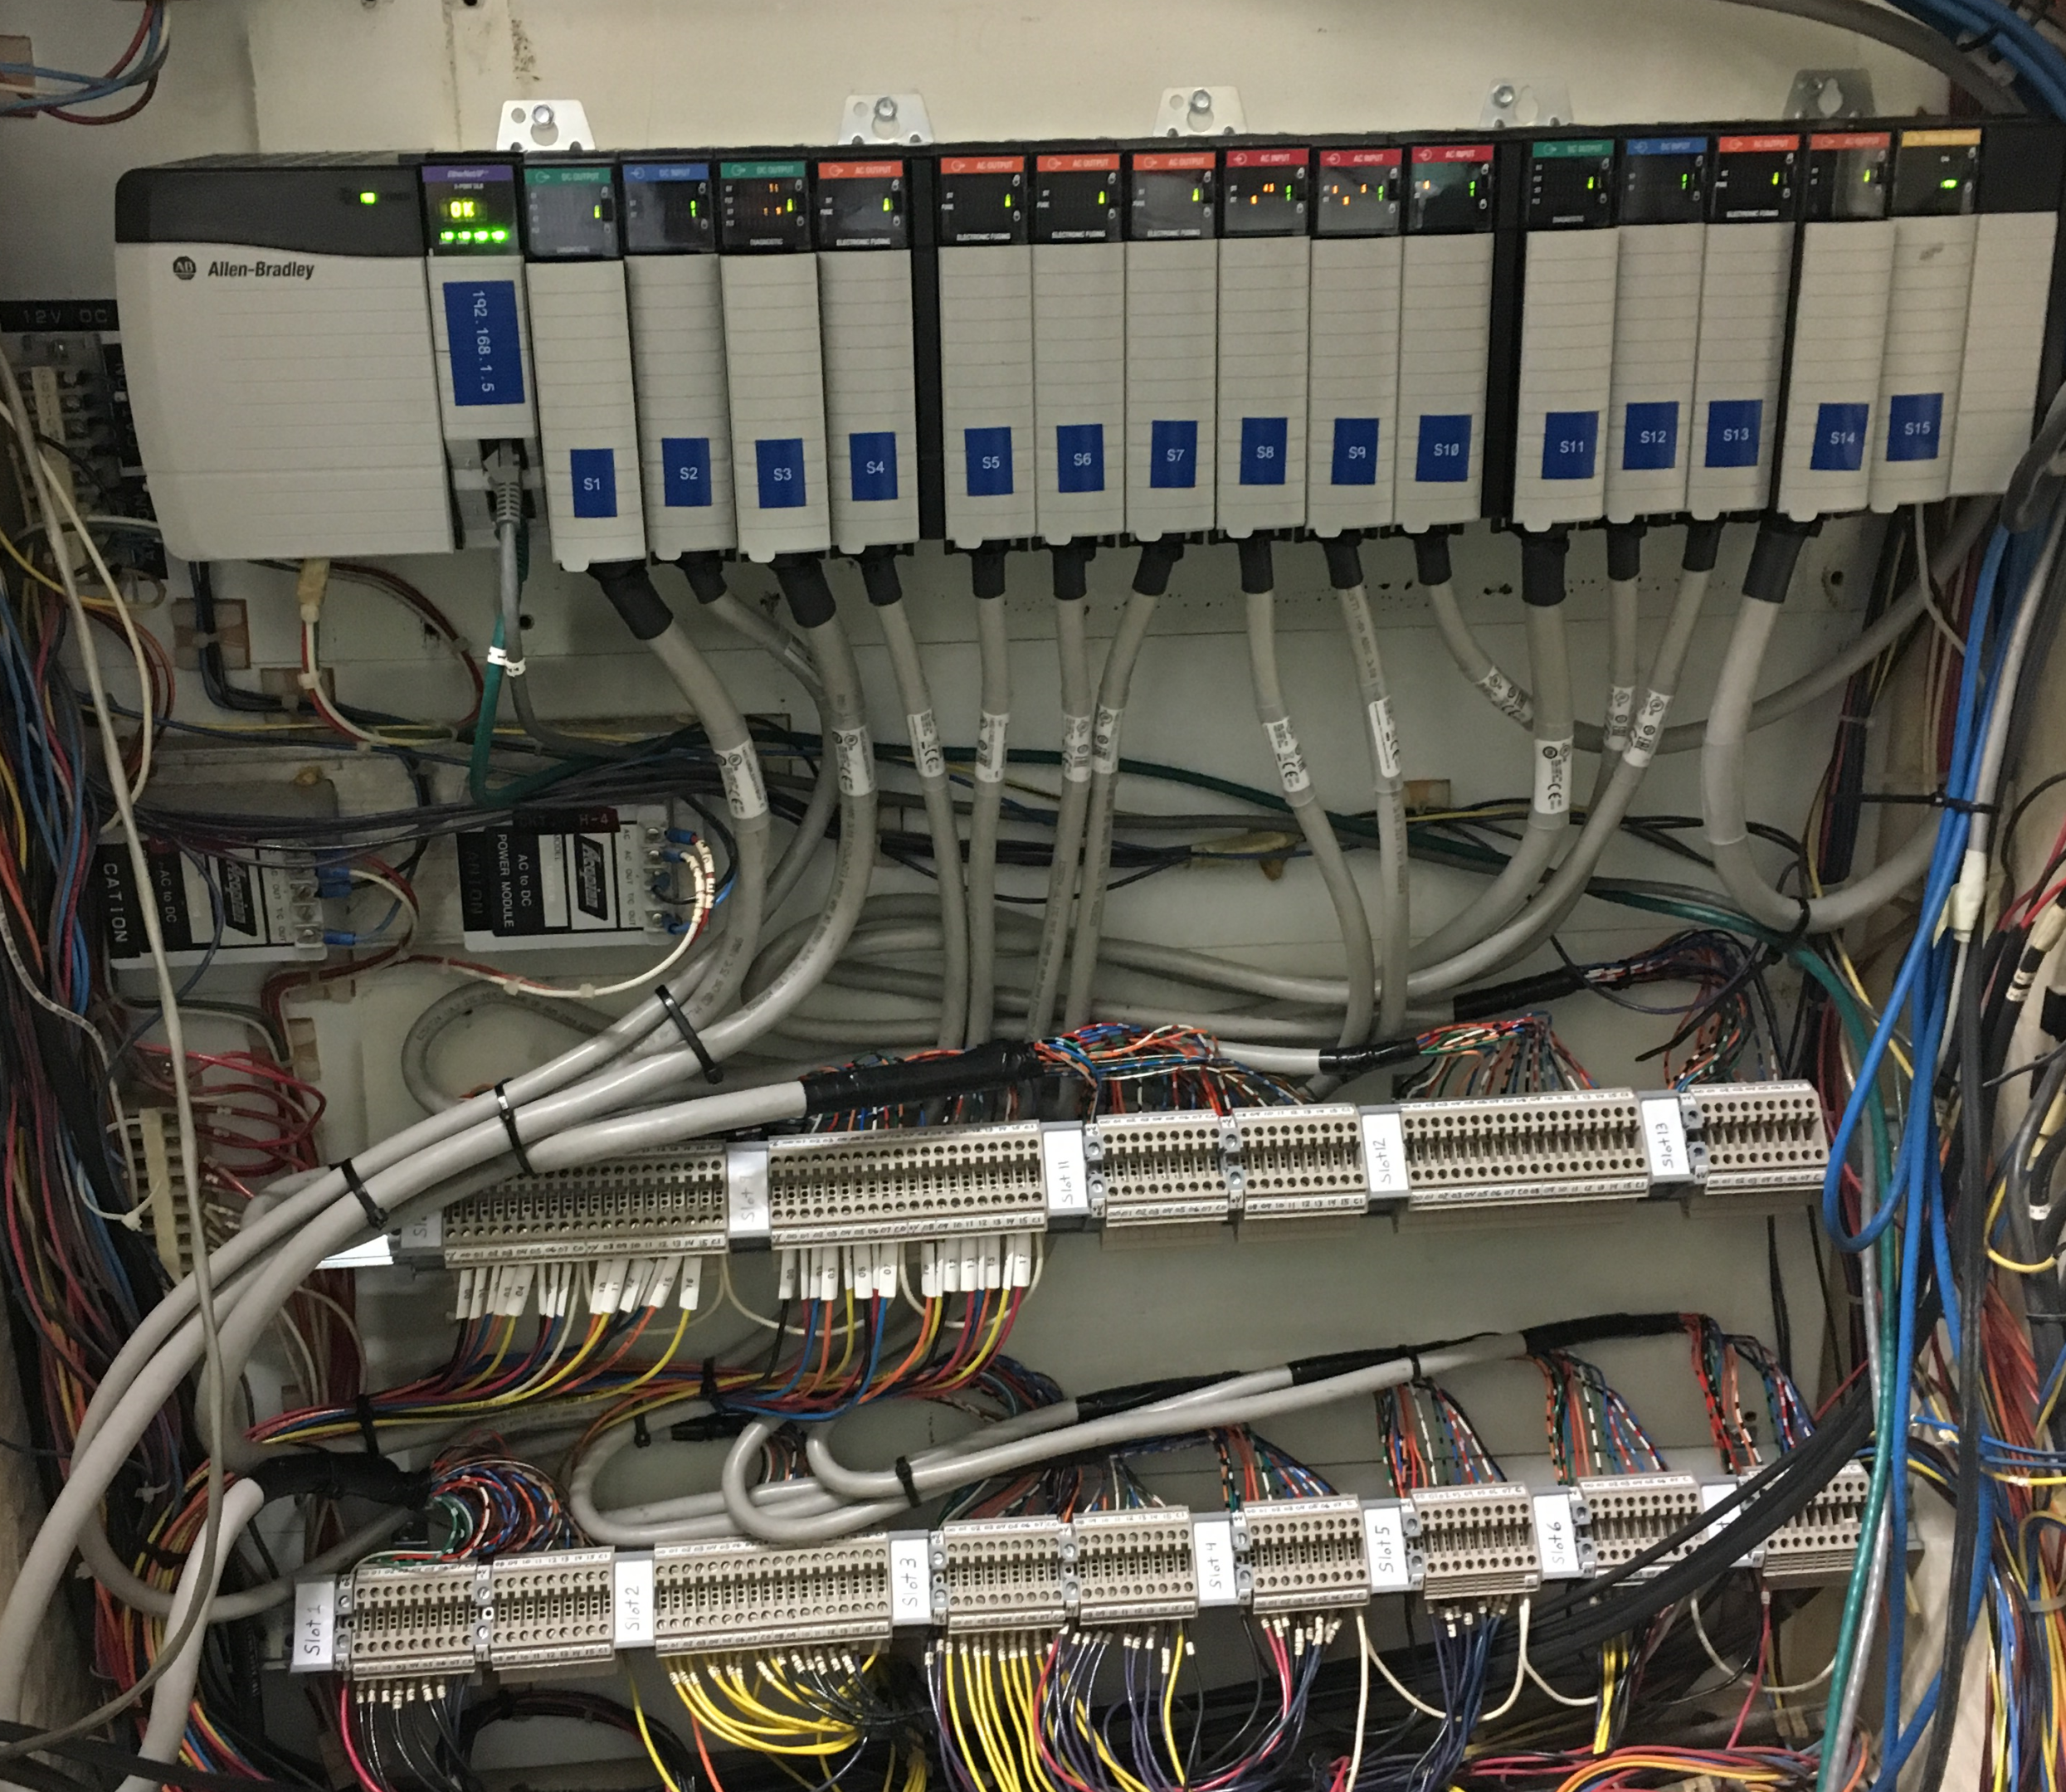
While ControlNet is a truly deterministic network, first the hurdle most users ran into when adding new I/O to an existing network was they needed to use a separate software package called “RSNetworx for ControlNet” to configure (aka “schedule”) the network.
And to schedule the network you not only had to put your ControlLogix into program mode, you also had to understand the nuances of the network’s NUT (network update time) and RPI (Requested Packet Interval) settings.
As the hardware and software of ControlLogix has evolved, so has the ease of configuration and capabilities of adding a new I/O Chassis without taking the Controller to “program mode.”
You can now even add a new 1756 remote I/O chassis at any time while the controller is in run mode, all without disturbing the currently running process.
That said, there’s always a risk when modifying a control system during operation, so take all risks into consideration before attempting any of these modifications to a control system that is on process.
In our facility we now use EtherNet/IP to connect to remote racks of I/O, and many of our systems implement Rockwell’s DLR (Device Level Ring) architecture.
DLR was developed by Rockwell to provide network redundancy to devices in an EtherNet/IP ring.
In today’s article I walk you through the basic setup instructions to configure a new DLR connection from a primary ControlLogix chassis to a remote chassis of 1756 I/O:

Setting Up DLR For A Remote I/O Chassis
Step 1) In Studio 5000, add a 1756-EN2TR in your controller’s chassis to be the primary device on a new DLR network:
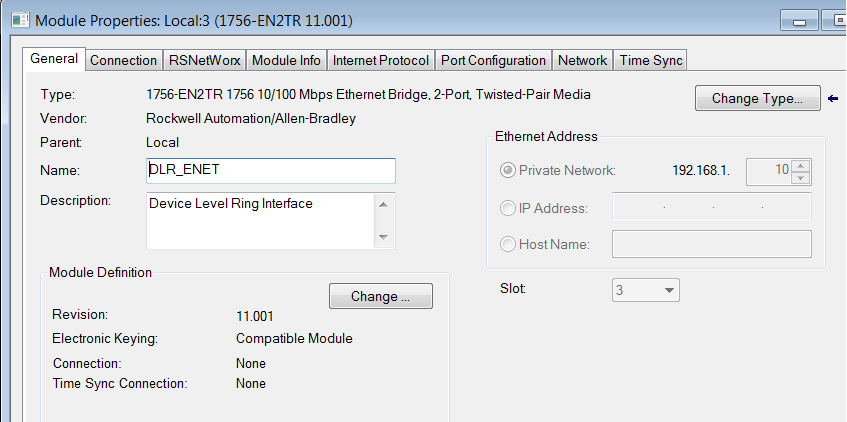
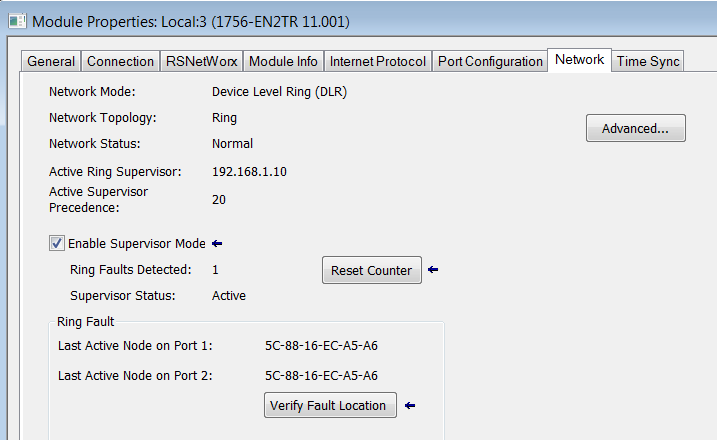
Step 2) On the network tab of the module properties window, enable “Supervisor Mode”:
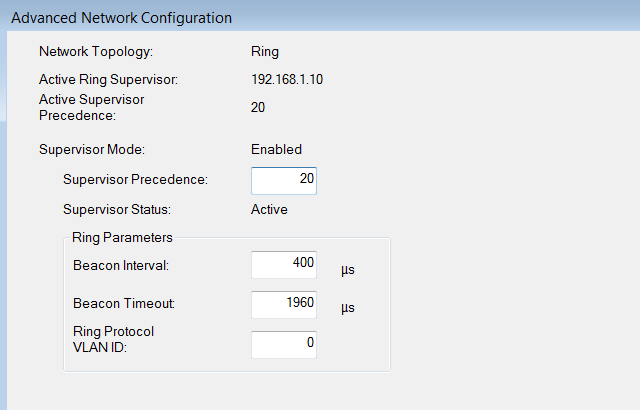
Step 3) Next, click on the “Advance Button” and set the “Supervisor Precedence” to 20 (the higher the number the higher the voting priority for determining the supervisor node)
Step 4) Next, add a second 1756-EN2TR on the Ethernet network under the primary EN2TR. This represents the network adapter for the remote I/O chassis, and preferably the slot of the module will be set to 0. This remote EN2TR will also need to have a unique IP Address on the same subnet as the primary EN2TR.
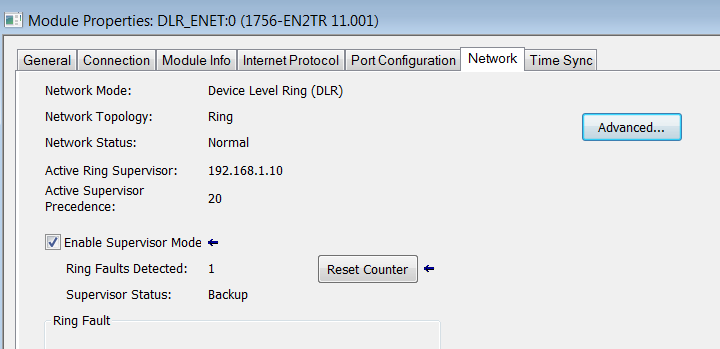
Step 5) On the network tab of the module properties window for the remote EN2TR, enable the “Supervisor Mode” as well:
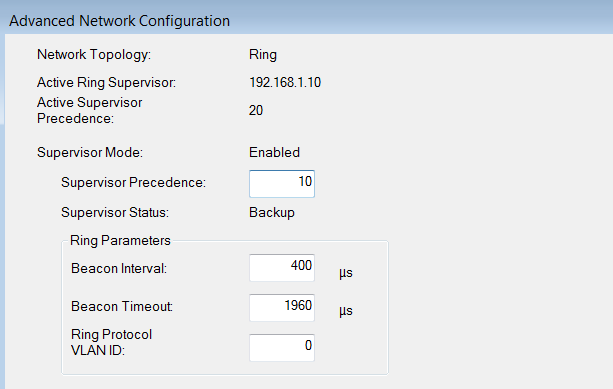
Step 6) Then click the “Advanced” button, and set the supervisor precedence to 10 (This node will be the backup supervisor)
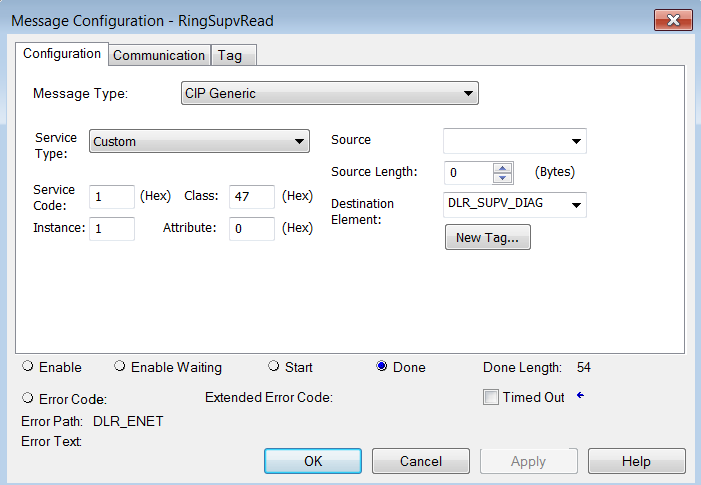
Step 7) Now create a message in ladder to read diagnostic information from the DLR Supervisor:

Step 8) In this example, the Message instruction is configured as follows:
The “Destination Element” Tag, “DLR_SUPV_DIAG,” is a SINT[54] data type:
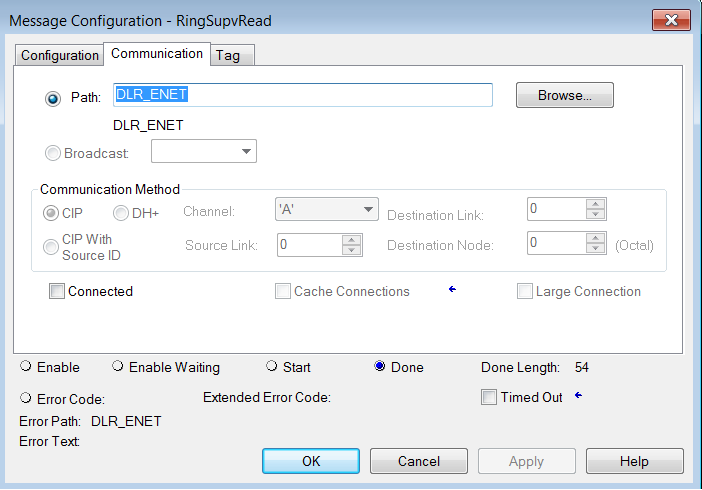
The “Communication” tab also has the message “Path” to the main EN2T which in this example is the “Ring Supervisor” (you can browse and select it from the Controller I/O tree):
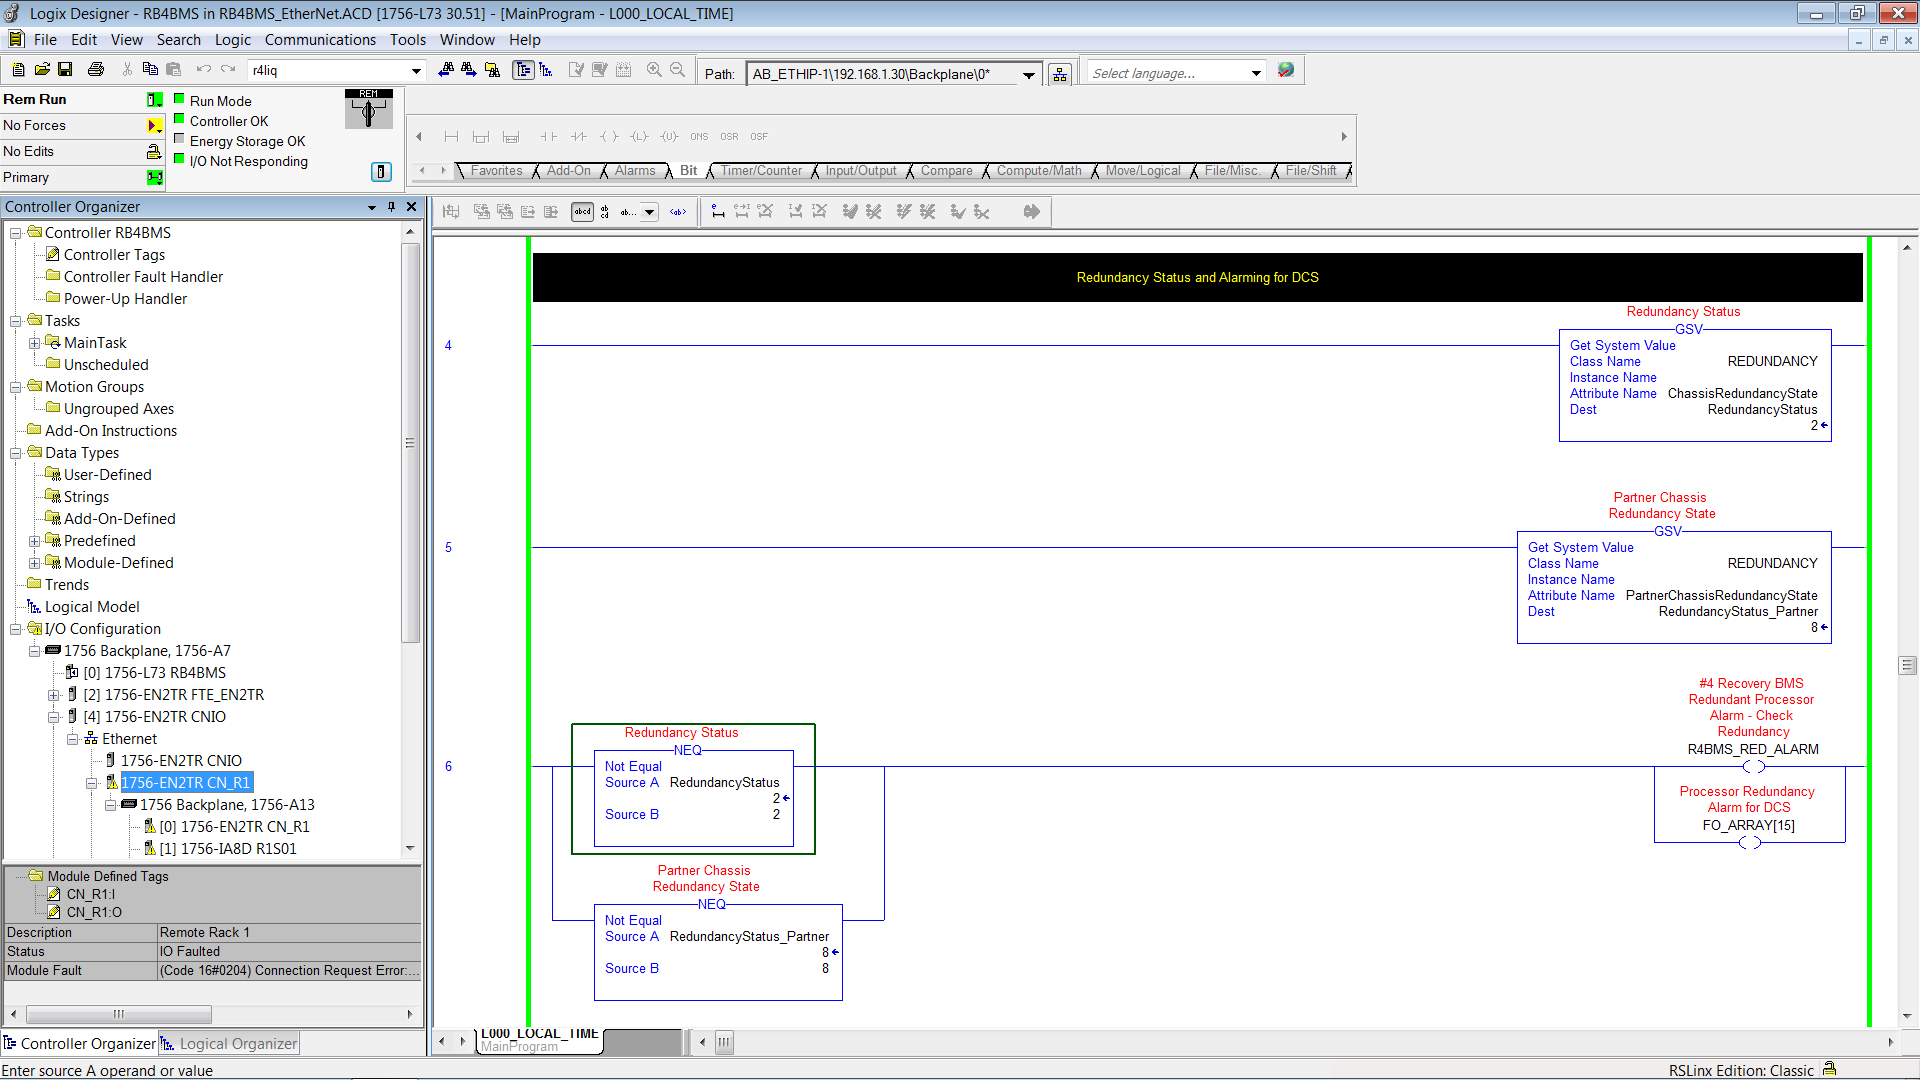
Step 9) To test your diagnostic alarm, unplugging a physical DLR cable between the local EN2TR and remote chassis EN2TR.
Conclusion
The ease of setting up a DLR remote I/O chassis and the capability to monitor diagnostics in the DLR network make this a confident scenario to have in your control system.
By monitoring the DLR for faults and other information, you can know if the network needs attention before a fault occurs that takes the remote I/O to the point of complete failure.
Written by Brandon Cooper
Senior Controls Engineer and Freelance Writer
Have a question? Join our community of pros to take part in the discussion! You'll also find all of our automation courses at TheAutomationSchool.com.
Sponsor and Advertise: Get your product or service in front of our 75K followers while also supporting independent automation journalism by sponsoring or advertising with us! Learn more in our Media Guide here, or contact us using this form.
- Things I’ve Learned Travelling for Work (2) - July 17, 2025
- Things I’ve Learned Travelling for Work (1) - July 10, 2025
- Emulating an Allen-Bradley E3 or E3 Plus - June 30, 2025

Discover more from The Automation Blog
Subscribe to get the latest posts sent to your email.


