
The MicroLogix 1400’s LCD, unlike the MicroLogix 1100’s, can be used to set the unit’s IP Address.
In today’s article we’ll show you the steps to do just that.
Setting the IP Address of a MicroLogix 1400 using the built-in LCD:
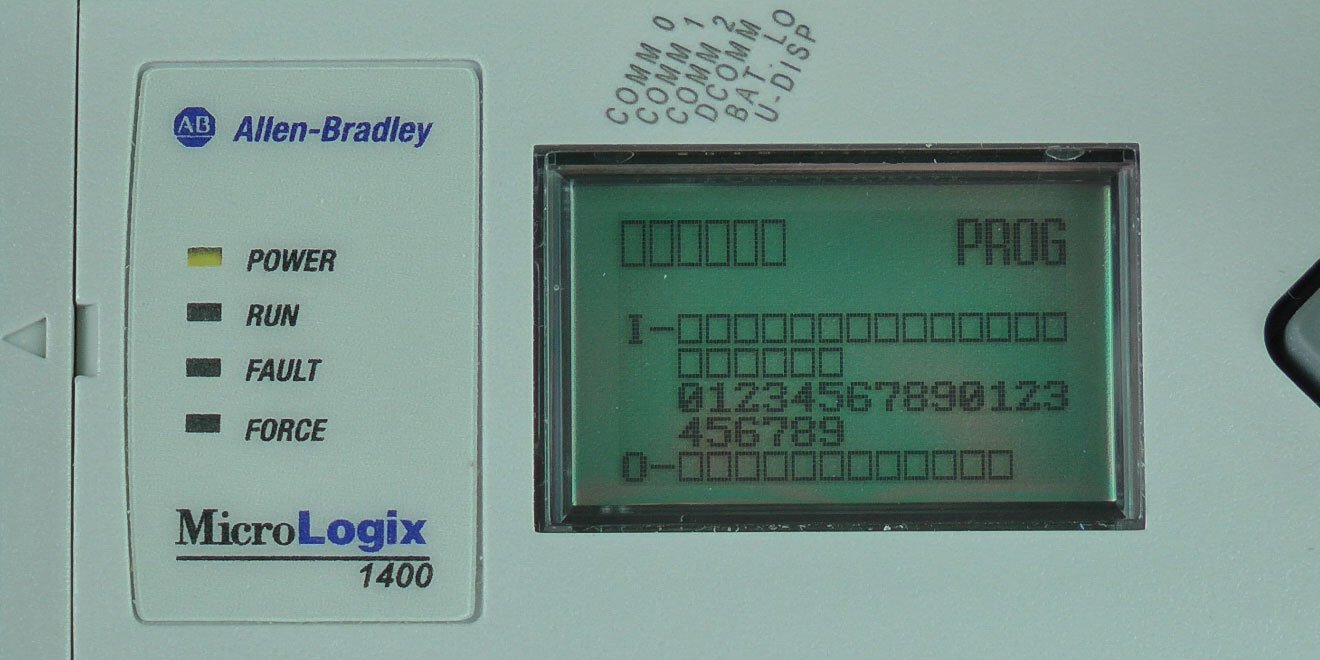
1) When the MicroLogix 1400 is powered on, it displays the I/O Status screen as shown below:
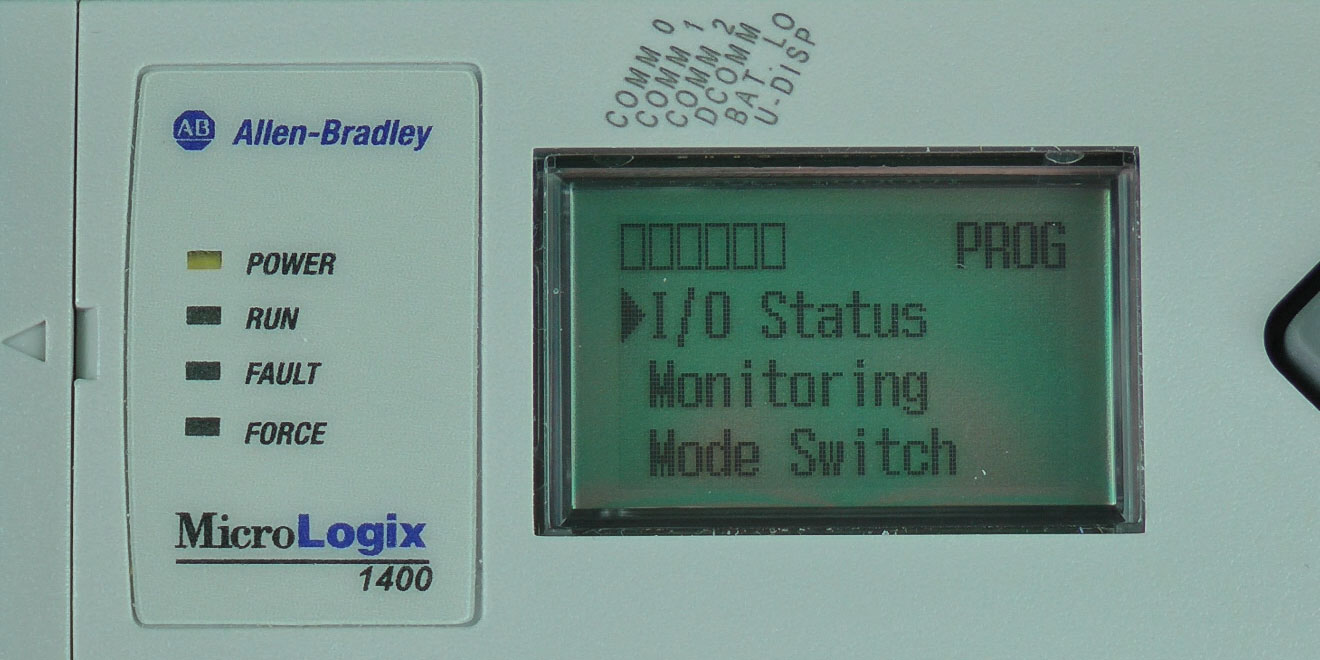
 2) To set the Micro’s IP and MAC address using the LCD, we need to access it’s menu. To do this, press the ESC button and you should see the menu below:
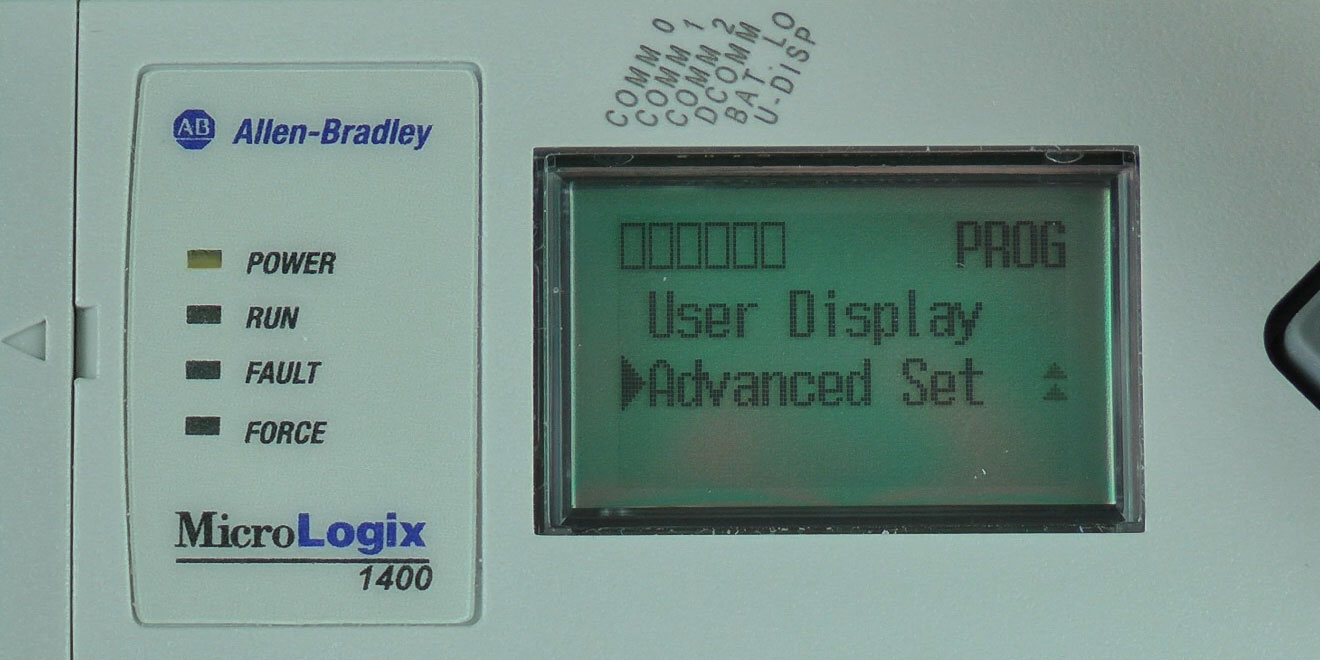
 3) Next, press the down arrow button four times to select “Advanced Set,” then press the OK button:
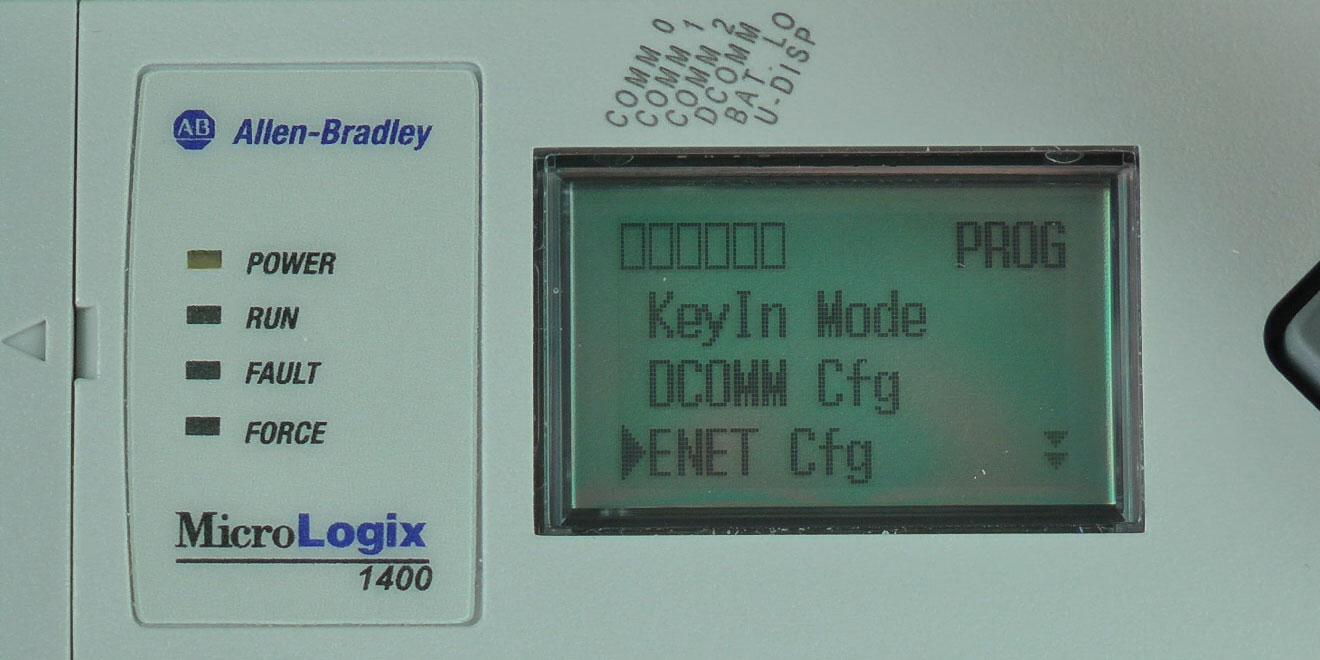
4) Here, press the down arrow button twice to select “ENET CFG,” then press the OK button:
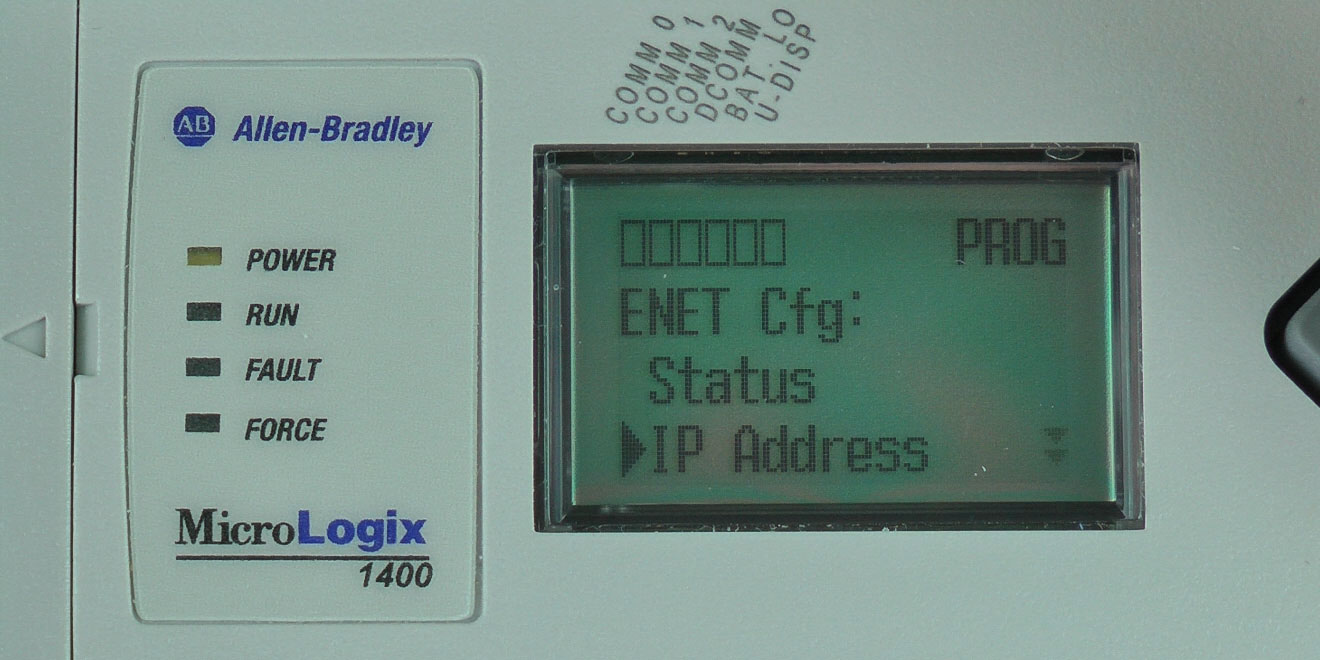
 5) Now press the down arrow button once to select IP Address and press the OK button.
 6) To enter the Ethernet Setup you must provide the password t. However if the unit is new, or no password has been set, you can press the OK button to bypass this screen.
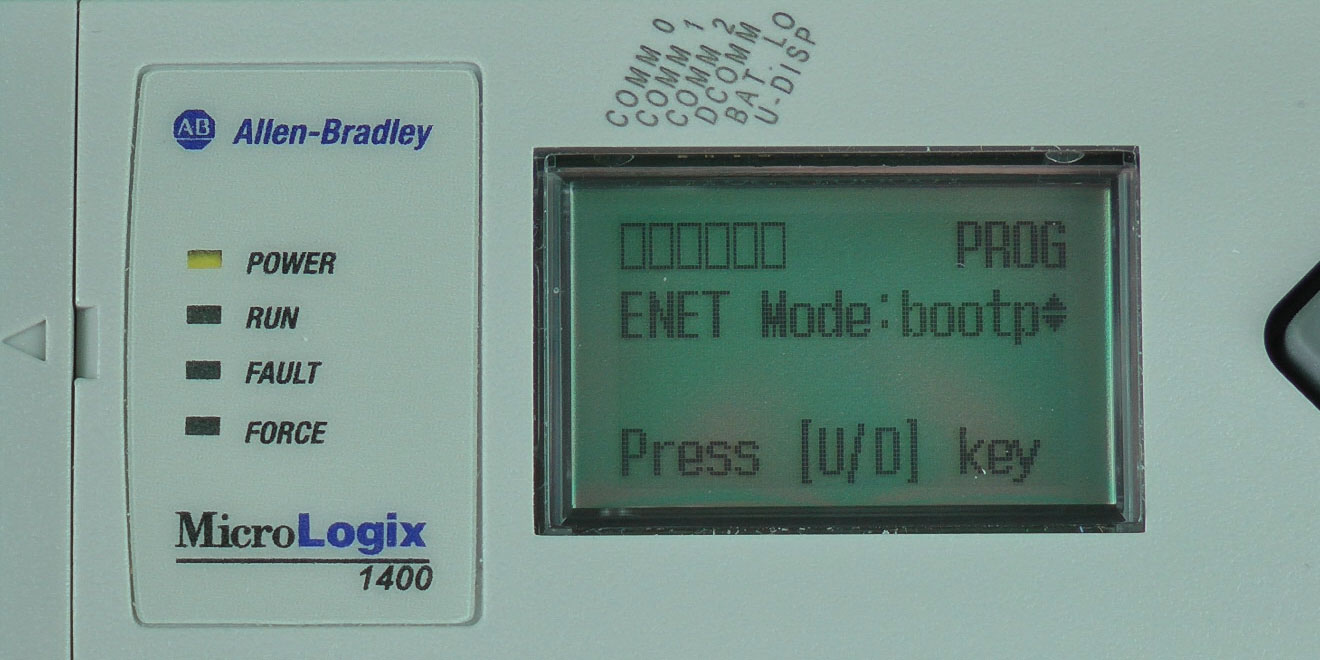
 7) New MicroLogix 1400’s come setup to automatically obtain an IP Address using BOOT-P, as shown below:
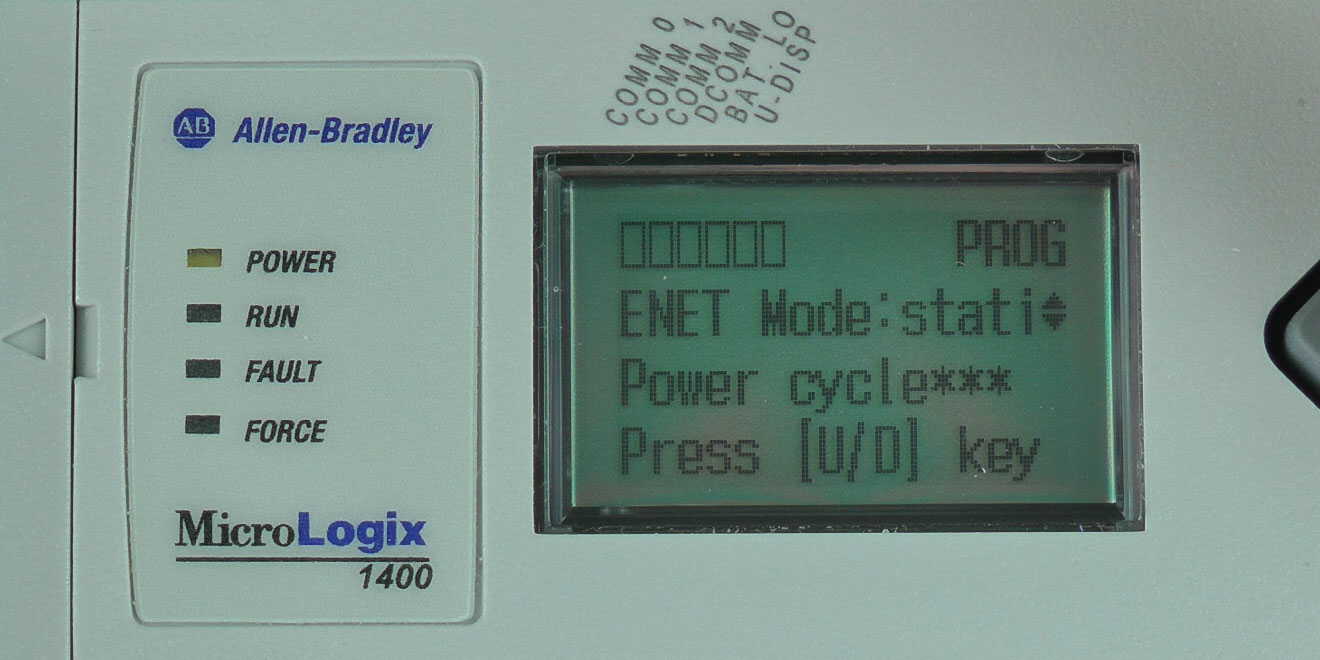
 8) To manually assign an IP Address, press the Down Arrow button twice to change the ENET Mode option to “static,” and then press the OK button.
NOTE: The display will not show a message stating that for this change to take effect the Micro will need to be power cycled. We will do this after entering our IP Address.
 9) You can now use the Arrow buttons to change the IP Address to your desired value. When done, press the OK button.
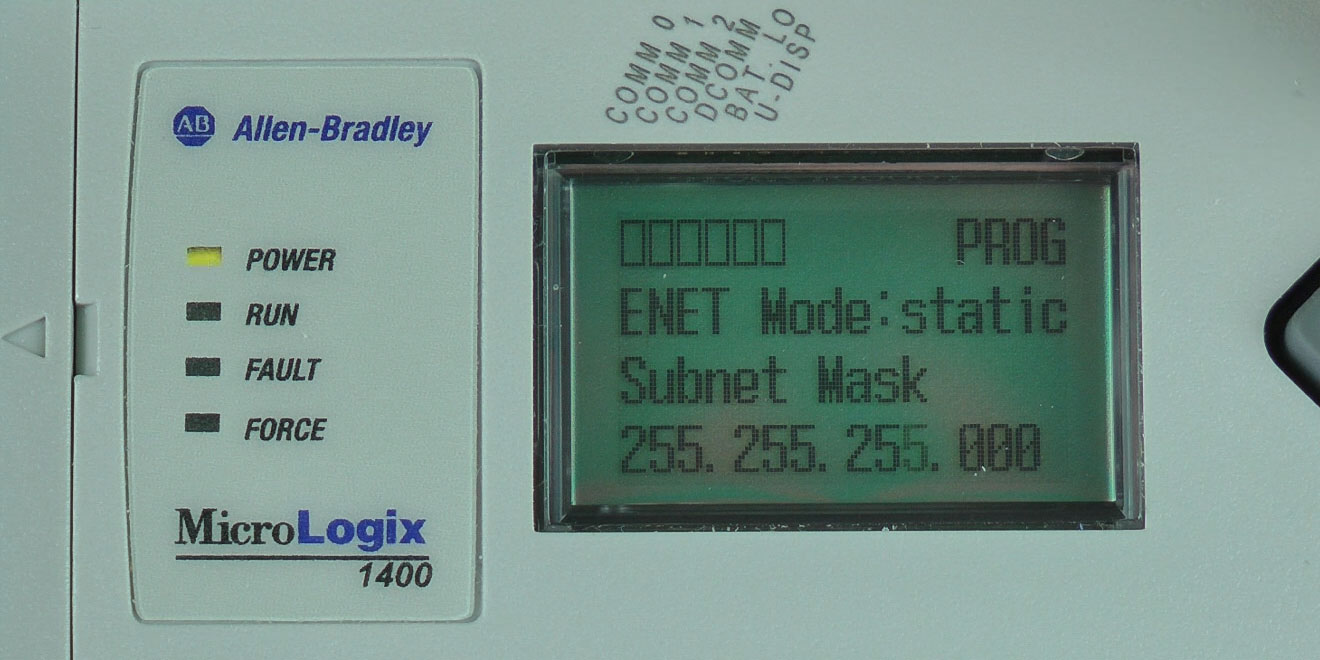
 10) Now use the Arrow buttons to change the Subnet Mask Address to your desired value. When done, press the OK button.
 11) If you wish to enter a Gateway address, use the Arrow buttons to change the address to your desired value. When done, press the OK button.
 12) If you wish to enter a Primary DNS address, use the Arrow buttons to change the address to your desired value. When done, press the OK button.
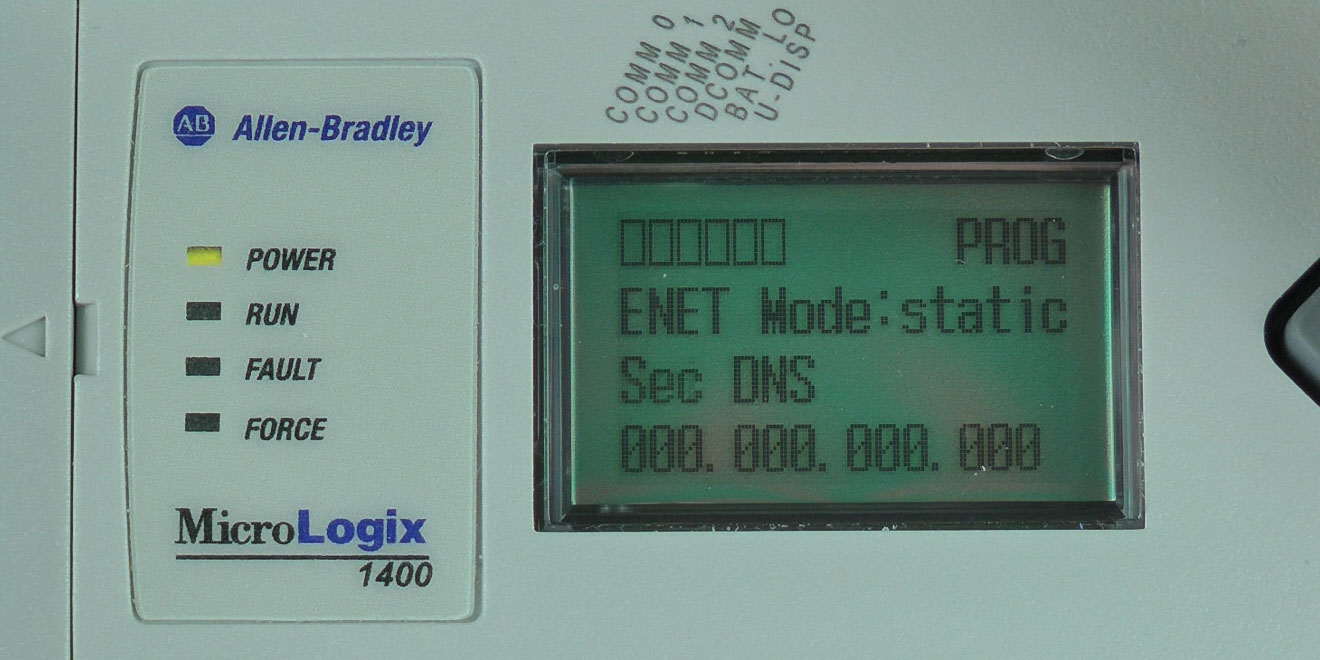
 13) If you wish to enter a Secondary DNS address, use the Arrow buttons to change the address to your desired value. When done, press the OK button.
 14) Now you’re finished setting up the MicroLogix 1400’s IP Address. As noted above, for the changes to take place you will need to cycle power to your Micro.
15) If you prefer to return to the I/O Status display, press the ESC button until you see the main menu, and then select “I/O Status” and press the OK button:
I hope the above procedure on how to set a MicroLogix 1400’s IP address using the LCD was helpful.
If you have any comments, questions, suggestions, or corrections, please feel free to leave them with us by filling out the “post a comment or question” link below.
Until next time, Peace ✌️
If you enjoyed this content, please give it a Like, and consider Sharing a link to it as that is the best way for us to grow our audience, which in turn allows us to produce more content 🙂
Shawn M Tierney
Technology Enthusiast & Content Creator
Support our work and gain access to hundreds members only articles and videos by becoming a member at The Automation Blog or on YouTube. You’ll also find all of my affordable PLC, HMI, and SCADA courses at TheAutomationSchool.com.
- FactoryTalk Design Workbench First Look, CCW Comparison - December 19, 2025
- Drew Allen of Grace Technologies on Automation, Safety, and More (P256) - December 17, 2025
- Robotics in Warehouse Automation with Erik Nieves of Plus One Robotics (P255) - December 10, 2025

Discover more from The Automation Blog
Subscribe to get the latest posts sent to your email.

 (M5E41)")
")
Buenas tardes quisiera saber si hay algun forma de recuperar el master password
saludos
Good afternoon Isaac,
I don’t speak Spanish, sorry,
Sincerely,
Shawn Tierney
[sc name="stsigcom"]
Good afternoon. I wonder if there is any way to recover the master password greetings.
I have a feeling I know which Master Password he means . . .
Hey Rob,
I wondered if he tried just pressing enter as the default password is blank?
I’m not seeing any default passwords in the manual, and if I knew of a backdoor I wouldn’t post it as I know people who have been threatened with lawsuits if they supplied one 🙁
Sincerely,
Shawn Tierney
I am wondering if anyone else has had the problem of the ML1400 losing its IP address. It’s been set as Static, on two identical machines we have, and both have come up from a power cycle with a 0.0.0.0 address.
Good afternoon Rob,
Sounds familiar – I recommend checking to see if that was fixed in a firmware update…
Please let us know how you make out,
Shawn Tierney
[sc name="stsigcom"]
The latest revison at RS is 15.07. Our controller is already at FW 15; I did not check for the minor rev, as I thought that something as drastic as losing its IP address would have been taken care of by rev. 2.0. The machines have been in production for a week, and we will be checking tomorrow whether they retained their IPs for this long.