When you’re working with Mitsubishi PLCs and GX Works3, from time to time you may find it necessary to add profiles for components (like networked devices) so they can be added into the communications setup of your project.
In today’s article I’ll walk you through how to add a couple of new devices (a remote I/O communication module and variable frequency drive) as well as how to add them to your project.
The basic steps to register your device profile in the GW Works3 software are as follows:
Note: You’ll need to close any open projects, or re-open GX Works without selecting a project to start or edit.
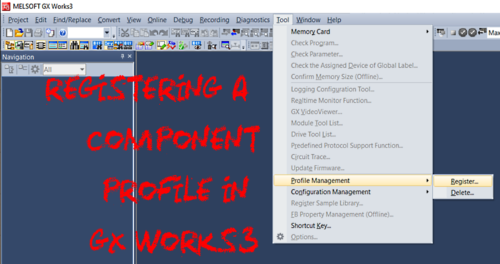
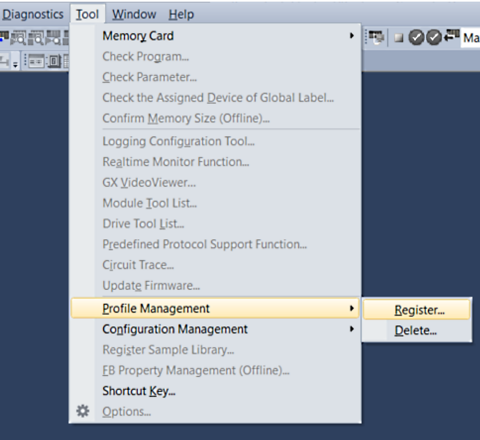
1) In the pull-down menu, select “Tool” -> “Profile Management” -> “Register…”.
2) Select a file in the “Register Profile” dialog screen and click the “Register” button. Do this by navigating to the location you saved the CSPP file or other compressed file used for the profile.
Something to be careful about: Profiles are supplied as compressed files (such as *.zip, *.ipar, and *.cspp,) and you’ll go through the registration of the profile without decompressing. If you unzip or decompress it beforehand it will not register.
A profile registered in GX Works3 can also be deleted, but I doubt you will need to do that. Here is how to do it just in case the need arises.
1) Just like adding a profile, start by selecting “Tool”, then “Profile Management” from the pull-downs.
2) From there, click “Delete” instead of “Register”.
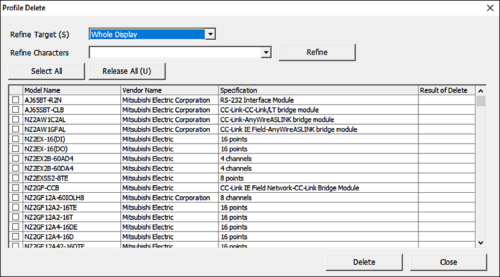
3) Select the checkbox of a model name to be deleted in the “Profile Delete” screen, then click the “Delete” button.
Once the profile has been registered, you can now access it from the configuration window.
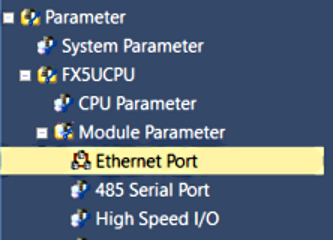
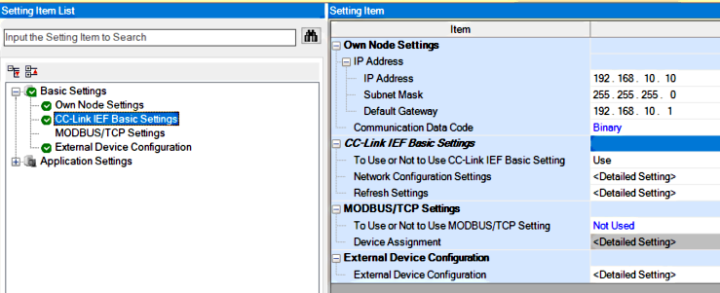
You will need to open the Ethernet Port Settings by double-clicking in the Navigation window under the parameters (Parameters -> FX5CPU -> Module Parameter -> Ethernet Port).
Next, enable the CC-Link IEF Basic Setting by changing the default “Not to use” to “Use”.
You can do that by double-clicking the “Do Not Use” or using the pull-down option.
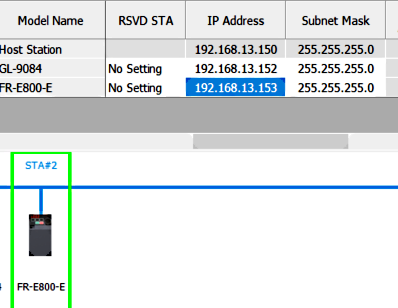
When enabled, you can then drag and drop the device under the “Network Configuration Settings” by either double-clicking “<Detailed Settings>” or clicking the button to the far right on that line.
For this example, we are adding an E800 IE-Field variable frequency drive beside an existing IE-Field I/O comms module.
Mitsubishi did a nice job here by allowing you to just drag and drop the device from the list on the right to the location you want on the topology line display on the left.
Once you have it dropped in place, you will need to scroll over in the view of the connection list to set the desired IP address. At the same time, it would be a good idea to be sure your Host Station (listed at the top) is set to what you expect.
When you are done dropping devices in place and setting IP addresses, you will need to save it. Do this by pressing the “Close with Reflecting the Setting” button at the top of the configuration window.
If you need to, you can also close without saving. Maybe if you made a mistake, this might be the easiest route to reset to what it was before you started.
Next, you will need to set the I/O under the “Refresh Settings”. This is where you will set up the mapping for the discrete I/O between the PLC and the device.
This is where you will need to keep in mind the numbering systems used for I/O and data types to keep things a little simpler. For instance, in the FX5 CPU, the Y output addresses are set in octal, not hex.
But the mapping for the IE-Field is set up and easier to map in hex. For the FX5, I would choose to use the B data type so the address mapping aligns easier.
To access these settings, do the same as the network configuration by double-clicking “<Detailed Settings>” or clicking the button to the far right on that line. You will then see the I/O mapping details.
Change the Target to “Specify Device”. Once that is selected, select the data type you would like to use for the Device Name. In the FX5 again, it would simplify things to select the B device type as shown. When complete, press apply.
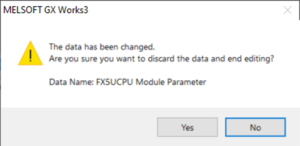
Finally, once back at the Setting Item List, be sure to click the Apply button once again if needed. GX Works3 will let you know if this is needed and you try to close it without pressing. Another helpful notification from Mitsubishi.
Little reminders like that are nice. Save the program, download the parameters, and for a good measure, you should then reset the PLC or cycle power.
You will then be ready to test the communications and the discrete I/O setup between the IE-Field device(s) and the processor. Good luck!
Written by Paul Hunt
Senior Automation Engineer and Freelance Writer
Have a question? Join our community of pros to take part in the discussion! You'll also find all of our automation courses at TheAutomationSchool.com.
Sponsor and Advertise: Get your product or service in front of our 75K followers while also supporting independent automation journalism by sponsoring or advertising with us! Learn more in our Media Guide here, or contact us using this form.
- Mitsubishi PLCs: Brief History and Hardware Overview - August 2, 2022
- Mitsubishi PLCs: FX5 vs iQ-R - February 10, 2022
- How To Register and Use a Device Profile in GX Works3 - November 9, 2021

Discover more from The Automation Blog
Subscribe to get the latest posts sent to your email.


