In today’s article I review how to add a momentary “Start-up Splash Screen” to a FactoryTalk View Studio Machine Edition project without using PLC logic as we did in yesterday’s article.
One of our readers at TheAutomationForums recently asked how he could add a “start-up splash screen” to his PanelView Plus that would display his company’s logo for a few seconds, before switching to the project’s main menu.
In today’s article I’ll show how to do this without using PLC code like we did yesterday. Instead we’ll use FactoryTalk View Macros.
Steps to be taken:
The steps we need to take to complete this object are as follows:
- We need to detect when the PanelView launches our project, and we can do this by setting our start-up splash screen as the default display, and giving that display a unique display number, which in our example is 99.
- After the set period of time has elapsed, we need to command the HMI to display our main screen, which in this example will have a display number of 1 (no other displays can have a display number of 1 or 99)
- Once the main screen is displayed, we need to release screen control to the operators so they navigate the HMI.
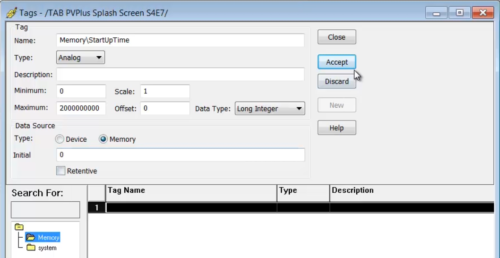
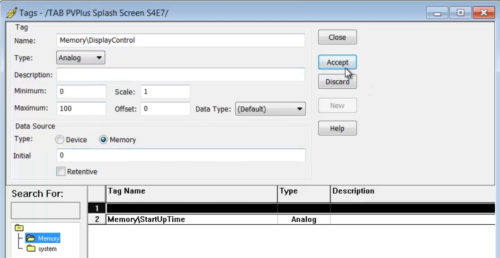
Step 1) Our first step is to open the “HMI Tag Editor” and create two HMI memory tags, both of which I’ll put into a new “Memory” HMI tag folder.
The first tag is named “StartUpTime” with the settings shown below:
The second tag is named “DisplayControl” with the settings shown below:
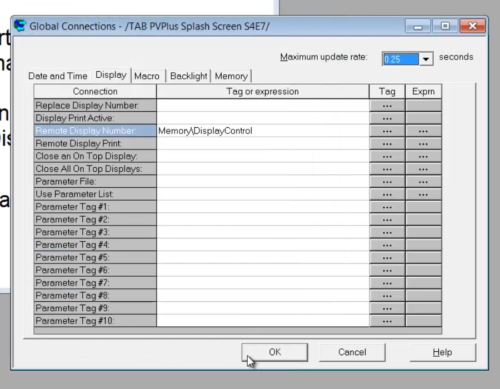
Step 2) Next, we close the “HMI Tag Editor” and open “Global Connections.” Then we set the “Remote Display Number” to our new “Display Control” tag, and click on “OK” to save our changes:
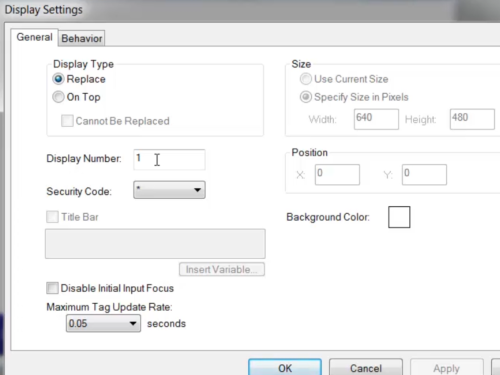
Step 3) Next, we open each of our project’s Graphic Displays and insure they each have a unique “Display Number.” This setting is found in the “General” tab of “Display Settings” which is found in the “Edit” and “Right Click” menus when the “Graphic Display” is selected:
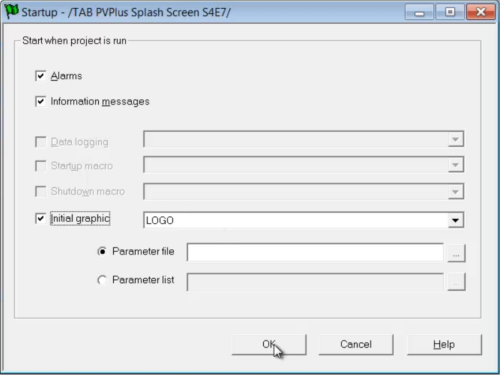
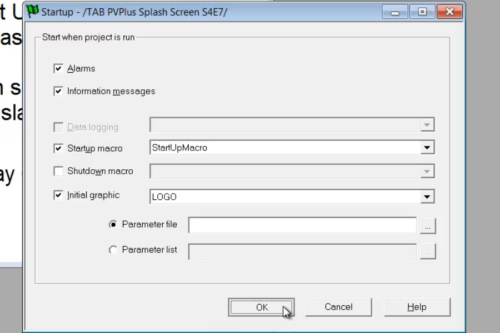
Step 4) Now that we’ve updated and saved all our graphic displays, we next open “Startup” and insure our start-up splash screen display is set as the initial graphic. In this example that screen is named “LOGO.” Once done we click on “OK” to save our settings:
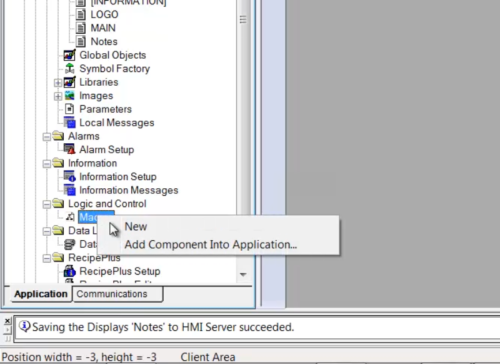
Step 5) At this point we need to create our first new Macro:
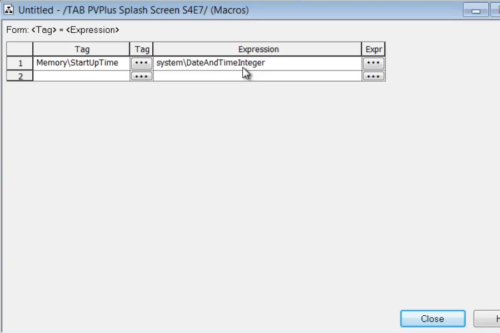
Step 6) This macro will have a Tag of “Memory\StartupTime” and an expression of “system\DateAndTimeInteger,” as shown below:
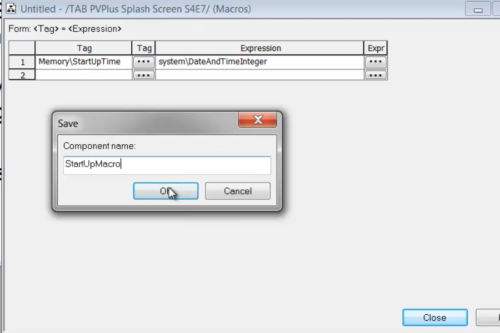
Step 7) The we save this new Macro as “StartUpMacro::
NOTE: You can purchase “ad free” copies of our articles, videos, and sample code for $1 each here.
Step 8) Now we return to “Startup” and select our new “StartUpMacro” as our “Startup Macro,” as shown below:
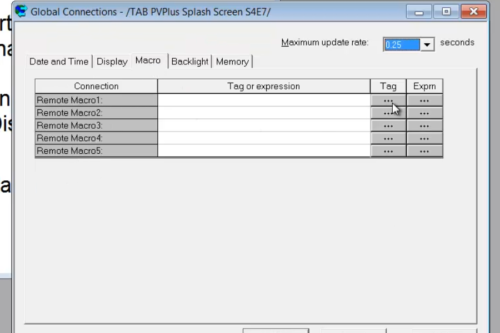
Step 9) From there we head over to Global Connections again, and this time we go to the “Macro” tab:
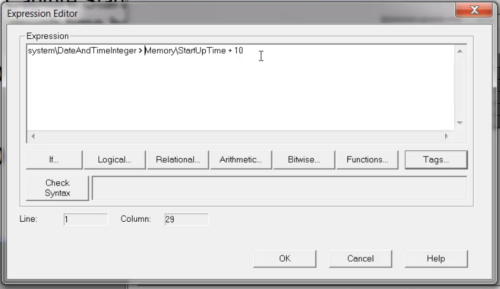
Step 10) Under “Remote Macro 1” we add the following expression as our trigger and click “OK” twice to save it:
-
system\DateAndTimeInteger > Memory\StartUpTime + 10
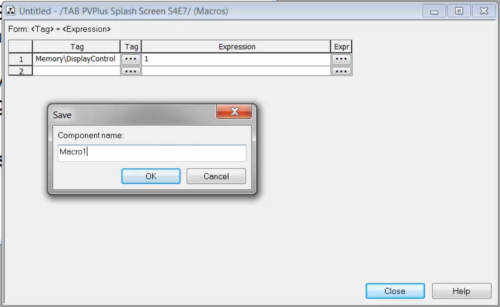
Step 11) We now need to create two more Macros. The first has a tag of “Memory\DisplayControl” and a value of 1, and must be saved with a name of “Macro1”:
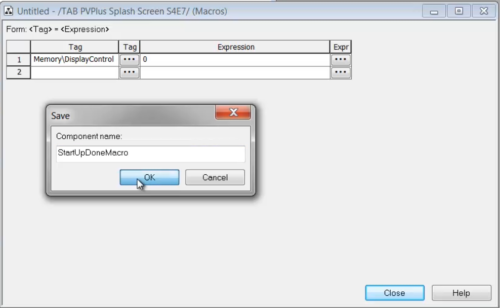
Step 12) The next has a tag of “Memory\DisplayControl” and a value of 0, and is saved as “StartUpDoneMacro”
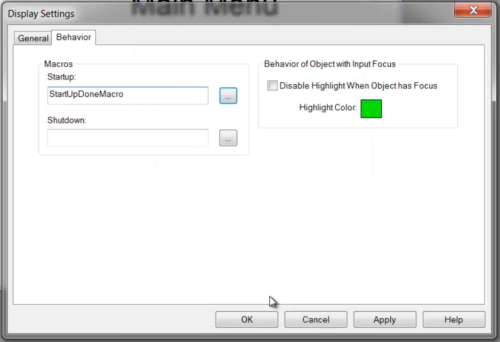
Step 13) The last step is to open our “main” screen (with a display number of 1) and set the “Display Settings – Behavior” to use a Startup Macro of our new “StartUpDoneMacro,” as shown below:
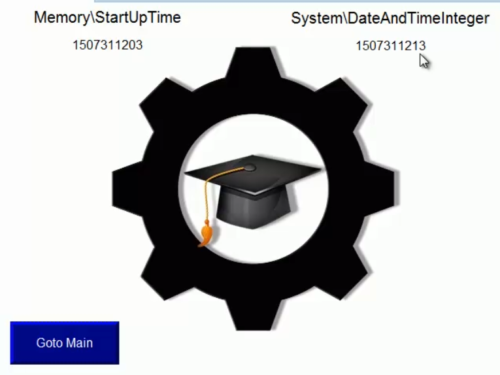
Step 14) Now when we run our project, our “LOGO” start-up splash screen will be displayed for ten seconds:
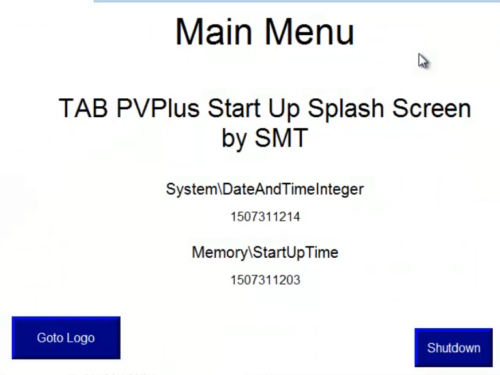
Step 15) After which our “main” screen will be displayed, and the “Remote Display Number” will be reset to 0 to allow operator navigation control:
If you’d like to watch a video demonstration of the above, check out Episode 7 of The Automation Minute Season 4 below:
Have a question or comment? Please feel free to ask me here.
Until next time, Peace ✌️
If you enjoyed this content, please give it a Like, and consider Sharing a link to it as that is the best way for us to grow our audience, which in turn allows us to produce more content 🙂
Shawn M Tierney
Technology Enthusiast & Content Creator
Support our work and gain access to hundreds members only articles and videos by becoming a member at The Automation Blog or on YouTube. You’ll also find all of my affordable PLC, HMI, and SCADA courses at TheAutomationSchool.com.
- FactoryTalk Design Workbench First Look, CCW Comparison - December 19, 2025
- Drew Allen of Grace Technologies on Automation, Safety, and More (P256) - December 17, 2025
- Robotics in Warehouse Automation with Erik Nieves of Plus One Robotics (P255) - December 10, 2025

Discover more from The Automation Blog
Subscribe to get the latest posts sent to your email.


