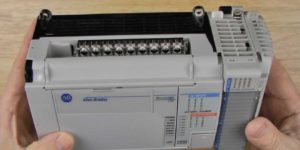
 The MicroLogix 1500’s base I/O can be expanded using the popular line of 1769 expansion I/O, also known as Compact I/O. In this article we’ll describe the details of how this is accomplished.
The right side of the MicroLogix 1500 I/O base is equipped with a 1769 expansion I/O port. Out of the box this port is covered with a protective ESD sticker. So, the first step in adding 1769 I/O to a MicroLogix 1500 base is to power down the unit and remove this sticker.
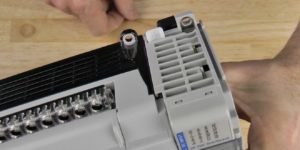
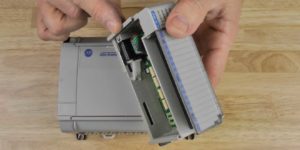 Next, with power still off, slide your first 1769 expansion I/O modules onto the MicroLogix 1500 base using the tongue-and-grove system. Once the module has been completely slid on and lined up with the base, slide the bus connector lever arm (found on the top of the module) to the left until you feel it “click” into place.
NOTE: Most 1769 module issues I’ve seen in the field are a result of the bus connector lever arm not being completely engaged. Always physically inspect the bus connector arm to insure you have indeed fully engaged it.
Now add any additional 1769 expansion modules in the same way as the first. Do this until you have installed all your modules, or until you’ve reached the 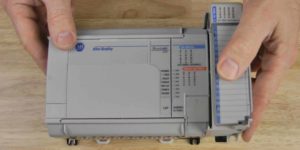 power supply limit of your MicroLogix 1500 base. At this point you must either install an end cap (1769-ECR,) or an expansion I/O cable which leads to a second bank of 1769 I/O with it’s own power supply and end cap.
NOTE: Every 1769 Compact I/O system must be terminated with either a right (1769-ECR) or left (1769-ECL) end cap. Without an end cap installed, your processor will fault on transitioning from program to run mode.
 The total number of expansion I/O modules a MicroLogix 1500 can support is 16. Of those, up to 8 can be installed directly to the base. However, the number of modules that can be connected to the base may actually be less than 8, depending on the power consumption of the chosen modules.
To aid in the process of calculating exactly how many modules can be added, Rockwell has developed an easy to use spreadsheet to help qualify MicroLogix 1500 systems. This spreadsheet can be downloaded from Rockwell’s website using the below link:
It is also important to note that some 1769 modules must be located within a certain number of slots from the base or expansion power supply. So keep in 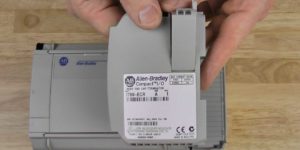 mind that you must review each modules power supply distance rating when designing your system to insure you place all modules within their rated distance.
Finally, for those systems larger systems where just adding 1769 I/O to the MicroLogix 1500 base won’t suffice, as mentioned above additional modules can be added in a second bank of 1769 I/O. This additional bank is connected via a cable with two end caps preinstalled, and the second bank it attaches to must contain it’s own 1769 power supply as well as a bus terminating end cap.
 One version of the expansion I/O cable has two right end caps attached, and is typically used in installations where the second bank of I/O will be mounted directly under (or over) the MicroLogix 1500 base. In these installations, the left side of the second bank must have a left end cap (1769-ECL) to terminate the 1769 bus.
A second version of the expansion I/O cable has one right end cap and one left end cap attached. This allows for side by side installations of the base and second bank of I/O. In these installations, the second bank of I/O must be terminated with a right end cap (1769-ECR.)
Well, that’s it for today’s article reviewing the expansion I/O used with the MicroLogix 1500 programmable controller. For more information on the installation of MicroLogix 1500 expansion I/O, see the manufacturer’s installation instructions HERE.
And if you’ve have any comments, questions, or corrections, please feel free to fill out the “post a comment or question” for at the bottom of the page.
Until next time, Peace ✌️
If you enjoyed this content, please give it a Like, and consider Sharing a link to it as that is the best way for us to grow our audience, which in turn allows us to produce more content 🙂
Shawn M Tierney
Technology Enthusiast & Content Creator
Support our work and gain access to hundreds members only articles and videos by becoming a member at The Automation Blog or on YouTube. You’ll also find all of my affordable PLC, HMI, and SCADA courses at TheAutomationSchool.com.
- FactoryTalk Design Workbench First Look, CCW Comparison - December 19, 2025
- Drew Allen of Grace Technologies on Automation, Safety, and More (P256) - December 17, 2025
- Robotics in Warehouse Automation with Erik Nieves of Plus One Robotics (P255) - December 10, 2025

Discover more from The Automation Blog
Subscribe to get the latest posts sent to your email.


