So you need to know how to setup RSLinx Classic to communicate to an Allen-Bradley MicroLogix 1400 using Ethernet in order to download or go online with RSLogix?
Well you’re in luck as in today’s article I’ll walk you step by step through how to setup RSLinx communications, as well as how to download or go online from RSLogix:
Notes and prerequisites: Before you begin, insure you have the correct software. You’ll also want to make sure you know the Ethernet address of your MicroLogix 1400 which you can find by following this article. If you’d prefer to setup communications using serial RS232 DF1, see this article. And for images of the MicroLogix 1400 communications ports see this article.
Step 1) Ethernet Connectivity
The first step is to insure you have Ethernet connectivity between your PC and MicroLogix PLC. The easiest way to obtain this is to connect them both to the same physical network and logical network.
While many with Ethernet experience will know how to accomplish the above, for those less experienced I’ll add some additional info below:
- You’ll likely find the easiest way to connect your PC to the same physical network as the MicroLogix PLC is to use an Ethernet switch. You can also connect directly using an Ethernet crossover cable. Note: If you have a newer PC your Ethernet port will likely support “Auto MDI-X,” in which case you can also use a standard Ethernet patch cable.
- If you’re not going through a router, next insure your PC is on the same logical network (aka subnet) as the MicroLogix. This can be done by comparing the IP address and Subnet Mask of your PC to your MicroLogix to insure the are on the same subnet as explained here.
- If you are going through a router, the default gateway will need to be set correctly in both the PLC and on your PC. If you’re not sure about this, please consult your IT personnel.
- Finally, to check that your PC is able to communicate to your PLC, open a Windows Command Prompt and “Ping” your PLC’s Ethernet address (i.e. Ping 192.168.1.10) as explained in this article.
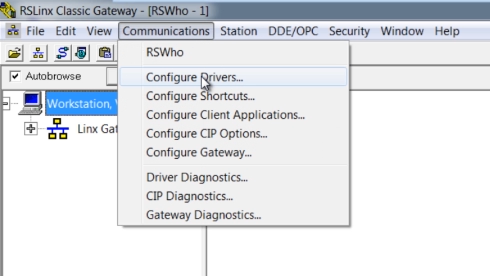
Step 2) Next launch RSLinx Classic, and then under the Communications menu select Configure Drivers:
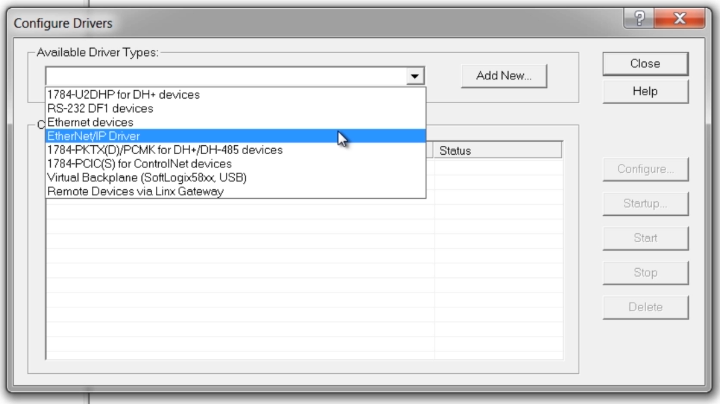
Step 3) Now from the Available Driver Types drop down list select the Ethernet/IP driver, a driver which will attempt to automatically find your MicroLogix on Ethernet:
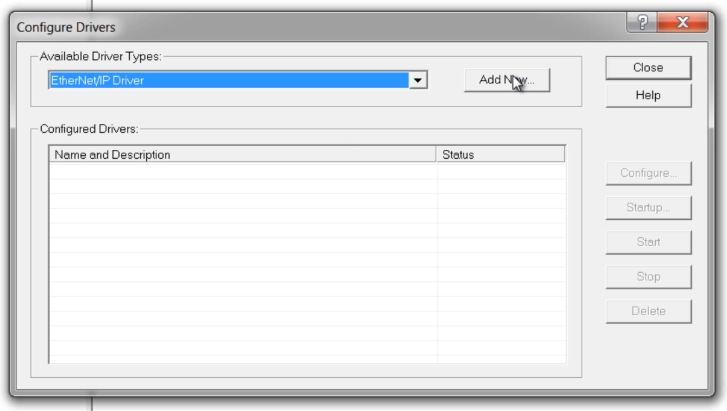
Step 4) Next click on Add New
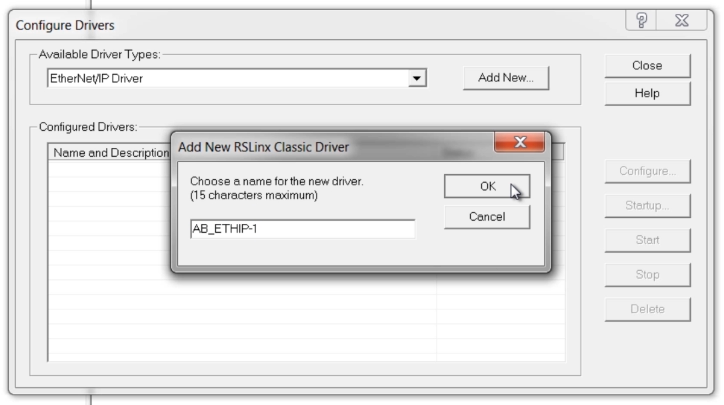
Step 5) And accept the default name by clicking on OK:
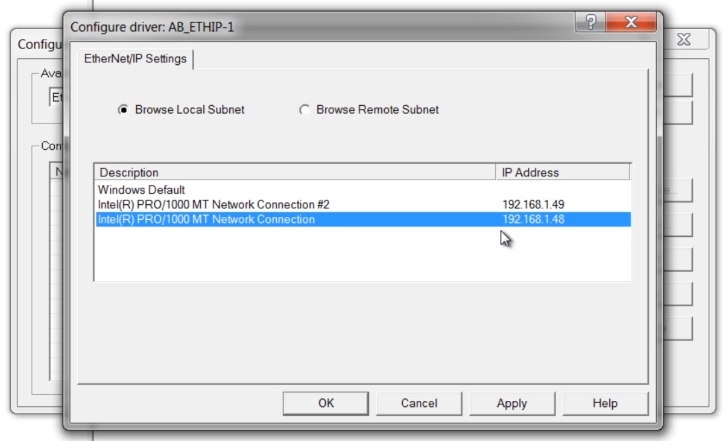
Step 6) Now select the Ethernet Port on your PC to which your MicroLogix is connected. Beware not to choose WiFi or Bluetooth network cards if your MicroLogix is not connected to them:
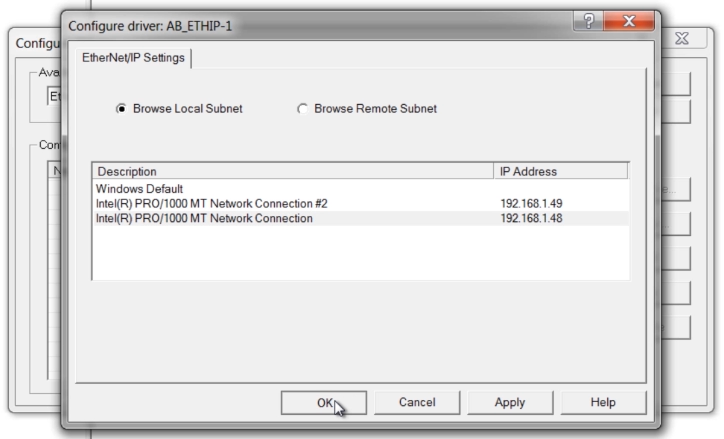
Step 7) Now click on OK to close the driver window:
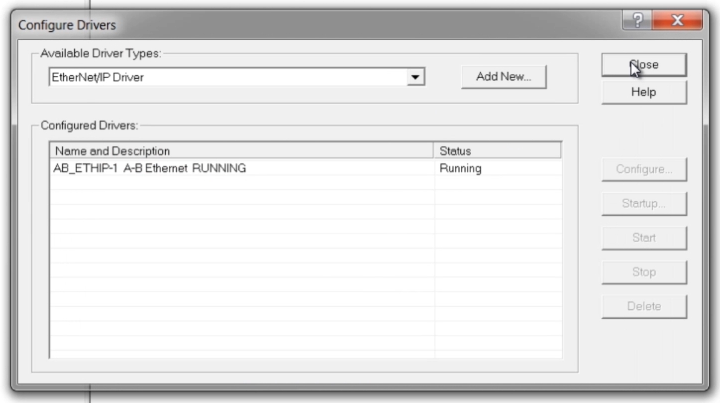
Step 8) And click on Close to close the Configure Drivers window:
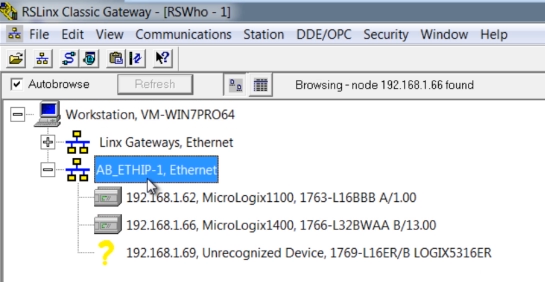
Step 9) Next, double click on your new driver in the RSWho window as shown below:
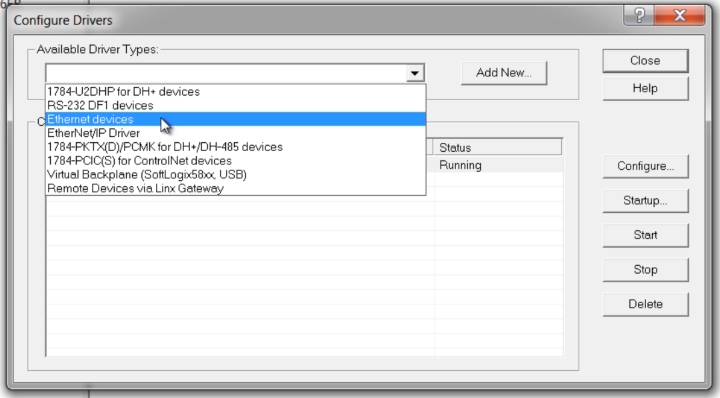
Step 10) If after ten seconds of browsing RSLinx does not find your MicroLogix, you may wish to try adding it manually by adding the Ethernet Devices driver under Communications, Configure Drivers, Available Driver Types:
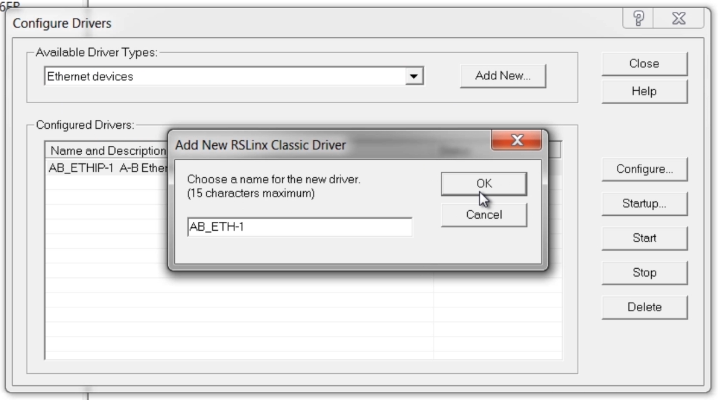
Step 11) As before, select the driver, click Add New, and then click Ok:
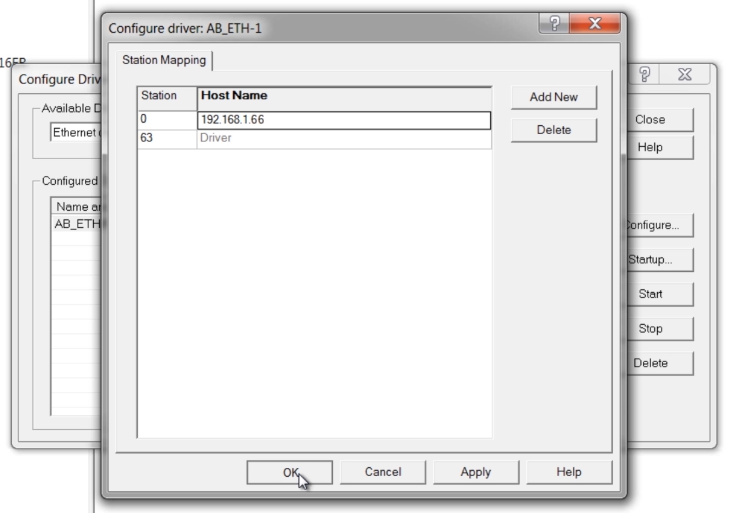
Step 12) Here, add the Ethernet address of your MicroLogix (see notes above Step 1 for that procedure) and then click on OK:
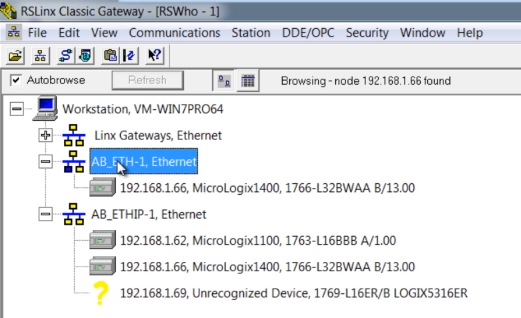
Step 13) Now double click on your new driver in the RSWho window and after a few seconds you should see your Micro appear:
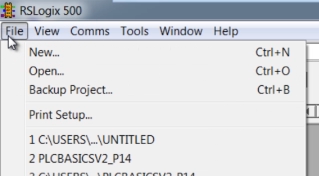
Step 14) Now open either RSLogix Micro or RSLogix 500, and then open your program file:
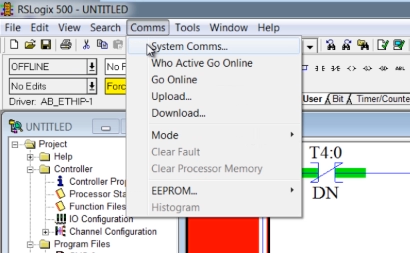
Step 15) Next, from the Comms menu select System Comms:
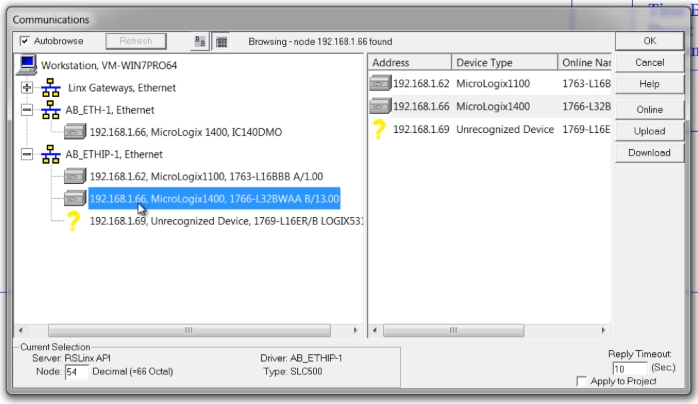
Step 16) Then in the popup Communications window expand your Ethernet driver and select your Micro:
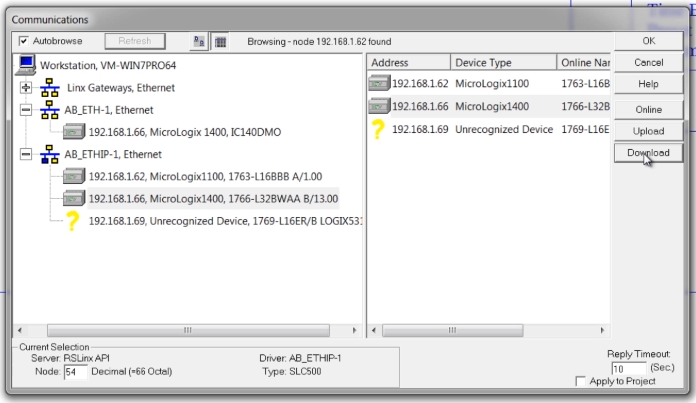
Step 17) To download your program just select the Download button. Alternatively, you could go online by selecting the Online button:
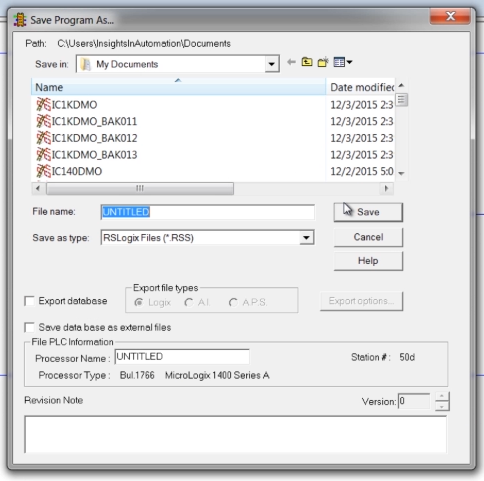
Step 18) At this point if you made any changes to your program you may be prompted to save it:
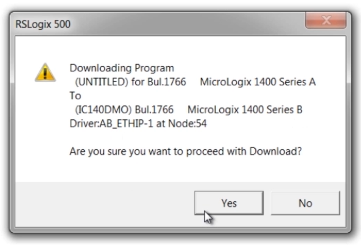
Step 19) Next, confirm you would like to download your program into the Micro you selected:
NOTE: The MicroLogix PLC can only hold one program at a time, and downloading to it will erase the Micro’s current program. If you do not have a copy of the current program loaded in your Micro, you should first perform an upload and save.
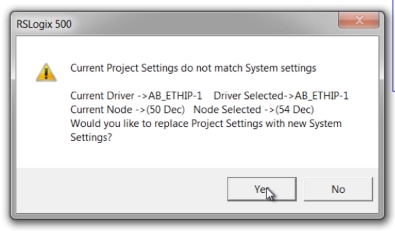
Step 20) At this point if the Current Project Settings don’t match the System settings you’ll be asked if you would like to update the project settings:
Step 21) And then if the Controller is different you will be asked to confirm the change and resize data tables:
Step 22) If the Micro was in Run Mode you’ll be asked if you would like to put it into Program Mode so the download can take place.
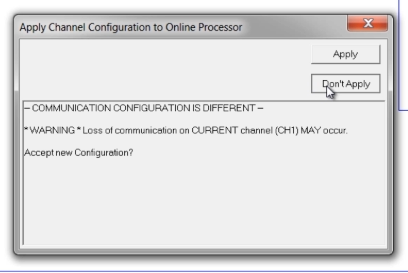
Step 23) Next, if the communications settings in your Micro are different than the settings in the program you are downloading, you will receive a notice as to whether or not you want to change the Micro to match the program you are downloading:
NOTE: If you change the settings of the port you are downloading to, after the download you likely will lose communications with the Micro. To regain comms you’ll have to edit your driver in RSLinx to match the new settings.
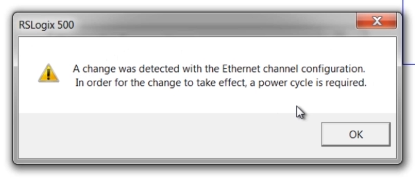
Also, if you changed the Ethernet settings you may receive a notice that they will not take place until after a powercycle:
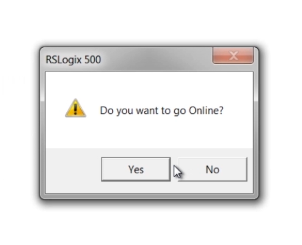
Step 24) At the end of the download process, if you still have communications with the MicroLogix controller you will be given the option of putting the controller back into the Run Mode if it was in the Run Mode prior to downloading, and you’ll also receive the option of going online:
NOTE: You can watch a video demonstration of this procedure below:
I hope today’s article about how to setup RSLinx Classic to communicate to a MicroLogix 1400, and then how to download to the MicroLogix using RSLogix was helpful.
If you have any questions, comments, or suggestions, please feel free to post the by clicking on the “Click here to post a comment or question” link below.
Until next time, Peace ✌️
If you enjoyed this content, please give it a Like, and consider Sharing a link to it as that is the best way for us to grow our audience, which in turn allows us to produce more content 🙂
Shawn M Tierney
Technology Enthusiast & Content Creator
Support our work and gain access to hundreds members only articles and videos by becoming a member at The Automation Blog or on YouTube. You’ll also find all of my affordable PLC, HMI, and SCADA courses at TheAutomationSchool.com.
- FactoryTalk Design Workbench First Look, CCW Comparison - December 19, 2025
- Drew Allen of Grace Technologies on Automation, Safety, and More (P256) - December 17, 2025
- Robotics in Warehouse Automation with Erik Nieves of Plus One Robotics (P255) - December 10, 2025

Discover more from The Automation Blog
Subscribe to get the latest posts sent to your email.


