
In today’s article (and video) I walk through how to add Ethernet Flex I/O to a ControlLogix System:
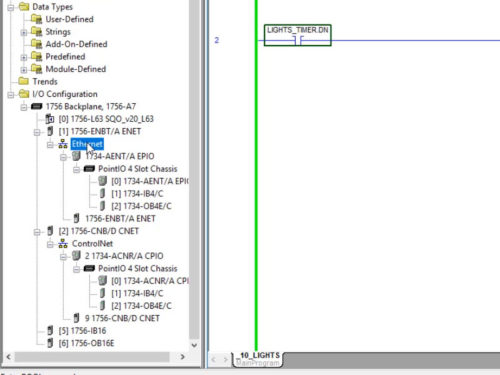
Step 1) To start, open your RSLogix 5000 or Studio 5000 project and find your Ethernet communications module under I/O Configuration. Once you find it, expand it by clicking on the plus sign (+) so you can see the “Ethernet” network under it:
NOTE: While some CompactLogix and ControlLogix controllers have Ethernet port(s) built-in, most will require you to add one to your project before you can add Distributed Ethernet I/O like Flex I/O.
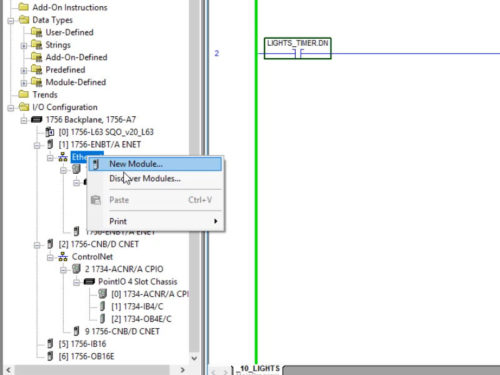
Step 2) Next, right click on “Ethernet” and select “New Module”:
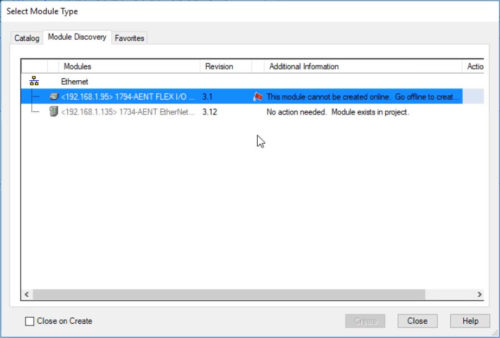
NOTE: While you may be tempted to try to add or “Discover” Flex I/O “Online,” this is not supported as shown below:
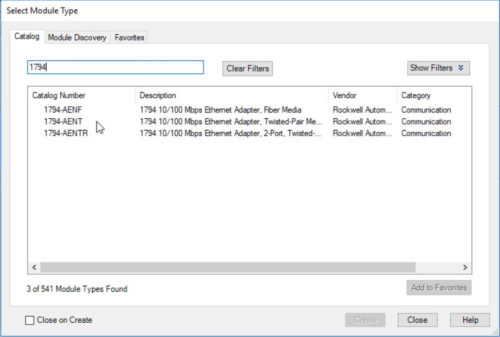
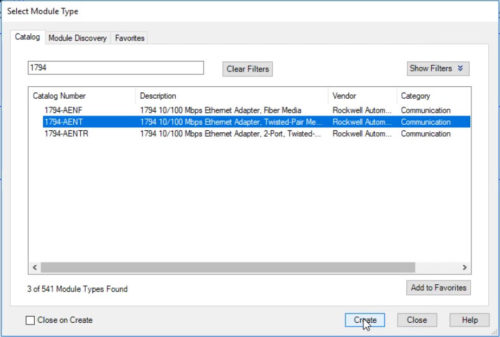
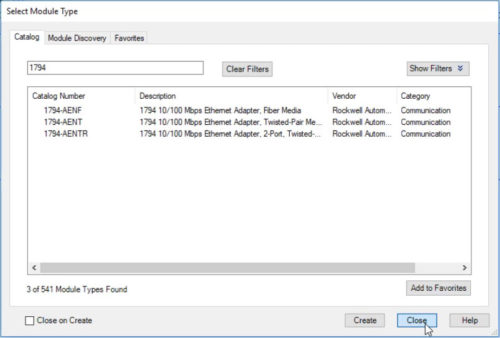
Step 3) In the “Select Module Type” window type in the part number of your Flex I/O Ethernet Adapter. In this example I’m using a 1794-AENT:
Step 4) Next, select your Adapter from the list and click on “Create”:
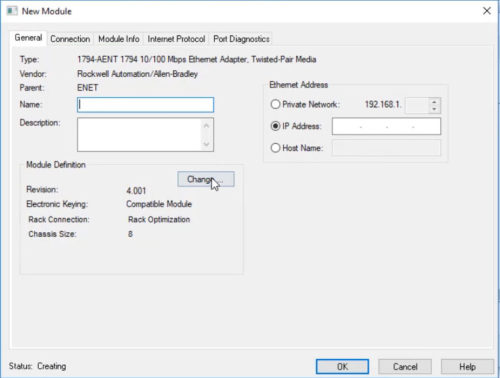
Step 5) In the “New Module” window, check the default “Revision” and “Chassis Size” to see if they match your actual Adapter and application. If not, click on “Change” to edit either or both fields:
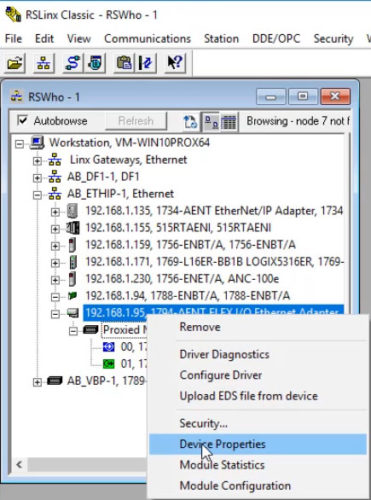
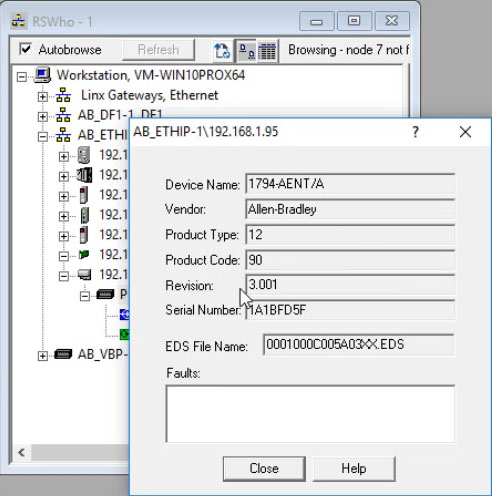
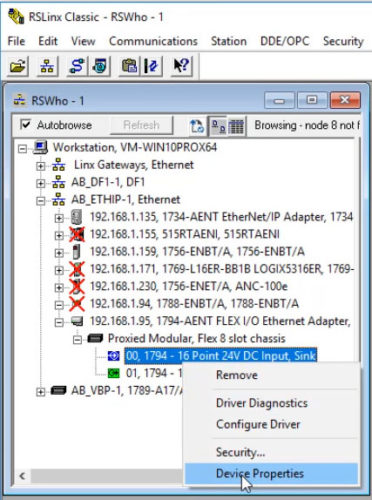
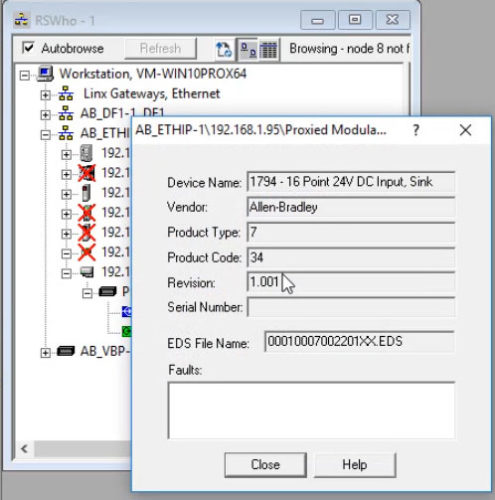
Note: If your Adapter is already powered and wired to the network, you can check it’s revision by first finding it in RSLinx, and then right clicking on it and selecting “Device Properties”:
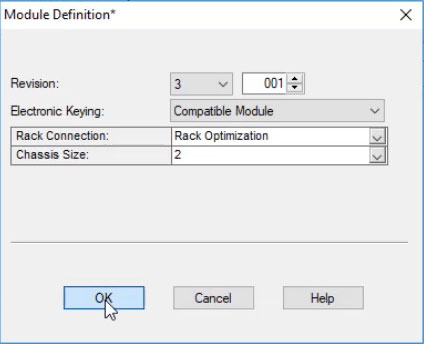
Step 6) If you need to make a change, click on the “Change” button and update the “Revision” and/or the “Chassis Size” to match what you have installed and click on “OK.” Note that most Flex I/O Adapters support up to 8 modules, which is a chassis size of 8:
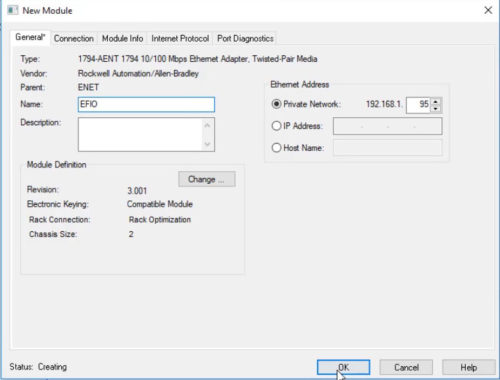
Step 7) After your Module Definition matches your physical hardware, you need to “Name” your adapter and give it an “Ethernet Address” before clicking on “OK”:
NOTE: It’s important to understand that your Flex I/O Tags will show in Controller Tags using the name you give your adapter here. In our example we used the name “EFIO.”
Step 8) Once you’re finished adding all your Ethernet devices, click on “Close”:
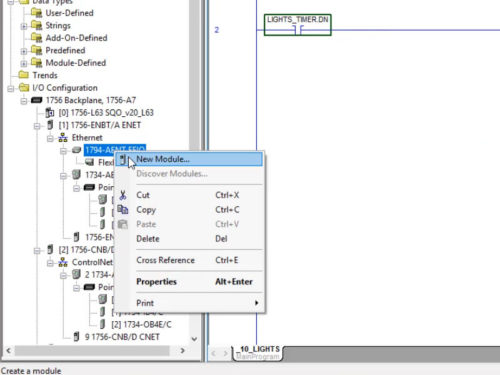
Step 9) With your Flex I/O Ethernet Adapter added to the I/O Configuration, the next step is to add your Flex I/O Modules to the Adapter. To do this, right click on the Adapter and select “New Module”:
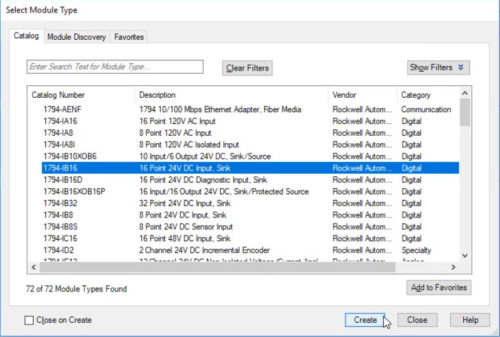
Step 10) Now find and “Create” each of the Flex I/O modules connected to the Adapter:
Step 11) Just like with the Adapter, you can also find a module’s “Revision” in RSLinx Classic by right clicking on the module and selecting “Device Properties”:
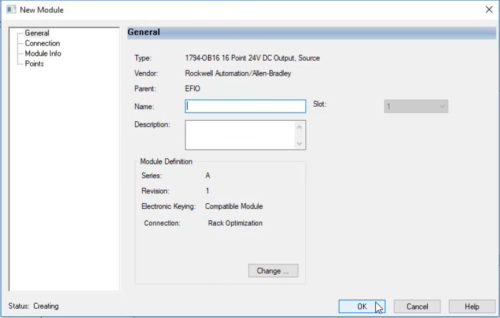
Step 12) As you add each module, confirm the “Module Definition” and “Slot” is correct before clicking on “OK”:
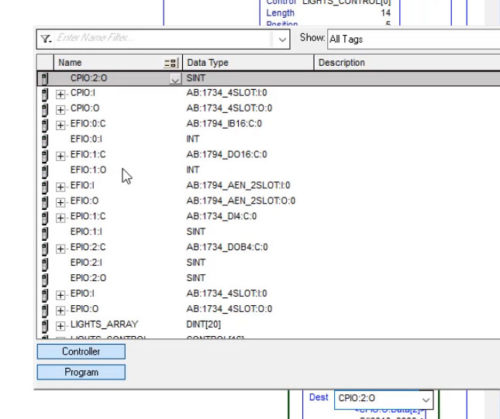
Step 13) Once all your modules have been added, you’ll find their I/O Tags in Controller Tags with the “Name” you gave your Flex I/O Adapter.
In this case we used “EFIO” as our adapter’s name, and below you can see our new “EFIO” Flex I/O Controller Tags:
The Automation Show, Episode 21:
Adding Ethernet Flex I/O To ControlLogix
I hope you found today’s article (and video) about how to add Ethernet Flex I/O to your ControlLogix helpful!
If you have any comments or questions, please don’t hesitate to post it using the “comment” link found below my signature.
Until next time, Peace ✌️
If you enjoyed this content, please give it a Like, and consider Sharing a link to it as that is the best way for us to grow our audience, which in turn allows us to produce more content 🙂
Shawn M Tierney
Technology Enthusiast & Content Creator
Support our work and gain access to hundreds members only articles and videos by becoming a member at The Automation Blog or on YouTube. You’ll also find all of my affordable PLC, HMI, and SCADA courses at TheAutomationSchool.com.
- FactoryTalk Design Workbench First Look, CCW Comparison - December 19, 2025
- Drew Allen of Grace Technologies on Automation, Safety, and More (P256) - December 17, 2025
- Robotics in Warehouse Automation with Erik Nieves of Plus One Robotics (P255) - December 10, 2025

Discover more from The Automation Blog
Subscribe to get the latest posts sent to your email.




Hi Shawn,
Is there any easy way to convert existing ControlNet Flex RIO to Ethernet Flex RIO? I’ve tried a couple of different methods, but both methods require me to sift through the entire code and manually change the old ControlNet IO addresses to the new Ethernet IO addresses. I am using a 1756-L72 V30. Any input would be greatly appreciated. Thanks
Good afternoon Mike,
So when I try to dragging Flex I/O modules from ControlNet to Ethernet adapters in Studio 5000, while the module details seem to move over, none of my individual addresses or aliases update.
This is different than when I change the slot number of a module in the chassis, as that does update.
I believe this is one reason Rockwell recommends aliasing the entire “Data” INT or DINT, and then using the Alias addresses (Alias.1, Alias.2) so if you need to move modules between networks, or change platforms, you only need to update one Alias per module.
Hope this helps,
Shawn Tierney
Instructor at http://www.TheAutomationSchool.com
[sc name="stsigcom"]