
There are times when equipment runs until the day it can be decommissioned and shut down peacefully, removed from service and replaced with an entirely new system in an orderly manner.
There are also times when you have to do whatever you have to do to get by until a more permanent solution can be implemented. If you are still maintaining DeviceNet motor control centers, this tip could be of use to you.
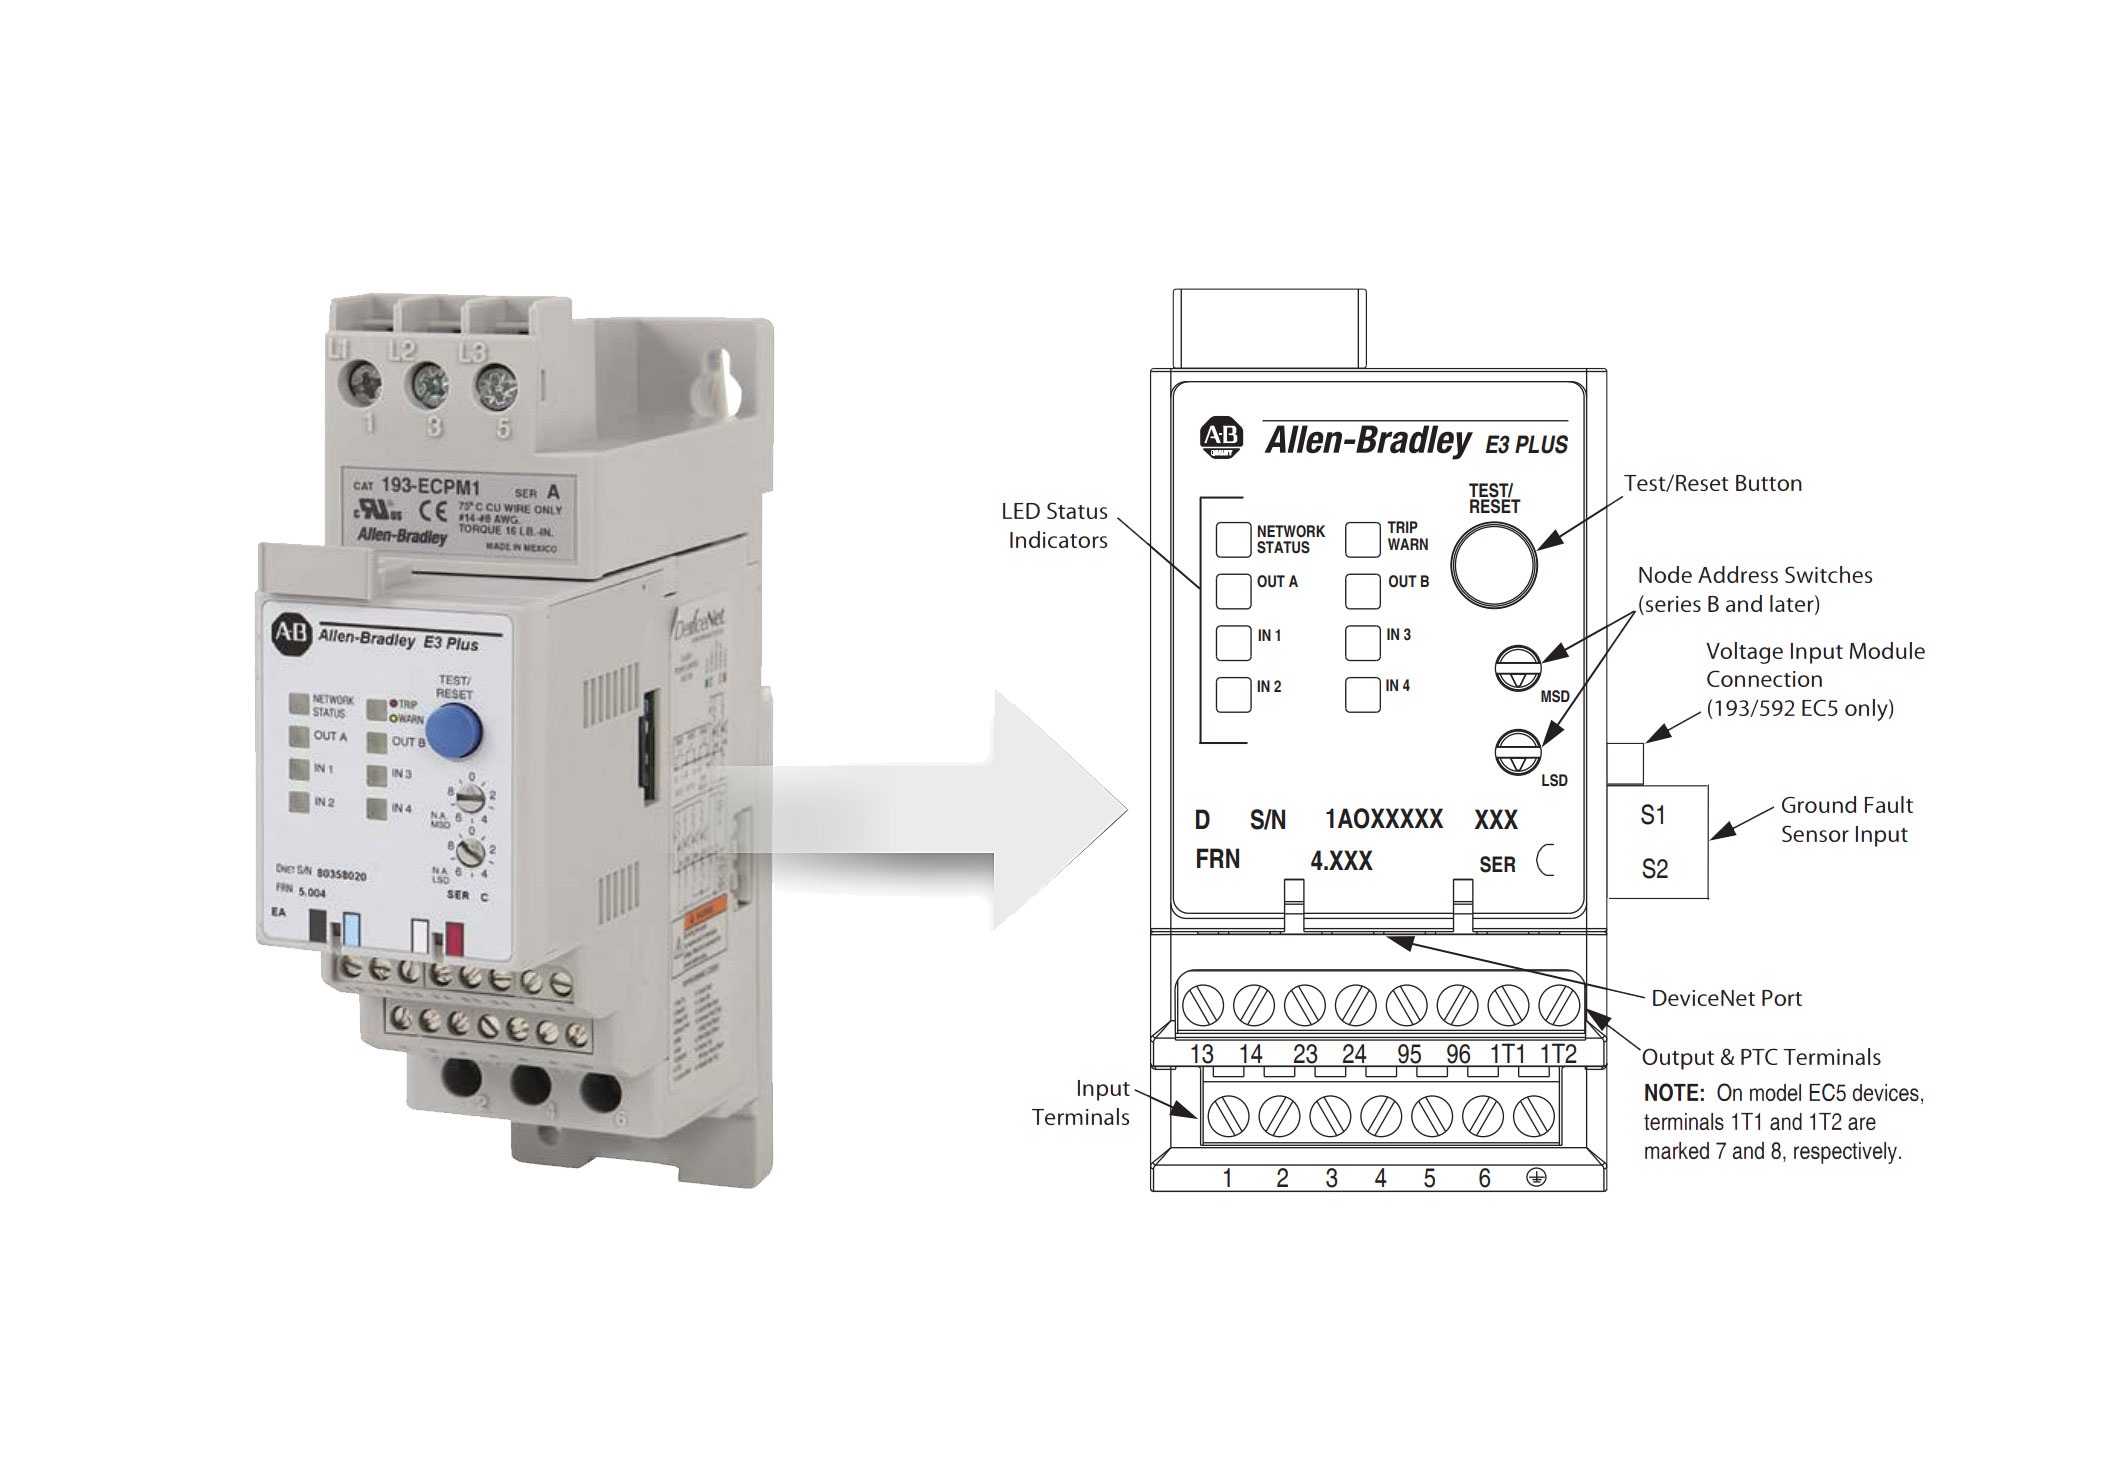
Lets say that you have a motor control center full of Allen Bradly E3 modules and begin to have failures. One solution is to replace the E3 or E3+ module with the DeviceNet E300 module and then run the E300 DeviceNet module in E3 Simulation Mode.
Reading through the knowledge article, it isn’t something you will easily do in the middle of the night as many pieces of the puzzle from software revision to firmware revisions have to be at a certain level to get it all working correctly.
This is something you would have to prepare for. If you have all the software and firmware revisions up to date for your system, then during failures, you could replace the E3(+) modules with the E300 DeviceNet modules and keep your DeviceNet motor control center functioning for some time.
Prerequisites for setting up your E300 DeviceNet module to replace an E3 or E3 Plus:
- Update RSNetworx for DeviceNet to version 28.
- Update your Rockwell Automation DeviceNet scanner to the latest firmware. The instructions in the knowledge article were tested with a 1756-DNB series B DeviceNet scanner running version 7.003 firmware.
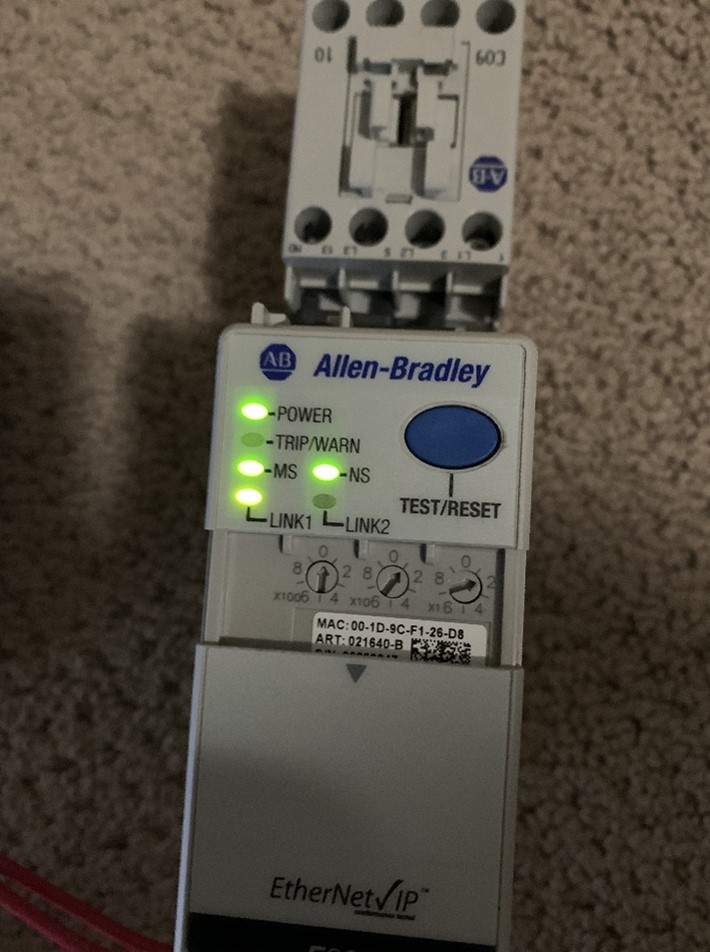
- Install a 193-ECM-DNT DeviceNet Communications Module rev 1.003 or higher for the E300 Overload Relay
- Install a 193-EIO-XXX Series B Control Module (revision 7.008 or later) for the E300 Overload Relay
- Install a 193/592-ESM-XX sensing module with firmware revision of 2.003 or higher.
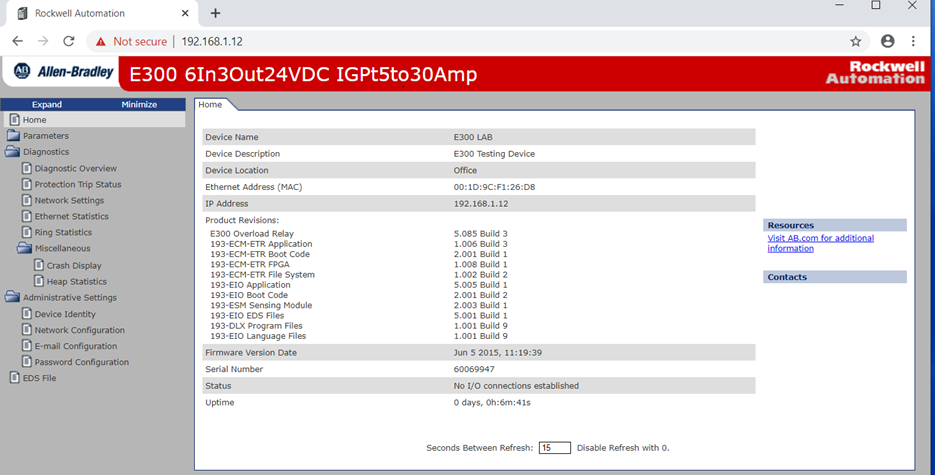
- Install Emulation Mode EDS Files version 6.02 or higher. Verify E300 is in default mode. Parameter 195 should be NetOverload or Mode 2.
- If the DL over the E300 is green in the graphic mode, right click on device and select Logic Enable off to make the DL red.
- Determine which Emulation Mode to use. Refer to the E3 to E300 Migration Product Profile
- Verify you have met the proper I/O required for the E3 plus device you are replacing.
- Verify the E300 193-ESM-XXX or 592-ESM-XXX sensing module is in the range of the E3/ E3 Plus device you want to emulate.
Steps: (for a complete list, reference the below referenced knowledge article from Rockwell.)
- Open RSNetworx for DeviceNet with the appropriate saved network configuration.
- Go online and browse the network. Make note of the next available node address.
- Set the node address on the replacement E300 to the next available node address, the one you noted above.
- Power down the E3 Plus that you want to replace. Physically remove the E3 Plus.
- Physically Install the E300 in place of the E3 Plus you just removed. Power up the E300.
- In RSNetworx re-browse the network. You can do this by going offline and back online. You should observe that the E3 Plus you physically removed will have a red “minus” icon on it, indicating that it cannot be seen on the network. You should also observe that the E300 you physically installed shows up at the address you set it to in step #3.
- Double click the E300 and select the Parameters tab. You will have the choice to upload or download, select upload. When the upload is complete, navigate to parameter 300.
- Set parameter 300 to emulate the E3 Plus that you are replacing. For example: The E3 Plus was a 3-15 Amp model so you will select the E3 Plus (3-15A) from the dropdown menu. NOTE: Make sure that the E300 sensing module (the bottom module in the stack) you are using for a replacement has an amperage range that includes the E3 Plus you are replacing. If you enter an incompatible E3 Plus you will get an “object state conflict” error in RSNetWorx for DeviceNet. Click Apply then click your way through the various dialog boxes that pop up. Click OK to close dialog box.
- Delete the E300 node that you were just working with. You can do this by single clicking it and pushing the delete key on your keyboard. Click Save.
- Re-browse the network. The node that showed your E300 should now show up as an E3 Plus. After it shows up, delete it again. Click Save. You now have an E300 running as an emulated E3 Plus.
- Physically power down the emulated E3 Plus. Change the node on the emulated E3 Plus to the node of the E3 Plus you are replacing. Power up the emulated E3 Plus.
- You should still be online in RSNetworx, if not, go online and re-browse the network. In RSNetworx double click the Scanner node and select the Scanlist tab. If prompted, select upload. In the Scanlist, highlight the node of the E3 Plus you are replacing. Directly below the scanlist is a checkbox for “Node Active” deselect this checkbox. Click Apply and then click your way through the dialog boxes. Click OK to close the dialog box. Click Save.
- Re-browse the network. You should observe the node for the E3 Plus you are replacing show up with a blue “not equal” icon, this means there is a mismatch. Double click the node and solve the mismatch by clicking your way through the dialog boxes. The node dialog box will open, proceed to the next step.
- Select the Parameters tab. When prompted download the parameters to the node. Click your way through the dialog boxes. Click Apply. Click OK to close the dialog box. (This step is where you are pushing the saved parameters from the E3 Plus that you are replacing into the emulated E3 Plus.)
- Double click the scanner module and select the Scanlist tab. Highlight the node for the E3 Plus you have been working on. Reselect the “Node Active” checkbox. Click Apply and then click your way through the dialog boxes. Click OK to close the dialog box.
- Click Save. Check the parameters on the node you were working with. Make a fresh backup.
References:
Rockwell Tech Support Article ID: QA45907 | Access Levels: Everyone
E300 Emulation Mode Requirements and Setup for E3 Plus Relay on DeviceNet
Conclusion:
We run across nuances and features all the time that are good to know in case it helps you overcome a potentially catastrophic event such as a power surge that damages an entire motor control center and you can’t get your hands on enough E3’s anymore.
I was recently made aware of this feature or capability and decided to make note of it in case it helps me in the future and I wanted to share it with you as well.
Written by Brandon Cooper
Senior Controls Engineer and Freelance Writer
Have a question? Join our community of pros to take part in the discussion! You'll also find all of our automation courses at TheAutomationSchool.com.
Sponsor and Advertise: Get your product or service in front of our 75K followers while also supporting independent automation journalism by sponsoring or advertising with us! Learn more in our Media Guide here, or contact us using this form.
- Things I’ve Learned Travelling for Work (2) - July 17, 2025
- Things I’ve Learned Travelling for Work (1) - July 10, 2025
- Emulating an Allen-Bradley E3 or E3 Plus - June 30, 2025
Discover more from The Automation Blog
Subscribe to get the latest posts sent to your email.
")
")
