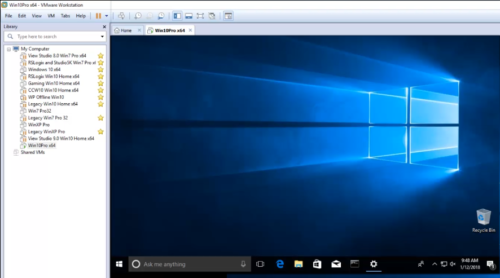
In this article I’ll walk you through creating a Windows 10 Virtual Machine using VMware Workstation.
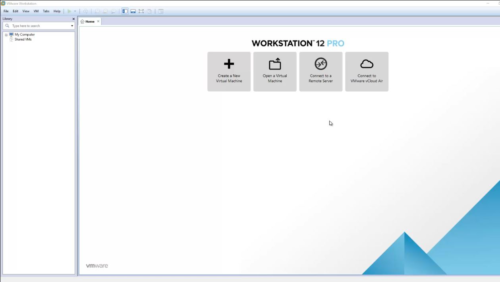
Step 1) The first step is to open VMware Workstation, which can be purchased here:
Note: The free “Player” version is available here for non-commercial, personal and home use, and is limited to running a single virtual machine.
Step 2) Next, you’ll need your operating system installation DVD or ISO. In my case I purchased a new Windows 10 Pro 64 Bit OEM disk, which you’ll find on Amazon.com here:
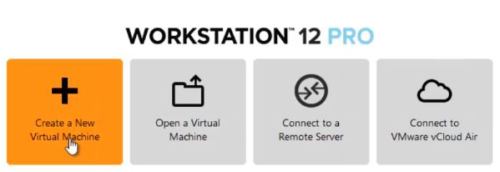
Step 3) The next step is to click on “Create a New Virtual Machine”:
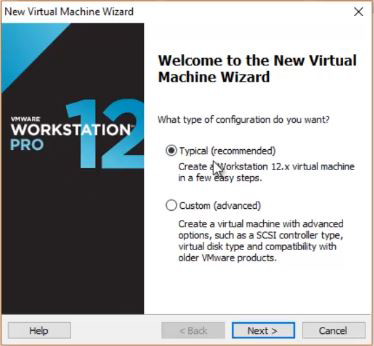
Step 4) Then choose Typical, and click on Next:
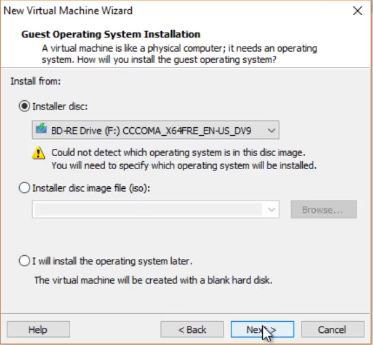
Step 5) On this screen is where you’ll select your OS DVD or ISO, and click on Next:
Step 6) If VMware is unable to identify your OS, be sure to choose the correct one from the list:
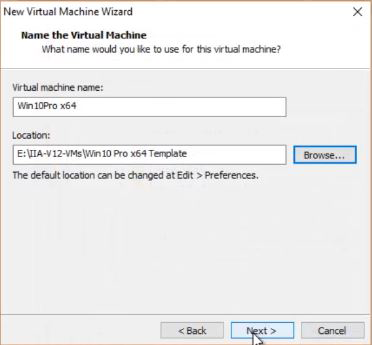
Step 7) Now name your virtual machine, and choose where you would like to store it:
Note: You’ll want to be sure the destination you choose has enough space to host your VM.
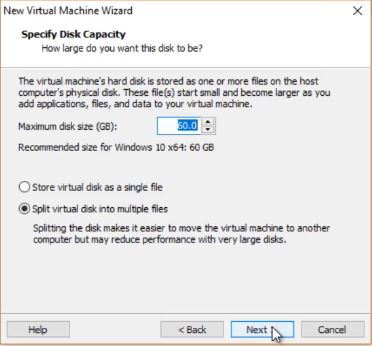
Step 8) On this screen we set the maximum disk size as well as a single or multiple file preference. Below I left both choices at their defaults:
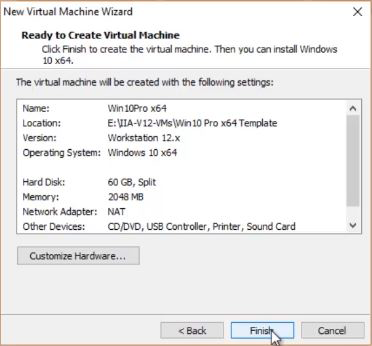
Step 9) If everything looks correct, click on Finish:
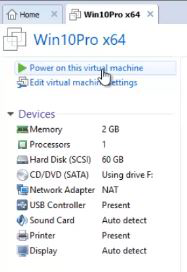
Step 10) Now power on your new VM to begin the installation process:
Step 11) At this point you may see a notice asking you to let VMware Workstation know when the installation is complete:
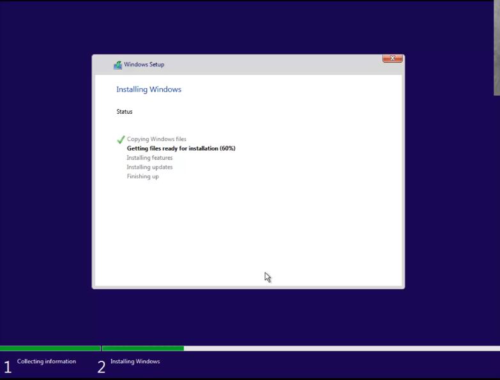
Step 12) In this example Windows 10 Pro 64 bit took just over 17 minutes to install.
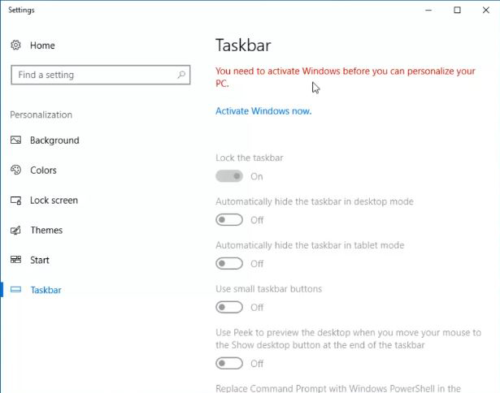
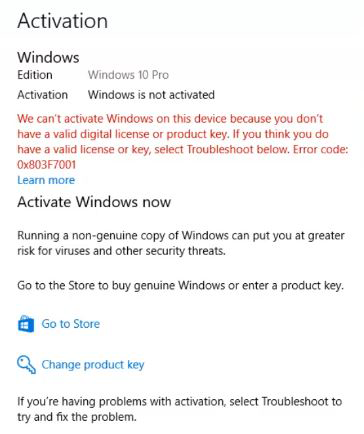
Note: During the installation, Windows prompted me to activate the OS, but I chose not to as I want to customize Windows and take a clean snapshot prior to activating it.
Step 13) After the installation completed, I began customizing Windows. Well, with exception of the Taskbar, which can’t be personalized until after activation:
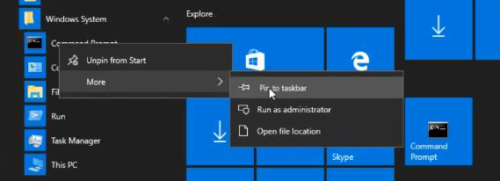
Step 14) The first thing I customize is what programs are pinned to the start menu and task bar. This allows me quick access to common utilities like the Command Prompt, Snipping tool, Calculator, etc.
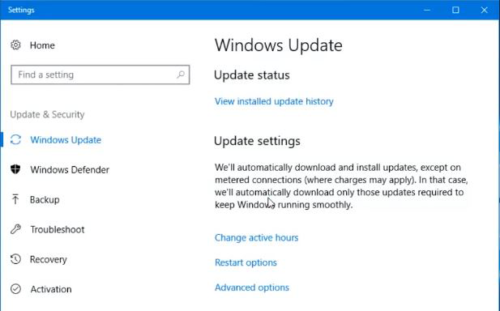
Step 15) Another option I like to customize is “Windows Update,” including the disabling of the option for my VM’s OS to serve update files to other PCs.
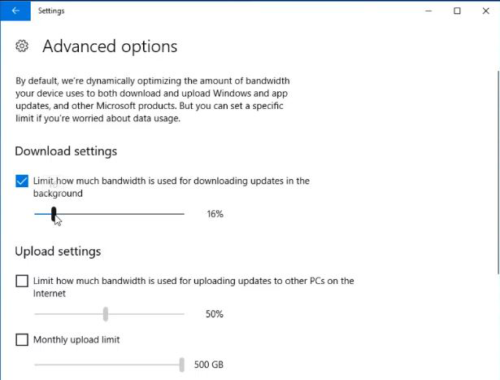
Step 16) Under the advanced options for Windows Update you can even limit how much bandwidth is used for updates:
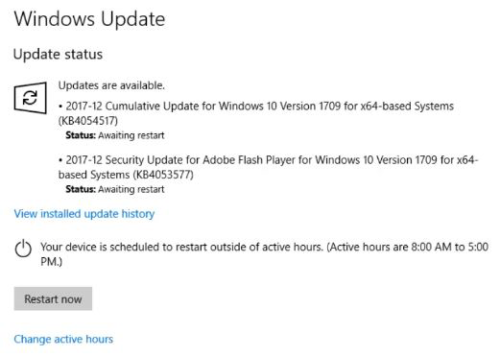
Step 17) Next, I like to manually run Windows Update to insure my VM’s OS is as up to date as possible before I clone it:
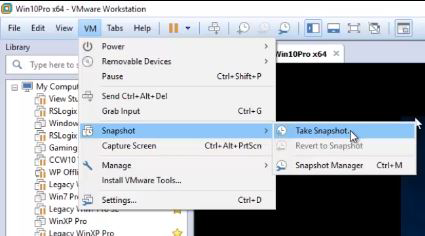
Step 18) Once I complete the above customization of Windows, I then take a snapshot as clone the VM in it’s pre-activated state just in case I need additional un-activated Win 10 VMs in the future:
Step 19) Next, I activate Windows, and then immediately take a snapshot and make multiple clones of the VM:
Step 20) Going forward, I only use clones of the original activated Windows 10 VM, saving the original for future cloning as needed:
If you’d like to watch a video demonstration of the above, check out Episode 21 of The Automation Minute Season 4 below:
I hope you’ve found the above information on how to create a Windows 10 VM helpful.
If you have any questions, or would like to comment on the above article, please feel free to click on the “post a comment or question” link below.
You can also become a Patron to support my work at TheAutomationBlog.com/join and in return receive free downloads of my sample, videos, and blog articles.
Until next time, Peace ✌️
If you enjoyed this content, please give it a Like, and consider Sharing a link to it as that is the best way for us to grow our audience, which in turn allows us to produce more content 🙂
Shawn M Tierney
Technology Enthusiast & Content Creator
Support our work and gain access to hundreds members only articles and videos by becoming a member at The Automation Blog or on YouTube. You’ll also find all of my affordable PLC, HMI, and SCADA courses at TheAutomationSchool.com.
- FactoryTalk Design Workbench First Look, CCW Comparison - December 19, 2025
- Drew Allen of Grace Technologies on Automation, Safety, and More (P256) - December 17, 2025
- Robotics in Warehouse Automation with Erik Nieves of Plus One Robotics (P255) - December 10, 2025

Discover more from The Automation Blog
Subscribe to get the latest posts sent to your email.


