Rockwell’s Micro820 and Micro850 both have built-on Ethernet communication ports, and in today’s article I’ll show you two ways to assign these ports an Ethernet Address.
Preface: The first procedure below requires RSLinx Classic, and the second also requires Connected Components Workbench, both of which you can learn how to download in our previous article, Download a free copy of Connected Components Workbench.
Option 1: BootP
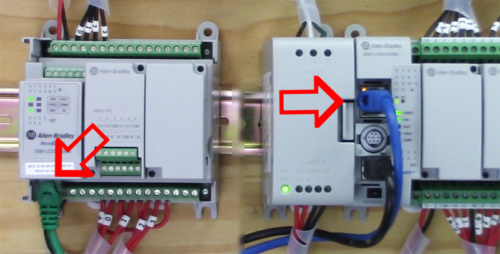
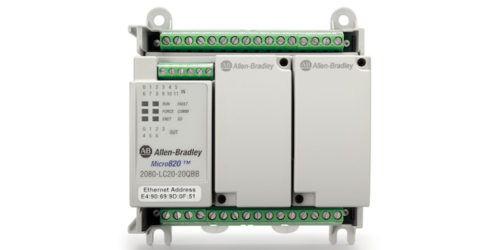
Step 1) Start by looking at the label on the front of your Micro820, or the side of your Micro850, and record the Ethernet (MAC ID) Address displayed:
Step 2) Next, make sure your Micro820 or Micro850 is connected to the same network as your PC:
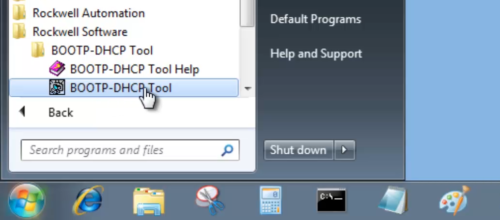
Step 3) Now launch the BOOTP-DHCP Tool that is installed along with RSLinx Classic:
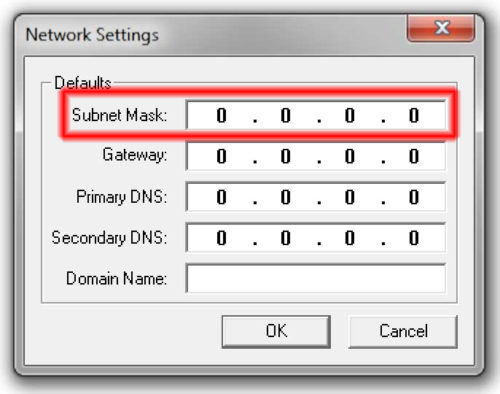
Step 4) If this is the first time you’ve launched this utility, at a minimum you’ll need to fill in the subnet mask of your network and click on OK:
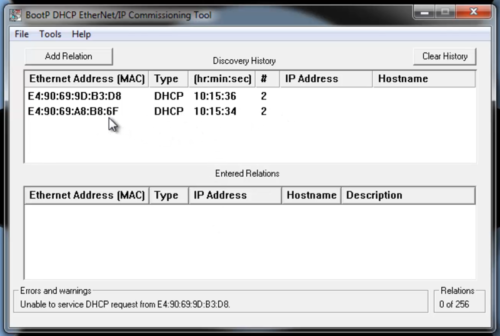
Step 5) A short time after the utility loads you should see the MAC ID of your Micro800, similar to what is shown below:
NOTE: If your device does not show up after a few moments, cycle power to your Micro800 as it asks for an address quite often when set for BOOTP/DHCP and is first powered on.
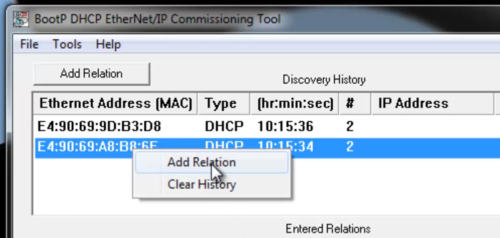
Step 6) Select your Micro800 and click on the “Add Relation” button, or right click on your Micro800 and select “Add Relation”:
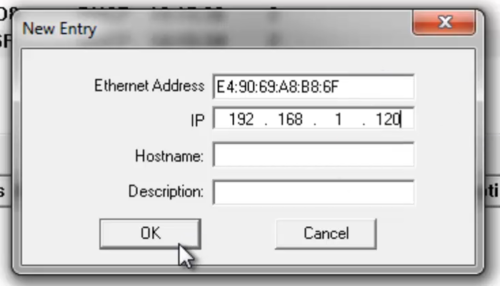
Step 7) At a minimum you must enter in the Ethernet Address you would like to assign to your Micro800, and then select OK:
Step 8) Once done, your Micro800 will have a temporary Ethernet address. At this point if you were to cycle power to the Micro800 it would request a new address upon boot.
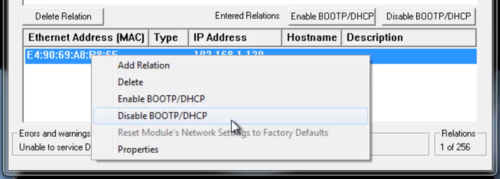
Step 9) To insure your Micro800 keeps the address you assigned it above, you need to disable BOOTP/DHCP in the Micro800. One way to do this is to select the unit from the lower window and click on the “Disable BOOTP/DHCP” button, or right click on the Micro800 and select “Disable BOOTP/DHCP:
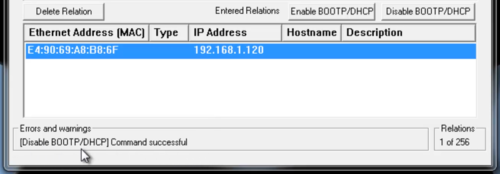
Step 10) Note that the above step does not work with all devices, so make sure you confirm that BOOTP/DHCP has been disabled by reading the confirmation message at the bottom left of the utility.
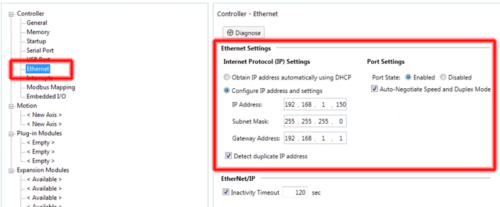
Step 11) If the above step to disable BOOTP/DHCP fails, you can create a new Micro800 project in CCW for your model of Micro, edit the Ethernet settings to provide a static IP Address and Subnet mask (insuring “Obtain IP automatically” is not selected,) and then download this new project to your Micro800 over Ethernet using the above assigned Ethernet address:
Option 2: Download a program with an Ethernet Address via USB
NOTE: While the Micro850 has a USB communications port built-in, the Micro820 requires an accessory to gain a USB port.
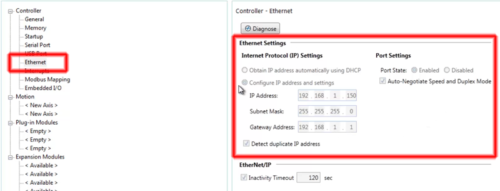
Step 1) Create a program for your Micro800 in CCW with the desired Ethernet settings, insuring “Obtain IP automatically” is not selected and a valid Ethernet Address and Subnet Mask is provided (the Default Gateway setting is optional):
Step 2) Connect your Micro800 to your PC via USB and confirm it shows up in RSLinx. For more information about connecting via USB see our previous article, Setup Micro800 USB Comms.
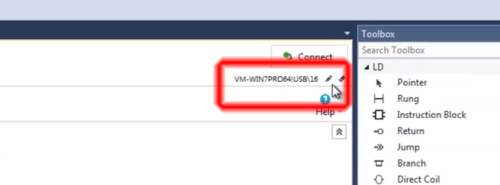
Step 3) Now in CCW, insure USB is set as the current path. If it is not, select the pencil icon as shown below:
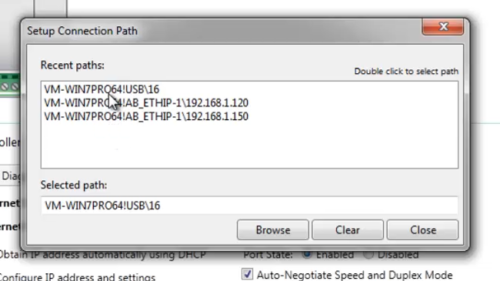
Step 4) Then in the Setup Connection Path popup, select the USB connection by double clicking on it:
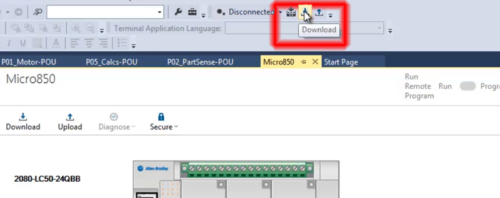
Step 5) Now download your program with the correct Ethernet address to your Micro800 over USB:
Step 6) Finally, when prompted select yes to go online with your Micro, double click on the controller and then Ethernet, and check the online settings to insure the correct Ethernet address has been downloaded:
Question) Did you Find this article helpful? If so, please share it with co-workers and colleagues! You can also keep our site online with regular updates with a $1 monthly pledge at TheAutomationBlog.com/join
And to learn everything you need to know to setup and start programming the Micro800 line of programmable controllers, check out my Micro800 course at Nano Basics Course
I hope you found this article helpful. If you have any questions please feel free to post them at TheAutomationBlog.com/join which I visit each weekday to reply to reader’s questions.
Until next time, Peace ✌️
If you enjoyed this content, please give it a Like, and consider Sharing a link to it as that is the best way for us to grow our audience, which in turn allows us to produce more content 🙂
Shawn M Tierney
Technology Enthusiast & Content Creator
Support our work and gain access to hundreds members only articles and videos by becoming a member at The Automation Blog or on YouTube. You’ll also find all of my affordable PLC, HMI, and SCADA courses at TheAutomationSchool.com.
- Digital Twin Discussion with Arthur Alter of Smart Spatial (01/15/26) - January 15, 2026
- PRONETIQS: Measure, Monitor, and Maintain (P257) - January 14, 2026
- FactoryTalk Design Workbench First Look, CCW Comparison - December 19, 2025

Discover more from The Automation Blog
Subscribe to get the latest posts sent to your email.


