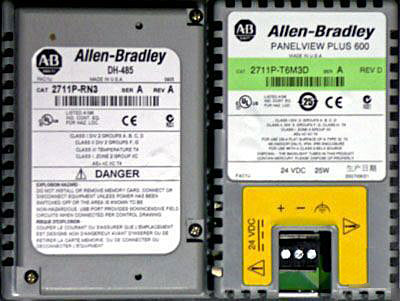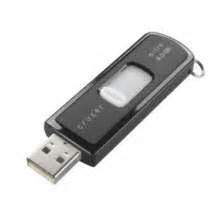
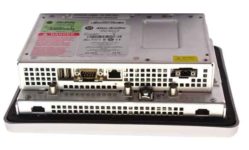
On Monday and Tuesday we discussed how to access the “Configuration Mode” of the PanelView Plus and PanelView Plus 6. One additional way we did not yet cover is using an “autorun.bat” file on a USB Memory Stick (aka USB Thumb Drive, USB Flash Drive.)
These script are written to automatically move all your FactoryTalk View Machine Edition (ViewME) Runtime Files (.mer) off your terminal so when it’s rebooted it doesn’t find the needed .mer file and therefore returns to the “Configuration Mode.”
The “autorun.bat” file used for this purpose is a simple text based file reminiscent of the old DOS files of the same name.
When you place one of these files in the root folder of your USB Memory Stick, and insert it into your PVPlus, it immediately runs.
And while the commands in the “autorun.bat” file aren’t limited to coping your “.mer” files to and from your USB memory stick, this is what the below samples scripts are designed to do.
 The first two scripts are custom ones I created for a client with a PanelView Plus 6 firmware rev 6.0 terminal.
The first backs up all the .mer files on the terminal to the USB Memory Stick , and then deletes them from the terminal.
The second script copies all the .mer files from the USB Memory Stick back to the Terminal.
Update 08/11/15: The below scripts are now available as a bundled download here:
Update 08/11/15: I recently received a PVP7s donation (thanks RK!) and can confirm these files also work on it.
Update 08/11/15: I’ve added two new scripts whch have been edited to work on a PanelPlus v5.1, but I also tested them on a PanelView Plus v3.2 and they worked there as well.
PanelView Plus 6 / 7 autorun.bat file script text used to backup .mer files from the terminal to the usb memory stick, and then delete the .mer files from the terminal.
NOTE: This file was tested on a PanelView Plus 6 and PanelView Plus 7 Standard
UPDATE: The below text was updated on 08/11/2015 to correct a typo in the REMarks
echo on
REM BACKUP AND DELETE ALL .MER FOR PVPLUS 6
REM **************************************************************
REM CREDITS: This file was created by Shawn Tierney and may be purchased
REM as part of a bundle for just $0.99 at theautomationblog.com. Thank you in
REM advance for your support!
REM **************************************************************
REM **************************************************************
REM REQUIREMENTS:
REM 1) THIS FILE MUST BE NAMED autorun.bat TO WORK
REM 2) THIS FILE IS FOR PANELVIEW PLUS 6
REM 3) THIS SCRIPT MAY TAKE UP TO 120 SECONDS TO COMPLETE
REM **************************************************************
REM **************************************************************
REM STEP 1 – Make backup MER folder on the PVPlus 6 in case copy fails
CD\application data\rockwell software\rsviewme
MD backup
REM **************************************************************
REM **************************************************************
REM STEP 2 – Copy MER files to the backup directory created above
CD runtime
COPY *.* “\application data\rockwell software\rsviewme\backup”
REM **************************************************************
REM **************************************************************
REM STEP 3 – Copy the MER files to the USB STORAGE DEVICE
COPY *.* “\usb storage”
REM **************************************************************
REM **************************************************************
REM STEP 4- Make correct directory on USB Drive (may already exist)
CD\usb storage
MD “Rockwell Software”
CD Rockwell Software
MD RSViewME
CD RSViewME
MD Runtime
CD Runtime
REM **************************************************************
REM **************************************************************
REM STEP 5 – COPY MER files to correct directory on the USB Drive
CD\Application Data\Rockwell Software\RSViewME\Runtime
COPY *.* “\USB Storage\rockwell software\rsviewme\runtime”
REM **************************************************************
REM **************************************************************
REM STEP 6 – Delete MER files from the PVPlus 6 application directory to
REM force the system to return to Configuration Menu on reboot
DEL *.mer
REM **************************************************************
REM **************************************************************
REM REMINDER – Tell the operators to allow 120 seconds from when they
REM insert the card before they remove it
REM The process is now complete
REM Remove the USB Drive and cycle power to the terminal
REM **************************************************************
REM **************************************************************
REM This file was written & tested by Shawn Tierney, InsightsInAutomation.com
REM and may be purchased as part of a four file bundle for just $0.99
REM at http://www.theautomationblog.com. Thank you in advance for your support!
REM **************************************************************
PanelView Plus 6 / 7 autorun.bat file script text used to copy .mer files from the usb memory stick to the terminal:
NOTE: This file was tested on a PanelView Plus 6 and PanelView Plus 7 Standard
UPDATE: The below text was updated on 08/11/2015 to correct a typo in the REMarks
echo on
REM COPY ALL .MER FILES FROM USB TO PVPLUS 6
REM **************************************************************
REM CREDITS: This file was created by Shawn Tierney and may be purchased
REM as part of a bundle for just $0.99 at theautomationblog.com. Thank you in
REM advance for your support!
REM **************************************************************
REM **************************************************************
REM REQUIREMENTS:
REM 1) THIS FILE MUST BE NAMED autorun.bat TO WORK
REM 2) THIS FILE IS FOR PANELVIEW PLUS 6
REM 3) THIS SCRIPT MAY TAKE UP TO 120 SECONDS TO COMPLETE
REM **************************************************************
REM **************************************************************
REM STEP 1 – Copy all .MER files from the correct directory on the USB Drive
REM to the correct directory on the PanelView Plus 6
CD\Application Data\Rockwell Software\RSViewME\Runtime
COPY “USB Storage\Rockwell Software\RSViewME\Runtime\*.*”
REM **************************************************************
REM **************************************************************
REM REMINDER – Tell the operators to allow 120 seconds from when they
REM insert the card before they remove it
REM The process is now complete
REM Remove the USB Drive and cycle power to the terminal
REM **************************************************************
REM **************************************************************
REM This file was written & tested by Shawn Tierney, InsightsInAutomation.com
REM and may be purchased as part of a four file bundle for just $0.99
REM at http://www.theautomationblog.com. Thank you in advance for your support!
REM **************************************************************
NEW! PanelView Plus 5.1 autorun.bat file script text used to backup .mer files from the terminal to the usb memory stick, and then delete the .mer files from the terminal.
NOTE: This file was tested on a v5.1 and v3.2 PanelView Plus
echo on
REM BACKUP AND DELETE ALL .MER FOR PVPLUS 5.1
REM **************************************************************
REM CREDITS: This file was created by Shawn Tierney and may be purchased
REM as part of a bundle for just $0.99 at theautomationblog.com. Thank you in
REM advance for your support!
REM **************************************************************
REM **************************************************************
REM REQUIREMENTS:
REM 1) THIS FILE MUST BE NAMED autorun.bat TO WORK
REM 2) THIS FILE IS FOR PANELVIEW PLUS FIRMWARE 3.0 TO 5.1
REM 3) THIS SCRIPT MAY TAKE UP TO 120 SECONDS TO COMPLETE
REM **************************************************************
REM **************************************************************
REM STEP 1 – Make backup MER folder on the PVPlus in case copy fails
CD\storage card\rockwell software\rsviewme
MD backup
REM **************************************************************
REM **************************************************************
REM STEP 2 – Copy MER files to the backup directory created above
CD runtime
COPY *.* “\storage card\rockwell software\rsviewme\backup”
REM **************************************************************
REM **************************************************************
REM STEP 3 – Copy the MER files to the USB STORAGE DEVICE
COPY *.* “\usb storage”
REM **************************************************************
REM **************************************************************
REM STEP 4- Make correct directory on USB Drive (may already exist)
CD\usb storage
MD “Rockwell Software”
CD Rockwell Software
MD RSViewME
CD RSViewME
MD Runtime
CD Runtime
REM **************************************************************
REM **************************************************************
REM STEP 5 – COPY MER files to correct directory on the USB Drive
CD\storage card\rockwell software\rsviewme\runtime
COPY *.* “\usb storage\rockwell software\rsviewme\runtime”
REM **************************************************************
REM **************************************************************
REM STEP 6 – Delete MER files from the PVPlus application directory to
REM force the system to return to Configuration Menu on reboot
DEL *.mer
REM **************************************************************
REM **************************************************************
REM REMINDER – Tell the operators to allow 120 seconds from when they
REM insert the card before they remove it
REM The process is now complete
REM Remove the USB Drive and cycle power to the terminal
REM **************************************************************
REM **************************************************************
REM This file was written & tested by Shawn Tierney, InsightsInAutomation.com
REM and may be purchased as part of a four file bundle for just $0.99
REM at http://www.theautomationblog.com. Thank you in advance for your support!
REM **************************************************************
New! PanelView Plus 5.1 autorun.bat file script text used to copy .mer files from the usb memory stick to the terminal:
NOTE: This file was tested on a v5.1 and v3.2 PanelView Plus
echo on
REM COPY ALL .MER FILES FROM USB TO PVPLUS 5.1
REM **************************************************************
REM CREDITS: This file was created by Shawn Tierney and may be purchased
REM as part of a bundle for just $0.99 at theautomationblog.com. Thank you in
REM advance for your support!
REM **************************************************************
REM **************************************************************
REM REQUIREMENTS:
REM 1) THIS FILE MUST BE NAMED autorun.bat TO WORK
REM 2) THIS FILE IS FOR PANELVIEW PLUS FIRMWARE 3.0 TO 5.1
REM 3) THIS SCRIPT MAY TAKE UP TO 120 SECONDS TO COMPLETE
REM **************************************************************
REM **************************************************************
REM STEP 1 – Copy all .MER files from the correct directory on the USB Drive
REM to the correct directory on the PanelView Plus
CD\storage card\rockwell software\rsviewme\runtime
COPY “\usb storage\rockwell software\rsviewme\runtime\*.*”
REM **************************************************************
REM **************************************************************
REM REMINDER – Tell the operators to allow 120 seconds from when they
REM insert the card before they remove it
REM The process is now complete
REM Remove the USB Drive and cycle power to the terminal
REM **************************************************************
REM **************************************************************
REM This file was written & tested by Shawn Tierney, InsightsInAutomation.com
REM and may be purchased as part of a four file bundle for just $0.99
REM at http://www.theautomationblog.com. Thank you in advance for your support!
REM **************************************************************
IMPORTANT: Please note, copying the above text from inside internet explorer may replace the standard “quotes” with angled “quotes,” which will in turn cause the copy and make directory functions to fail when executed on the PanelView Plus.
Update: The above scripts are now available as a bundled download here:
Hopefully the above autorun scripts will come in handy if you ever lock yourself out of your PVPlus, or if you just want an easy way to backup all your .mer runtime files on your terminal.
If you have any stories about being locked out of your PVPlus, or have a similar script to share, please click on the “post a comment or question” link below to share your comments with the rest of us.
Until next time, Peace ✌️
If you enjoyed this content, please give it a Like, and consider Sharing a link to it as that is the best way for us to grow our audience, which in turn allows us to produce more content 🙂
Shawn M Tierney
Technology Enthusiast & Content Creator
Support our work and gain access to hundreds members only articles and videos by becoming a member at The Automation Blog or on YouTube. You’ll also find all of my affordable PLC, HMI, and SCADA courses at TheAutomationSchool.com.
Shawn Tierney is a lifelong Technology Enthusiast who began programing in the early 80's on the Apple II and VIC-20 personal computers. After earning a degree in Electronics, he worked as a Certified Controls and Information Automation Specialist for 25 years before launching The Automation Blog and School in 2013.
Latest posts by Shawn Tierney
(see all)(no views)


 Option 1: Log to CompactFlash or SD Memory
 Option 2: Log internally to array, retrieve with MS Excel and RSLinx Classic
 Option 3: PanelView Plus CE or 6 (or ViewME Station) DataStore ActiveX
 Option 4: XLReporter from SyTech
  Option 5: FactoryTalk View Site Edition
 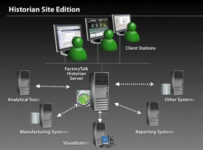 Option 6: FactoryTalk Historian SE


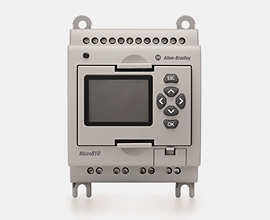 In my opinion, the Micro800 family of Micro PLC’s will give you the most value for your money.